Pin It button on image hover
Showing posts with label Healthy. Show all posts

Wednesday, August 1, 2012

Zucchini Bread


If you planted squash in your garden this spring you probably have an abundance of zucchini right about now or if you're like me and thought about planting a garden, never got around to it, but got lucky enough to have your husband's coworker share her abundance of zucchini, go ahead and make this zucchini bread recipe.  I've sung the praises of quick breads before (Jalapeno Cheddar Bread, Pecan Streusel Topped Banana Bread, or Lemon Poppy Seed Bread) but they are so easy!  You can literally have this in the oven in 15 minutes.  Can't do that if yeast is involved!

This makes a great treat for a mid afternoon snack, a quick breakfast, or even a light dessert served plain or with a dab of butter.  It is slightly less of an indulgent with the oil replaced with unsweetened applesauce.  You could also use whole wheat flour for half of the all purpose flour to make it even healthier but I didn't have any on hand.  This recipe will make two loaves and they freeze very well so go ahead and make both even if you won't go through them in a few days. Or give one to the neighbors, or in my case, your zucchini supplier.

Zucchini Bread
Adapted from Better Homes and Gardens New Cookbook

3 cups flour
2 tsp ground cinnamon
1 tsp baking soda
1 1/2 tsp baking powder
1 tsp salt
1/2 tsp ground nutmeg
2 eggs
2 cups sugar
2 cups grated zucchini (approximately 2 small zucchini)
1/2 cup unsweetened applesauce
1/2 cup chopped pecans
1/2 cup golden raisins

Preheat oven to 350 degrees.  Spray two 8" loaf pans with baking spray.  In a large mixing bowl combine flour, cinnamon, soda, baking powder, salt, and nutmeg.  Stir to combine.  In a second mixing bowl, whisk eggs until lightly beaten, add sugar, zucchini, and applesauce.  Make a well in the center of the flour mixture and mix in wet ingredients all at once.  Stir just until moistened.  Add pecans and raisins to the mixture and fold in.  Divide batter evenly between pans and bake for 50-55 minutes or until a wooden skewer inserted in the center comes out clean.  Cool in pan for about 15 minutes, run a knife around the edges to loosen and remove from pan.  Cool completely on a wire rack.  Wrap tightly in plastic wrap to store or freeze.

Monday, July 16, 2012

Berries and Cherries Fruit Salad


I have a hard time deciding which season is my favorite - summer or fall.  The abundant sunshine, time at the pool, beach vacations, and fresh fruit everywhere make me love summer.  But I love fall because I can wear jeans and boots, football season, the lack of humidity and 100 degree temperatures and anything with apples and cinnamon so it's a tie in my mind.  But while summer is here, I love to take advantage of all the fresh fruit that is in season.  The grocery store is full of cheap, fresh, local fruits that are delicious.  Why not use it to make a super simple, healthy side dish?  This fruit salad is the result of a Kroger sale on fresh berries last week and some gorgeous cherries that I had to buy.  It would also be good with the addition of fresh pineapple, kiwi, grapes, apples, etc.  Really anything goes, just add what you like.

This is perfect for a summer potluck or picnic too since it doesn't require refrigeration.  It's great for adults and kids, although remember that it is recommended that kids under one year of age shouldn't have honey.  My toddler absolutely loved this, but I did make sure I chopped the fruit a bit smaller than I normally would have if it was just being served to adults.

This also makes for a great dessert spooned over vanilla ice cream or with a dollop of whipped cream if you are going for a healthier option.

Berries and Cherries Fruit Salad

2 cups sliced strawberries
1 cup blackberries
1 cup raspberries
1 cup pitted, sliced cherries
1 tsp lime zest
2 T lime juice
2 T honey

In the bottom of a medium size bowl, whisk together lime juice, zest, and honey.  Add sliced fruit and gently stir to coat with sauce.  Refrigerate for at least one hour to allow the flavors to combine.  The juices from the fruit will add to the sauce as well.  Stir gently just before serving.

Thursday, April 7, 2011

Strawberry Banana Smoothie

Lately anything that can be made in five minutes or with one hand is what I'm making for breakfast, lunch or dinner.  These smoothies fit the bill - with a bonus that I only need one hand to drink it too.  Things involving forks and knives haven't been happening too often lately. 


This "recipe" is more of a method, you can change out the fruit to whatever you like best.  The yogurt is a must have for me - but feel free to use plain or vanilla or even another flavor if you prefer - but it really adds to the creamy smooth texture of the smoothie.  I also always combine fruit juice and milk instead of just milk to add some extra flavor.  Orange juice is my favorite but I also sometimes use cranberry juice - it's especially good with blueberries in your smoothie.  My final tip is frozen berries - using frozen berries means you don't have to add ice.  Your smoothie will have so much more flavor if you use frozen fruit instead of ice which dilutes the smoothie.  Occasionally I use frozen banana too - it's a great way to use up bananas that are almost past their prime, peel them, cut them into big chunks and freeze in a Ziploc bag and then use throw them in smoothies.


If you want to add some extra protein to your smoothie, mix in a scoop of protein powder and its a great post workout snack.  I prefer to mix the milk, OJ and powder by itself before adding the fruit because I think it gets rid of the grittiness that can sometimes result from adding protein powder to things.

Strawberry Banana Smoothie

8-10 large frozen strawberries
1 banana
1/2 cup milk (I use skim)
1/2 cup orange juice
1/2 cup vanilla yogurt

Put all ingredients in a blender and blend on high for about two minutes until smooth.  Pour and serve.  This makes 2-4 smoothies depending on the serving, for breakfast I usually split this between my husband and I, as a snack, it would serve four.

Saturday, December 11, 2010

Wild Rice and Butternut Squash Dressing

Wow... it has been a busy couple of weeks.  In the past 2 weeks we've travelled to my  parents for Thanksgiving weekend, had two baby showers, 2 prenatal classes, one of my college roommate's was in town to visit, a Christmas party, and our everyday jobs.  That didn't leave a lot of time for blogging.  So I have a stack of recipes to share with you and just need to find some time to post them.  Now if only I could find some time to get my holiday baking started and Christmas shopping done, I might actually catch up a little bit but the next couple of weeks are looking like they will be just as busy. 


Going back to my Thanksgiving recap, I want to share a recipe for wild rice dressing.  My mom isn't really a fan of bread so traditional stuffing recipes don't really appeal to her.  When I saw this recipe in Cooking Light for a wild rice dressing, I thought it would be a great addition to our normal Thanksgiving menu.  I made a few modifications for our own tastes to come up with the recipe below.  I think it turned out great and the leftovers were good as well.

Wild Rice and Butternut Squash Dressing
Recipe adapted from Cooking Light, November 2010

1 cup uncooked wild rice
1 cup basmati rice
2 cups low sodium chicken stock
2 cups water
1/2 tsp salt
1 small butternut squash, peeled and cubed
1 T olive oil
1 cup dried cranberries
5-6 green onions, chopped
2 T fresh sage, minced
2 T flat leaf parsley, minced
1 T fresh thyme, stripped from stems
1/2 tsp cumin
1/2 tsp garlic powder
Salt and pepper to taste

Preheat oven to 400 degrees.

In a large saucepan, combine rice, stock, water and 1/4 tsp salt and bring to a boil.  Cover, reduce heat and simmer about 40 minutes until rice is tender.  Transfer cooked rice to a 9x13 or similar baking dish coated with cooking spray, do not drain. 

While the rice is cooking, toss butternut squash with olive oil and sprinkle with remaining 1/4 tsp salt, spread in a single layer on a baking sheet.  Roast for approximately 20-25 minutes until tender.  Add to rice in baking dish.

Add cranberries, onions, herbs, and spices to mixture, adding additional salt and pepper as desired.  Stir everything together, cover with foil and bake about 15 minutes until everything is heated through.

Tuesday, November 30, 2010

Cider-Brined Roast Turkey and Gravy

The star of Thanksgiving dinner is the turkey.  There are many ways to make a turkey, you can bake it, fry it, grill it, smoke it, etc. but my favorite way to make it is to brine it overnight the night before you bake it.  Brining the turkey in a salty solution infuses the turkey with extra moisture, creating an extra juicy turkey.  While I don't take credit for the apple cider brine, I have no idea where the original recipe came from and its been adapted several times over the past few years to the current version. 


Even if you brine the turkey, the most important thing is not to overcook it.  If you overcook it, no matter what you did the turkey will be dry.  My advice - don't rely on that little pop-up button that comes in the turkey.  They are often wrong or just don't work at all.  Make sure you get a meat thermometer, you can find one at pretty much any store with a kitchen department.  While you can spend a lot of money, you definitely don't have to.  Personally, I prefer the kind that has a probe that you can leave in the turkey that connects to a display outside of your oven.  


The gravy recipe below is for "sweet gravy" a recipe that my grandma always made.  You can make the gravy without the sugar, but I really suggest trying it to see if you like it if you've never had sweet gravy before. 

Cider-brined Roast Turkey

Brine:
1 quart apple cider
1 cup brown sugar
1/2 cup kosher salt
1 T allspice
2 cups apple cider vinegar
1 bay leaf
1 onion
4 cloves garlic
1 T peppercorns
8 whole cloves
At least 3 quarts water

Heat the apple cider, brown sugar, salt, and allspice in a large stockpot over medium high heat. Stir frequently until boiling to dissolve sugar. Set aside to cool. Quarter onion and smash and peel garlic cloves. In a container large enough to submerge the turkey, add the cider mixture, apple cider vinegar, onion, and garlic along with bay leaf, peppercorns, and cloves. Add two cups ice. Carefully add thawed turkey (make sure to remove the neck and giblets first if necessary). Pour in water until the turkey is submerged. Refrigerate turkey for approximately 12 hours.

Turkey:
1 14-18 pound turkey
1/4 cup butter, softened
2 T sage, chopped
2 T thyme, chopped
1 apple, quartered
1 lemon, quartered
1 onion, quartered
1 tsp salt
1 tsp fresh ground pepper
1/2 cup dry white wine
4 cups chicken or turkey stock
Cheesecloth

When ready to cook the turkey, preheat oven to 375 degrees, rinse turkey and pat dry with paper towels.  Place turkey on a roasting rack in a heavy roasting pan.  Pour wine in a shallow bowl and soak a square of cheesecloth big enough to cover the turkey breast in wine.  Mix butter with herbs and rub liberally over turkey, including inside cavity and under skin of breast.  Sprinkle turkey with salt and pepper.  Lay cheesecloth over turkey breast.  Add apple, lemon and onion slices to the cavity of the turkey, put anything that doesn't fit in the bottom of the pan.  Pour any remaining wine over the turkey, add about 2 cups of stock to the bottom of the pan. 

Bake turkey at 375 degrees for about 30 minutes, then reduce heat to 300 degrees and continue baking for about 15 minutes per pound.  Baste the turkey every 30 minutes.  Remove the cheesecloth for the last 45 minutes of baking time.  Cook turkey until the temperature in the breast reaches 160 degrees on both sides.  Remove turkey from the oven, transfer to a platter, tent with foil and let rest for about 30 minutes.  Save the turkey drippings in the pan for gravy.  Temperature should continue to rise until it hits 165 degrees.  Remove the aromatics from the turkey cavity and discard.  Carve turkey as desired.  If during the cooking process, the wing tips or legs start to get too dark, cover them loosely with foil and continue cooking.

Gravy:
Turkey drippings
1/3 cup water
2 T cornstarch
2-3 T sugar
Chicken or turkey stock if necessary

Carefully pour turkey drippings from roasting pan into a large measuring cup, mason jar, or gravy separator or similar container.  Put container in the refrigerator.  The fat from the drippings will rise to the top and then can be carefully spooned or poured off and discarded.  Meanwhile, mix together cornstarch and water to form a slurry in a separate cup.  Heat a large deep skillet over medium heat.  Add remaining drippings.  Whisking constantly, add cornstarch slurry to thicken.  Continue whisking until the mixture thickens to desired consistency.  If its too thick or you don't have enough gravy, you can add additional stock, if it's too thin, add more cornstarch slurry.  Do not add the cornstarch directly to the gravy or it will be difficult to get rid of lumps, mix it with water first.  When it's the right consistency, add 2-3 tablespoons of sugar, to taste.  Transfer to a gravy boat or serving bowl and serve hot.

Thursday, November 18, 2010

Spicy Roasted Sweet Potatoes


Here's another alternative to that traditional sweet potato pie I was talking about yesterday, but this recipe has a savory spin on it.  These are as simple as it gets, all you have to do is peel and chop the sweet potatoes.  Then it's as easy as tossing them on a baking sheet with a little olive oil and some spices.  Roasting them at a high temperature, results in a crispy outside and soft inside.  These would be great as a healthier alternative to fries as a side for burgers.  Make them as a side dish for Thanksgiving, they would be great with a spice-rubbed turkey like this turkey breast.  A turkey breast is a great idea for a smaller Thanksgiving meal. 
  

Spicy Roasted Sweet Potatoes

2 medium sweet potatoes, peeled and cubed
1 T olive oil
1 tsp Ancho chili powder
1/2 tsp garlic powder
1/2 tsp cayenne pepper
1/2 tsp salt

Preheat oven to 400 degrees.  Chop sweet potatoes into approximately 1/2 inch cubes.  Toss sweet potatoes with olive oil.  Combine spices in a small bowl and sprinkle liberally over potatoes.  Toss well and bake about 20-25 minutes.  Use a spatula to turn the potatoes about halfway through the cooking time.  The potatoes should be crispy on the outside and easily pierced with a fork.

Wednesday, November 17, 2010

Sweet Potato Bake -- A Healthier Way

Maybe you are used to the marshmallow covered sweet potato "pie" served so often served at Thanksgiving, maybe you like your sweet potatoes baked and topped with sweet cinnamon butter.  These sweet potatoes are usually whipped with cream or butter and then topped with sugar or marshmallows and baked.  The result, a dish that could pass for dessert disguised as a side dish. 


This dish is still sweet, but due to the sweet potatoes natural sweetness and apple cider, rather than a lot of extra sugar.  I love them combined with apples and cranberries.  I also prefer them in chunks rather than whipped.  These are really easy and can be made for ten people just as easily as for one person.  You can bake up each person's serving in individual ramekins or bake it all in one big dish, whichever is easier.  The below recipe serves two.  I like to use an apple like Gala or Honeycrisp for this dish.


Come back tomorrow for a savory sweet potato dish!

Sweet Potato Bake

2 medium sweet potatoes, peeled and cubed
1 large apple, peeled, cored, and cubed
1/4 cup dried cranberries
1/2 cup apple cider
1 tsp ground cinnamon
1/2 tsp salt
1/4 tsp ground nutmeg

Preheat oven to 400 degrees.  Chop sweet potatoes and apples into approximately 1/2" cubes.  Divide potatoes and apples evenly among to two ramekins, divide cranberries among baking dishes.  Add half of the cider to each ramekin.  Combine spices in a small dish and sprinkle over potato mixture.  Toss to combine. 

Bake approximately one hour, stirring every twenty minutes until cider has cooked down to a glaze and potatoes are easily pierced with a fork. 

Wednesday, July 14, 2010

Linguine with Zucchini and Fire Roasted Tomato Sauce

The zucchini looked especially good at the grocery store the other day and it was on sale so I picked up a couple with an idea for a pasta dish in my head. I decided to use a whole wheat linguine and julienne the zucchini, along with a red bell pepper into long thin strips to put in the pasta. I wanted to make a spicy tomato sauce to bring everything together so I started with a can of fire roasted tomatoes to add a layer of smoky flavor.


I added some shrimp to round out the meal. Do yourself a favor and take the tails off before you cook them though. I bought the pre-cooked frozen shrimp the other day because they were on sale and didn't think about the fact that they had the tails on them until I dumped them in the pan. Not a huge deal, just makes it a bit of a hassle to eat.

Linguine with Zucchini and Fire Roasted Tomato Sauce

1 T olive oil
1 T butter
3 cloves garlic, minced
1 small onion, diced
1/2 tsp crushed red pepper flakes
1 can fire roasted tomatoes
1/2 tsp salt (+ more to salt pasta water)
1/2 tsp black pepper
2 T tomato paste
1 small zucchini, julienned
1 red bell pepper, julienned
1 cayenne pepper, minced
1/2 pound linguine
20-24 large shrimp
2 T fresh basil, chopped
1 T flat leaf parsley, chopped

Heat a large deep skillet over medium heat and add butter and oil. When hot, add onion, garlic and red pepper flakes. Cook about five minutes until onions are translucent and add tomatoes. Break up the tomatoes with a wooden spoon and cook to reduce. Stir in tomato paste, add cayenne pepper and cook sauce for about ten minutes to reduce.

Meanwhile, heat a large pot of water to boiling for pasta. Salt water liberally and add pasta. Cook to al dente and drain, reserving about 1/2 cup of pasta water.

About five minutes before pasta is done, add bell pepper and zucchini to the tomato sauce. Stir in some of the reserved pasta water to thin sauce to desired consistency. Add shrimp and cook until opaque or heated through if pre-cooked. Toss with pasta and add parsley and basil and serve.

Friday, June 25, 2010

Flank Steak Fajitas


I love fajitas, they might be my favorite dinner - it's hard to narrow it down to one favorite dinner but Mexican food is definitely my favorite and I always get fajitas. While I prefer chicken fajitas, my husband loves steak and I rarely make it for a couple of reasons - because I'm not a big red meat fan and because it's generally expensive.


Flank steak is one of the more affordable types of steak and making it into fajitas really allows you to stretch your dollar even a little further. Make chicken and steak fajitas like I did here and you can really cut back the cost. This whole plate of food consists of half of a flank steak and one chicken breast and was enough for both of us with enough leftovers for a second meal. For the chicken, I use the marinade from this recipe.


Flank Steak Fajitas

Steak:
1 flank steak
1/4 cup red wine
1 jalapeno pepper, minced
2 cloves garlic, minced
1/2 tsp cumin
1 1/2 tsp ancho chili powder
1/2 tsp salt
1 T olive oil
Zest and juice of 1 lime
Small handful of cilantro, finely chopped

Veggies:
1-2 bell peppers (any color)
1 onion (red or white will work)
1 tsp garlic salt (I prefer Lawry's)
1/2 tsp cumin
1/2 tsp ancho chili powder
Juice of 1/2 lime

Tortillas and any desired toppings for serving.
Combine all ingredients except steak and cilantro in a large Ziploc bag, mix well and add steak. Refrigerate for approximately one hour.

Preheat grill to medium high heat and remove steak from refrigerator to come to room temperature while grill preheats. If you add steak to the grill straight the from the refrigerator, it will make the meat tougher.

While grill preheats, slice bell peppers and onions into long thin strips. Lay out a large square of foil, add vegetables to the center, sprinkle with garlic salt, cumin and chili powder and squeeze lime juice over the top. Toss to coat the vegetables and fold foil around the vegetables to make a foil packet.

Add steak (and chicken if you are making both) to the grill. Cook steak directly over medium high heat to sear the outside for about five minutes per side, move to a cooler part of the grill and cook as desired, approximately another three to five minutes for medium. Cook vegetables over medium heat for about ten minutes until tender. Warm tortillas on grill over indirect heat. Let steak rest, covered with foil for an additional five minutes before slicing. Slice thinly, top with cilantro and serve.

Monday, June 21, 2010

Strawberry Summer Salad


This is a great light side dish to accompany summer BBQs and dinners. Take advantage of the wonderful fresh strawberries on sale everywhere these days. I prefer the baby spinach in this salad but a mix of baby greens or a mix other lettuces work equally as well. Don't skip the candied pecans - they add a sweet crunch that really makes this salad special. I used chopped pecans because I had them on hand but pecan halves make for a prettier presentation in my opinion.

I like to use a honey mustard vinaigrette for this salad, I think it goes really well with the fruit. Some other good choices would be poppy seed dressing, raspberry vinaigrette or balsamic vinaigrette.


Strawberry Summer Salad

1 cup strawberries, thinly sliced
4 cups baby spinach or other mixed greens
1/4 - 1/2 cup pecans
1 T brown sugar
1 tsp olive oil
1/4 cup dried cranberries
1/4 cup crumbled feta cheese
2 scallions, chopped

Heat a small skillet over medium heat. Add oil and sugar and stir to combine. Add nuts and toss to coat. Cook about five minutes and transfer to parchment paper, separate nuts with a fork and cool. Wash and dry greens and add to a large bowl and toss gently with remaining ingredients and add dressing.

Honey Mustard Vinaigrette
Recipe adapted from Leslie Sarna

1 clove garlic, grated
2 T whole grain Dijon mustard
2 tsp apple cider vinegar
3 tsp honey
Scant 1/4 cup olive oil
Salt and pepper to taste

Combine garlic, mustard, vinegar and honey and whisk to incorporate. While mixing, slowly stream in olive oil. Whisk vigorously until dressing is emulsified. Add salt and pepper to taste.

Thursday, June 17, 2010

Jerk Chicken Mango Kebabs


Kebabs are always fun to make on the grill and they generally impress your guests as well because you can incorporate different vegetables and fruits to make them nice and colorful. For maximum impressiveness, leave the kebabs skewered and serve, to make it easier on people, pull everything off the skewers and serve on a plate. This is what I do at home since the metal kebabs stay hot for a long time. They are also convenient because they cook very quickly because you cut the food into small chunks. In this case, I made jerk chicken and skewered it with mango chunks and red bell pepper pieces. The sweetness of the mango and peppers works great with the slightly sweet but spicy jerk chicken. The mangoes get soft and turn even sweeter when grilled to be completely delicious.


One thing to be aware of when making kebabs is that you want to load them up with foods that will cook at similar speeds. That way you don't have burned vegetables and undercooked poultry. If necessary you could also load up skewers with each type of food so they can be cooked at different times or over different parts of the grill.

You also want to make sure you soak wooden skewers if you are using them for at least 30 minutes before you put them on the grill so they don't catch on fire. You can also use metal skewers which I like because you don't have to mess with the soaking and they can be used over and over.


Jerk Chicken Mango Kebabs

Juice of 2 limes
1 T chili powder
1 tsp cayenne pepper
2 tsp chopped fresh thyme
1/2 tsp allspice
1/2 tsp salt
2 cloves garlic, minced
1 T brown sugar
1/4 tsp cinnamon
2 lbs boneless, skinless chicken breasts
2 mangoes
2 red bell peppers

Combine all ingredients through cinnamon in a large plastic Ziploc bag and mix well. Trim any fat off the chicken breasts and cut into approximately 1 1/2" chunks. Add chicken to the marinade and refrigerate for at least one hour.

Preheat the grill to medium heat.

Cut mangoes into large chunks. Mangoes have a large flat pit in the center. Cut each side off the mango, your knife will easily slice through the flesh of the fruit but not the pit so you'll know where to cut. Score each half into large chunks and fold the peel in to pop the pieces out. Slice off the chunks of mango to remove the peel.

Cut the bell peppers into large chunks and skewer alternating with the mangoes and chicken pieces. Grill about six minutes, rotate skewers, continue grilling about six more minutes until cooked through.

Friday, June 4, 2010

Chipotle Chili Grilled Corn

Corn on the cob is one of summer's best foods. Growing up in Iowa, fresh sweet corn was everywhere in the summer and super cheap. Luckily, even though I'm no longer surrounded by corn fields, I can still get good sweet corn in the grocery store. In June and July its often as cheap as 10 ears for $1.00. That means we make a lot of corn for dinner or barbecues. When we are grilling some chicken or burgers for dinner, I don't want to heat up the stove inside to boil corn, so I started making corn on the grill as well.


There are a couple of methods you can use. You can keep the corn in the husk, soak them in water for at least 15 minutes and grill in the husk for 20-30 minutes. Or you can husk the corn, wrap them in the foil, add seasoning and cook in foil for 15-20 minutes. Cooking in foil essentially steams the corn.

You can vary the flavors by making a compound butter to spread on the corn. My favorite is this smoky chipotle chili corn but I also like to use a little lime juice and cayenne pepper or garlic and fresh herbs depending on what I'm serving it with.

Chipotle Chili Grilled Corn

2 T unsalted butter, slightly softened
1 T chipotle in adobo sauce
1 chipotle pepper in adobo sauce, diced
1/2 tsp ancho chili powder
1/2 tsp ground cumin
1/2 tsp salt
4 ears of corn

Preheat grill to medium heat. (If you are cooking this as part of a meal, the corn is fine cooked over indirect heat but you may need to adjust the cooking time slightly.) In a small bowl, combine all ingredients except corn. Stir until well incorporated. Lay out four large squares of aluminum foil, about 12"x12" each. Place one ear of shucked, clean corn on each square. Use a pastry brush or your hands to add butter mixture to each ear. Wrap tightly in foil, making sure there are no leaks in the package. Cook over medium heat for 15-20 minutes. Be careful when you unwrap as the escaping steam will be very hot.

Note: If you use salted butter, decrease the amount of additional salt to taste. I use unsalted butter because I always have it on hand for baking.

Tuesday, May 25, 2010

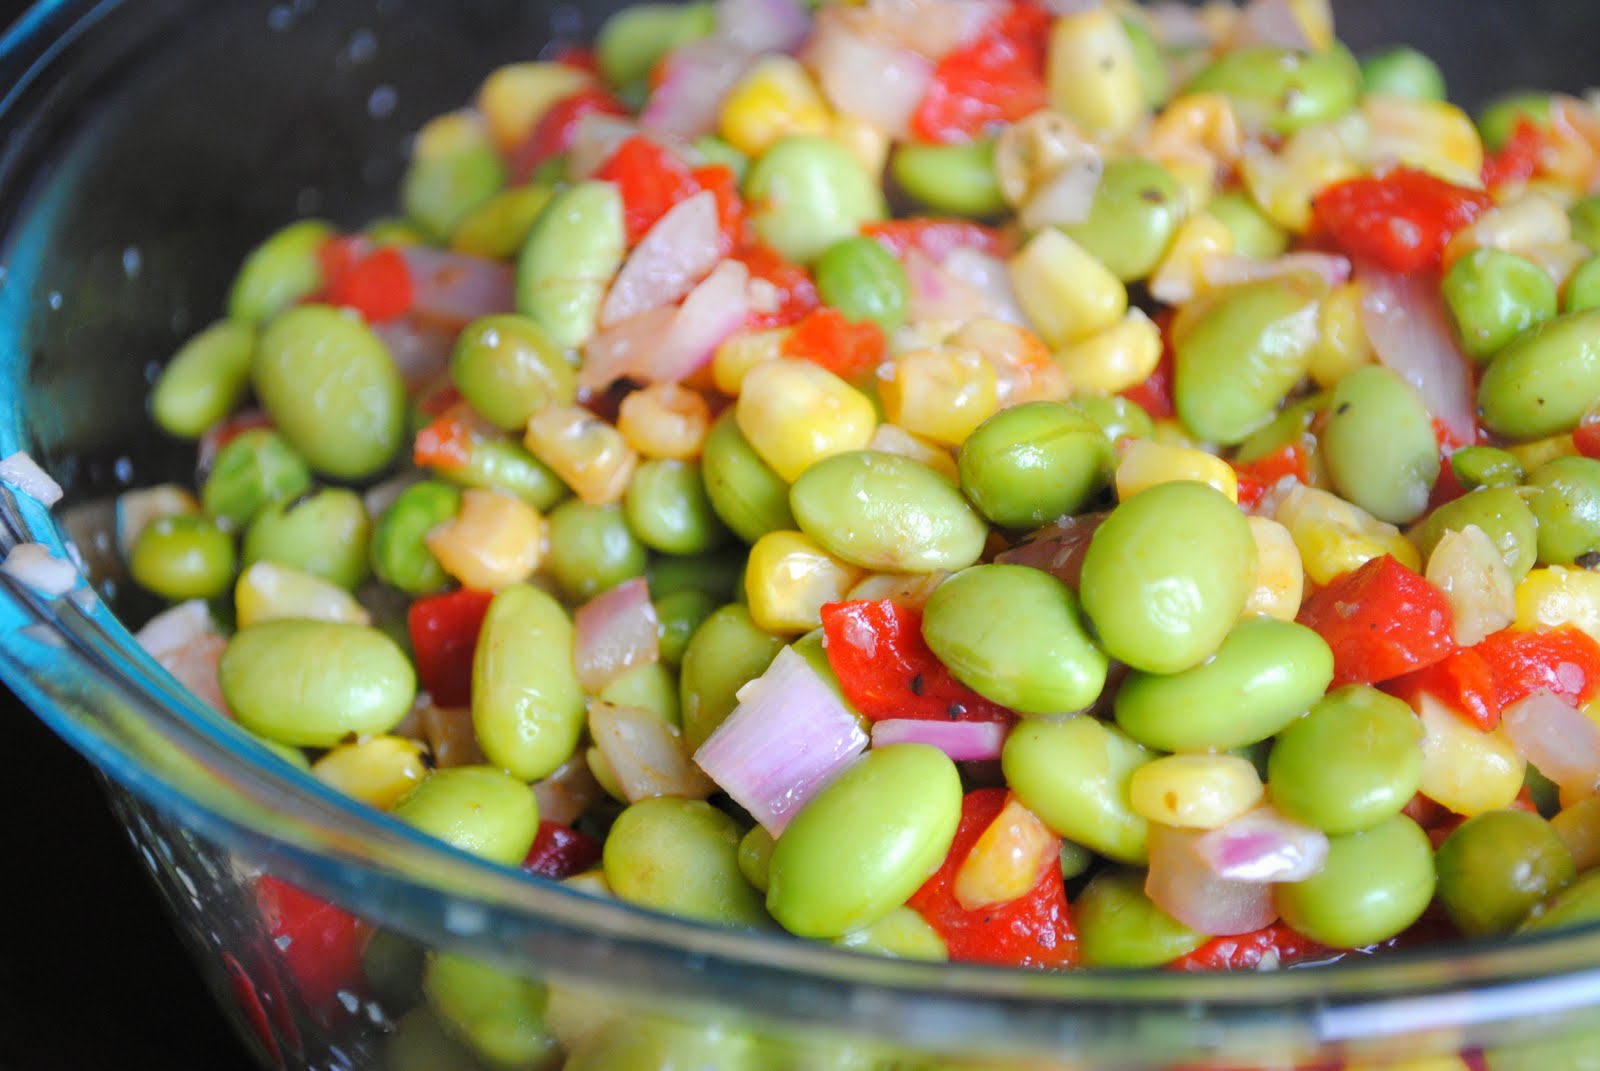
Edamame Succotash


This is a super easy side dish that you can make to go along with pretty much anything. Its healthy and colorful and ready in about 5 minutes - what more could you ask for?


If you haven't ever tried edamame, you should. You can pick up a bag in the freezer section of shelled edamame and you just pop them in the microwave to cook. They cook in just a couple of minutes and sprinkled with salt they make a great snack or add them to all kinds of things. I had a bag in my freezer for quite a while that I wasn't really sure what to do with until someone told me how good they were on their own. You can add them to stir-fry dinners, mix them with couscous or pasta salads, or even add them to hummus or guacamole, although I haven't tried that yet.


Edamame Succotash

1 cup shelled edamame
1 cup corn kernels
1 cup peas
1/2 cup red onion, diced
1/2 cup red bell pepper, diced (I used roasted red pepper but you could use raw too)
1 clove garlic, minced
1 tsp olive oil
2 T balsamic vinaigrette
1 tsp salt

Add oil to a large skillet and heat over medium heat. Add garlic and onion and cook about three minutes. Add remaining vegetables and vinaigrette dressing. Cook about five minutes until vegetables are hot and vinaigrette reduces slightly. Transfer to a serving bowl and sprinkle with salt.

Note: If edamame, peas, and corn are frozen, microwave or thaw to room temperature first or increase cooking time.

Monday, May 24, 2010

Lemon Thyme Chicken


Last week lemons were on sale at the grocery store so I picked up a whole bag of them. There are tons of things that you can use lemons to make. A bit of fresh squeezed lemon juice adds brightness to so many foods. You can add it to sweet or savory things, it mixes really well with lots of herbs - my favorites are thyme and rosemary. Unfortunately, I couldn't find a rosemary plan when I was buying some herbs to put in my garden this year.

Oregano and Thyme

Speaking of herbs - if you knew how cheap and easy they were to grow, you wouldn't pay the ridiculous prices for them in the store. Pick up some small herb plants or seeds and plant them. For a total investment of under $15, I have oregano, basil, thyme, sage, cilantro, and flat leaf Italian parsley growing in my garden right now. And my neighbor gives me chives and mint when I want them or I would have planted those too.

You can grow them in pots in your kitchen or on your patio or mix them in with flowers in your flower beds - this is what I do. However, I will warn you if you are going to grow mint, put it in a pot as it can be invasive.


Sage

Some of these herbs are even perennials, meaning they will come back year after year - my sage, oregano and thyme have been going for three years now. I cut them all way back this spring so they don't take over. Both thyme and oregano spread almost like a ground cover. Plant them in a sunny spot and water as necessary, they are all pretty hardy and don't take much effort. Make sure you keep your herbs from blooming or going to seed by pinching off the tops and cutting them frequently and they will continue to produce all summer.

Cilantro - an annual so its much smaller than the perennials at this point

But anyway, back to chicken since that's what I'm supposed to be talking about. This lemon thyme chicken is really easy and only involves a few ingredients. Marinate, refrigerate and toss it on the grill and you have a quick, healthy summer dinner. I served mine with an edamame succotash that I'll post shortly.


Lemon Thyme Chicken

1.5-2 pounds skinless boneless chicken breasts
2 lemons
1 T olive oil
8 -10 sprigs of thyme
Salt and Pepper

Trim any visible fat from chicken breasts and butterfly them to make thin cutlets of an even thickness. Rub olive oil on both sides and sprinkle with salt and pepper. Zest 1 lemon over the chicken. Squeeze juice of lemon over the chicken. Strip thyme off stems by holding the tips and running fingers down the stems, the leaves will fall right off. (I like to leave a couple sprigs to top the chicken after cooking.) Lightly chop and sprinkle over chicken. Cover and refrigerate for about one hour.

Preheat grill to medium heat. Add chicken and cook about five minutes per side, chicken will easily release when its ready to be flipped. Cook until juices run clear. Remove to a plate and tent with foil for 5-10 minutes to let juices redistribute. Squeeze juice of remaining lemon over chicken or serve with lemon wedges. Garnish with more thyme if desired.

Monday, May 17, 2010

Tropical Granola


I love making homemade granola -- it takes less than an hour including baking and its a lot cheaper and healthier than buying granola at the grocery store. I wanted to change my usual granola a little bit to make a bit more summery, so I came up with this tropical granola. Including the mashed banana really gives this a ton of flavor. Adding the egg white, helps the granola form clumps. Feel free to switch out the dried fruits for whatever you like, banana chips, papaya, or mango would also work great in this granola. This granola is great on its own or served over yogurt.


Tropical Granola

1 large very ripe banana, mashed
1/2 cup unsweetened applesauce
1/4 cup honey
1 T canola oil
1 tsp cinnamon
1/2 tsp ground ginger
1/4 tsp nutmeg
1/2 tsp salt
2/3 cup shredded coconut
2/3 cup dried cranberries
1 cup dried apricots, chopped
1 cup dried pineapple, chopped
4 cups old-fashioned rolled oats
1/2 cup ground flax seed
1 cup chopped pecans
1 egg white

Preheat oven to 300 degrees. Line 2 large baking sheets with Silpats or parchment paper. Combine banana, applesauce, honey, oil, cinnamon, ginger, nutmeg and salt and whisk together until smooth in a large bowl. Add remaining ingredients and stir gently with a wooden spoon until well incorporated. The mixture will be dry but all dry ingredients should be moistened. Beat egg white with a whisk until foamy and pour over mixture. Stir to incorporate.

Spread in an even layer onto prepared pans, if mixture is too deep, it may take longer to bake. Bake about 30 minutes, stir gently making sure to move the granola from the edges into the middle and bake about 20 minutes more. Remove from oven and cool on pans. Transfer to storage containers. Recipe yields about 3 quart-size jars of granola.

Friday, May 14, 2010

Healthy Grilled Tacos


Mexican food isn't usually the first thing you think of when you think about eating healthy, but there are ways to still enjoy Mexican food without all the fat. Starting with grilled chicken, a healthy tortilla (either low fat corn tortillas or whole wheat) and losing most of the cheese and high calorie sauces will result in a good-for-you taco. Add flavor with queso fresco, Mexican spices, cilantro and lime. These tacos are full of flavor, good for you and they are ready in no time. You don't even have to dirty a pan.

This recipe makes about double the chicken that I needed for 2 people, come back tomorrow and I'll show you what I did with the leftovers.


Healthy Grilled Tacos

2 large skinless, boneless chicken breasts (about 1.5 pounds)
2 tsp ancho chili powder
1 tsp + 1/2 tsp garlic salt (I like Lawry's)
1 tsp ground cumin
1/2 tsp cayenne pepper
Juice of 1 lime
2-3 roasted piquillo peppers, sliced into strips
1/2 -1 cup black beans
1/2 -1 cup corn kernels
2 oz queso fresco
2 T cilantro, roughly chopped
Tortillas

Trim any fat off chicken breasts, cut each breast in half horizontally to make chicken a uniform thickness, pound flat if necessary. Combine chili powder, garlic salt, cumin, and cayenne pepper in a small bowl. Coat both sides of chicken pieces with spice mixture. Squeeze juice from half the lime over chicken. Cover and refrigerate for about 30 minutes.

Preheat grill on medium-low heat. Grill chicken about 6 minutes, flip and grill 5-6 minutes more, until cooked through. Remove to a plate and cover with foil. Turn the grill off and place tortillas on the grill for 20-30 seconds per side to warm. You don't want the tortillas to char or crisp up or you will have tostadas instead of soft tacos so watch them carefully.

Combine corn, peppers and black beans in a small microwave-safe bowl and add 1/2 teaspoon garlic salt, microwave about 2 minutes until hot. Slice chicken thinly and assemble tacos with chicken and bean mixture. Crumble cheese over the top and add cilantro. Squeeze remaining lime juice over tacos. Serve with fresh salsa or pico de gallo if desired.

Note: Queso fresco is generally found in the dairy case with other specialty cheeses or in an ethnic food section of the grocery store. Roasted piquillo peppers are similar to roasted red peppers but are really good if you can find them; if not, you can substitute roasted red peppers.

Tuesday, May 11, 2010

Ginger Soy Turkey Burgers

I found an Asian sesame ginger salad dressing by Ken's Steakhouse in the grocery store the other day that sounded pretty good - unfortunately it contained high fructose corn syrup and since I'm cutting that out of our diets, I decided to leave it at the store. But it was still in the back of my mind when I decided to make these turkey burgers for dinner. I'm not positive this is the exact same result but it turned out to be really good.


I served these with some sweet potato fries with salt and thyme and steamed edamame sprinkled with a little garlic salt for an easy, healthy meal.


Ginger Soy Turkey Burgers

1 pound lean ground turkey (I use 93/7)
2 T sesame oil
1 T rice wine vinegar
2 T soy sauce
1 clove garlic, minced
1 tsp fresh grated ginger
1/2 tsp black pepper
1/4 cup panko bread crumbs
4 whole wheat hamburger buns
1-2 cups baby spinach
4 T feta cheese

Preheat grill on medium low heat. In a large bowl, whisk together oil, vinegar, and soy sauce. Add garlic, ginger, and black pepper and stir to combine. Remove about 1/3 of the mixture and set aside. Add ground turkey and bread crumbs and lightly mix with your hands until just incorporated, be careful not to over mix. Form into 4 patties and transfer to grill. Cook about 5-6 minutes and flip, grill an additional 5 minutes until cooked through. Grill buns for last minute of cooking time to warm.

To assemble, either top each burger with spinach and feta and drizzle on remaining sauce or combine spinach, feta and dressing in a bowl and toss to coat. Top each burger with "salad" and serve.


Friday, April 30, 2010

Tequila Lime Chicken

For as long as I can remember, I've always loved Mexican food. Good chips and salsa is definitely a weakness for me, no matter how much junk food I gave up, I don't think I could give up chips and salsa. When I don't know what to make for dinner and I need something fast, we inevitably have tacos. If I'm in a bad mood, my husband often suggests we go out for Mexican and I start to feel better. So it should come as no surprise that my experimenting often leads to Mexican-inspired flavors. I love adding spicy peppers, garlic, lime juice, cilantro, cumin, and other Mexican flavors to dishes.


I love ordering tequila lime fajitas when we go out to dinner so I thought I would make my own at home. Of course I decided this while inviting friends over for dinner when walking around the grocery store at 4:30 pm on a Saturday. So I picked up some chicken, some garlic, limes, and a couple of jalapeno peppers. We didn't end up making it into fajitas that night but ate it with a salad and some grilled potatoes but I turned the leftover chicken into fajitas a couple nights later and it was fantastic with a little avocado, grilled bell peppers and onions and warm tortillas. You're going to want to make extra so you have leftovers of this - grill out on Sunday, make double and you're 90% done with a weeknight dinner.

One more thing while I'm talking about chicken - I'm not sure about your grocery store, but whenever I buy boneless, skinless chicken breasts, the pieces are always huge. I generally remove the tender and butterfly each breast, so I have 2-3 pieces from each one. They cook up much faster and more evenly on the grill, so you don't end up with dried out chicken waiting on the middle to be done. It also helps make it easier to gauge one serving which is 3-4 ounces rather than a whole chicken breast.


Tequila Lime Chicken

4-5 pounds boneless, skinless chicken breasts
1/4 cup tequila
1/4 cup lime juice
1/4 cup honey
2 jalapeno peppers, chopped
3 cloves garlic, minced
1 T ancho chili powder
2 tsp ground cumin
1/4 cup cilantro, roughly chopped
1 tsp salt

In a large ziploc freezer bag, combine all ingredients, except chicken. Shake to combine. Add chicken, making sure to distribute marinade over the chicken. Refrigerate about 1 hour.

Preheat grill to medium heat. While grill heats, remove chicken from refrigerator and let stand at room temperature about 15 minutes. Spray grill with grilling spray or rub lightly with vegetable oil to prevent sticking. Add chicken and grill about 5 minutes on first side. Turn chicken and grill about 5 minutes more until cooked through. If chicken is sticking when you try to turn it the first time, give it another minute or so, it probably just isnt ready. Once cooked through, remove to a plate, cover tightly with foil and let stand for about 10 minutes so juices re-distribute.

Serve as is or use for fajitas, in enchiladas, tacos, chicken rollups or for sandwiches or salads.

Thursday, April 22, 2010

Spicy Shrimp Mango Salad

Whenever the weather warms up, instead of craving pasta and chili, I want grilled chicken and salads and fruit. At least its a good change in my eating habits. As I've said before, frozen shrimp is a great choice for weeknight dinners. It can be thawed very quickly, doesn't require a lot of time to marinate, and cooks in just a few minutes.


Fruit and salads don't belong together in everyone's mind but if you haven't tried it, give it a chance. The sweet and spicy goes great together. This particular salad was one of my favorite seafood dishes, grilled mahi mahi topped with mango salsa. The Caribbean jerk marinade for the shrimp works great in this salad because it has a bit of heat but the marinade is also a little sweet. The marinade looks like a lot of ingredients, but its mostly pantry staples and comes together very quickly.


Spicy Shrimp Mango Salad

Salad:
3 cups romaine lettuce, chopped
3 cups baby spinach
1 mango, diced
18-20 medium shrimp, marinaded (see below)
1/2 cup black beans
1/2 cup corn kernels
1/4 cup cilantro, finely chopped

Heat a large nonstick skillet over medium-high heat. Add shrimp to pan and cook about 3 minutes, turn over and cook on remaining side 1-2 minutes just until opaque. Remove shrimp to a plate and add reserved marinade, black beans and corn to pan. Cook about 3 minutes until hot and sauce is slightly thickened. Add to shrimp and mango and top with cilantro. Add lettuce and spinach to a large bowl or divide among plates. Top with shrimp mixture and serve. (Add dressing if desired, with the reduced marinade, I didn't need one but I'm not a big dressing person to begin with. A simple honey lime vinaigrette would be perfect.)

(Note: I would also have added some diced jicama to this but my husband is not a fan and I don't use enough of it to buy it just for me but it goes perfectly with this if you like it.)

Marinade:
1 jalapeno, finely diced
2 cloves garlic, minced
2 T brown sugar
1 tsp allspice
1/2 tsp cinnamon
1/4 tsp ground cloves
1 T fresh thyme
1 tsp salt
Juice of 1 lime
2 T olive oil
1 T dark rum
1 T orange juice

Mix all ingredients together in a plastic bag or shallow bowl, remove 2 T of marinade and set aside. Add thawed shrimp. For a milder marinade, remove ribs and seeds from jalapeno; to make it spicier, leave the seeds and ribs in. Toss to coat and refrigerate for about 20-30 minutes.

Monday, April 5, 2010

Fruit Salad with Poppyseed Dressing


Ummm... yes... you are in the right place - I made something besides cake for once and am actually blogging about it. Don't be alarmed - I still have another cake to post too.


But since spring is here in full force, I thought I would take advantage of the great red strawberries that were on sale everywhere this weekend. I wanted a light and easy side dish for my Easter dinner so I put together this fruit salad. This comes together with minimal effort and is so light and refreshing for a spring meal.


Fruit Salad with Poppyseed Dressing

1 package of strawberries, sliced
1 large bunch of grapes (about one cup), sliced in half if desired
1 package of blueberries
1 large can of pineapple chunks (in juice not heavy syrup, reserve the juice)
3 kiwis, peeled and sliced

Dressing:
1 tsp poppyseeds
1/2 cup pineapple juice
2 T sugar
1/4 tsp salt
2 T canola oil

Add pineapple juice, sugar and salt to a blender and blend until combined. Slowly stream in oil with blender running until emulsified. Add poppyseeds and pour over fruit. Keep refrigerated until ready to serve.

Related Posts with Thumbnails