Pin It button on image hover

Monday, December 24, 2012

Carrot Cake Pancakes for Christmas Morning

To begin with, Merry Christmas!!! I can't even believe that it's Christmas already, how did that happen, shouldn't it still be September or so?  This year has absolutely flown by.  But it's Christmas, which is one of my favorite times of the year.  We are home with my parents in Iowa right now and since the house is full of family, we've been having some fancier than normal breakfasts.

Photos by Dede Holman Photography

If you are in the mood to do the same for a special occasion, I totally recommend these pancakes.  Oh-my-god-good.  So delicious.  The pancakes have a super moist carrot cake flavor and don't skip the cream cheese anglaise, it takes them to a whole new level.  It's not overly sweet like a frosting but it's rich and creamy and a perfect addition.

Excuse the Instagram Pic... no one wanted to wait for pictures

I hope you and your family have a wonderful Christmas and a great New Year!

Carrot Cake Pancakes
Adapted from Southern Living

1 3/4 cups flour
1 1/2 tsp baking powder
1 tsp baking soda
1 1/2 tsp cinnamon
1 tsp salt
2 cups buttermilk
1/3 cup firmly packed brown sugar
1/4 cup unsalted butter, melted
2 large eggs
2 tsp vanilla extract
2 cups finely grated carrots

Heat a nonstick griddle or skillet over medium heat and add a little oil or nonstick spray.

Stir together flour, baking powder, baking soda, cinnamon, and salt in a large bowl.  Separately combine buttermilk, sugar, butter, eggs, and vanilla.  Stir wet ingredients into dry until just combined.  Don't over mix, batter should be lumpy.  Fold in carrots.  (You can also add golden raisins at this point or chopped pecans if you would like, I left out both but the original recipe included 1/2 cup of each.)

Pour approximately 1/4 cup of batter into rounds on skillet and cook until bubbles appear all around the pancake, then flip and cook until golden brown. 

Cream Cheese Anglaise

1 1/2 cups milk (I used 2%)
4 oz cream cheese, softened (I used 1/3 less fat)
1/3 cup sugar
3 egg yolks
1 tablespoon cornstarch
1/8 tsp salt
2 tablespoons butter
1 tsp vanilla extract

Combine milk, cream cheese, sugar, egg yolks, and cornstarch in a blender or a large bowl and use an immersion blender to process until smooth.  Heat mixture in a saucepan over medium heat and bring to a boil, whisking regularly.  Boil for approximately one minute, whisking constantly, mixture should thicken.  Remove from heat and add butter and vanilla and whisk to combine.  Pour over pancakes to serve.

Monday, November 19, 2012

Fresh Cranberry Cake


What's on your Thanksgiving menu this year?  I may have to go buy more cranberries so this cranberry cake can be a late addition to mine.  For the most part, I'm sticking with classic recipes this year but adding in a few new items as well.


Mashed Potatoes
Sweet Potato Casserole - I'm doing a cross between this recipe and a copycat Ruth's Chris Steakhouse version
Dressing with apples and cranberries


Cranberry Sauce

Classic Pumpkin Pie


If you haven't nailed down your desserts yet, I've got a new one for you to try.  This takes about 20 minutes of prep time, but with a stand mixer about half of that time is just running the mixer.  It's so simple and likely the only thing you don't already have in the pantry are fresh cranberries.  Take advantage of the cheap fresh berries in every grocery store and make this cake while they are in season.  The tart cranberries are perfect with the sweetness of the cake and the light glaze.  Served with a scoop of vanilla ice cream, this is a great finish to Thanksgiving dinner.


Fresh Cranberry Cake

Cake:
2 cups sugar
3 eggs
3/4 cup unsalted butter, slightly softened
1 1/2 tsp vanilla extract
1/2 tsp almond extract
1 T orange zest
2 cups flour
1 tsp cinnamon
2 1/2 cups cranberries

Glaze:
1 cup powdered sugar
2-3 T milk
1/2 tsp vanilla extract

Preheat oven to 350 degrees.  Spray a 10" springform pan or 9"x13" baking pan with baking spray and set aside.

Combine sugar and eggs in the bowl of a stand mixer or a large mixing bowl.  Mix 6-8 minutes on medium speed until pale yellow and doubled in volume.  Add in butter and extracts and zest and mix two more minutes.  Add flour and cinnamon and stir until combined.  Fold in cranberries.  Transfer batter to prepared pan.  If you are baking in a springform pan, put the pan on a cookie sheet and put in the oven.  Bake approximately one hour (about 45 minutes in a 9"x13" pan).  Cool completely and remove ring from pan.

Put powdered sugar in a small bowl, add milk one tablespoon at a time, whisking until smooth.  Add vanilla and drizzle over cake.

Saturday, October 27, 2012

Peach Spice Cake


So way back in August, I had a basket full of peaches fresh from the orchard that were tempting me from the counter.  I had many plans for them initially, peach cobbler, peach kolaches, peach pie, etc.  This peach spice cake wasn't on the list but as I was perusing a new cookbook that I picked up at The Lady and Sons restaurant in Savannah, GA while we were on vacation, I found a recipe for Fresh Pear Cake that sounded delicious.  Paula Deen can generally be trusted for baked goods so I didn't hesitate for too long before deciding to make this.  But not with pears and a bit of a doctored spice mixture - mostly because I'm not really a big pear fan and I really like ginger with peaches.  I also subbed applesauce for oil because everyone knows Paula's recipes can usually stand to cut out a few calories.  Yes peach season has passed... but you could sub apples for peaches and this would be delicious as well.


Peach Spice Cake
Adapted from The Lady and Sons: Just Desserts

Cake:
2 cups sugar
3 cups all-purpose flour
1 1/2 tsp baking soda
1 1/2 tsp salt
1 tsp cinnamon
1/2 tsp ginger
1/4 tsp ground cloves
1 tsp allspice
1/2 cup vegetable oil
1 cup unsweetened applesauce
3 eggs
1 tsp vanilla extract
3 cups peeled, pitted, and diced peaches

Glaze:
2 oz cream cheese, softened
2 T milk
1 cup powdered sugar

Preheat oven to 350 degrees.  Spray a bundt pan with baking spray or butter and flour.

Combine sugar, flour, baking soda, salt, cinnamon, ginger, cloves, and allspice in a large bowl.  Add the oil, applesauce, eggs, and vanilla and mix well.  Gently fold in peaches.  Pour mixture into pan and bake for approximately 1 - 1 1/4 hours until a skewer inserted in the center comes out clean.  Cool about ten minutes in the pan and then invert onto a wire rack to cool completely.

Before serving, combine cream cheese, milk and powdered sugar and whip in a mixing bowl to make a thick glaze.  Pour over the cake.  The glaze should coat a spoon but still run down the sides of the cake.

Tuesday, October 16, 2012

Apple Cranberry Bars


It's fall!  I'm so excited... I love the crisp fall air, a reason to wear boots and sweaters and apples!  Apples are everywhere these days, and we went and picked tons of them so I've been making lots of apple things lately.  I found this recipe one night while skimming through an old cookbook called Great Food Great Beer - it's actually a beer pairing book from Anheuser-Busch but it has some good recipes.  Of course, this started out as an apple pecan date bar but I didn't have any dates or pecans and decided to double the apples and increased the citrus, etc... you know some minor modifications to basically just make a completely different dessert.  The point however, is that these are absolutely delicious and take about 10 minutes to put together so go do it, you can thank me later.


Apple Cranberry Bars
Adapted from Great Food Great Beer

2 cups all-purpose flour
1 tsp baking soda
1 tsp baking powder
1/2 tsp salt
1 tsp cinnamon
2 cups sugar
7 T unsalted butter, room temperature
1 egg
2 egg whites
1/4 cup applesauce
1 tsp vanilla extract
1 cup dried cranberries (Craisins)
3 large apples, chopped into small pieces
1 T lime juice (you can use lemon if you prefer), plus 1 tsp zest
1/2 - 3/4 cup powdered sugar
1 T milk

Preheat oven to 325 degrees and butter a 13x9" baking dish.  Combine flour, baking soda, baking powder, cinnamon and salt in a mixing bowl and set aside.

In another large mixing bowl, beat butter and sugar together until light and fluffy.  Add egg and egg whites, one at a time, beating after each addition.  Add applesauce and vanilla.  Gradually add the flour mixture, stirring just until combined.  Chop apples, you don't need to peel them but you can if you prefer.  Toss with lime juice and zest and add to batter along with the cranberries.  Stir gently to incorporate and transfer batter to prepared baking dish.

Bake about one hour until a toothpick inserted in the center comes out clean.  The bars will puff up in the oven but settle a bit as they cool, becoming more dense.  Cool completely.

Whisk together powdered sugar and milk to make a glaze.  Drizzle over the pan and cut into pieces.  If you can't wait until they are cool, don't worry they are perfect warm with a scoop of vanilla ice cream.

Wednesday, August 1, 2012

Zucchini Bread


If you planted squash in your garden this spring you probably have an abundance of zucchini right about now or if you're like me and thought about planting a garden, never got around to it, but got lucky enough to have your husband's coworker share her abundance of zucchini, go ahead and make this zucchini bread recipe.  I've sung the praises of quick breads before (Jalapeno Cheddar Bread, Pecan Streusel Topped Banana Bread, or Lemon Poppy Seed Bread) but they are so easy!  You can literally have this in the oven in 15 minutes.  Can't do that if yeast is involved!

This makes a great treat for a mid afternoon snack, a quick breakfast, or even a light dessert served plain or with a dab of butter.  It is slightly less of an indulgent with the oil replaced with unsweetened applesauce.  You could also use whole wheat flour for half of the all purpose flour to make it even healthier but I didn't have any on hand.  This recipe will make two loaves and they freeze very well so go ahead and make both even if you won't go through them in a few days. Or give one to the neighbors, or in my case, your zucchini supplier.

Zucchini Bread
Adapted from Better Homes and Gardens New Cookbook

3 cups flour
2 tsp ground cinnamon
1 tsp baking soda
1 1/2 tsp baking powder
1 tsp salt
1/2 tsp ground nutmeg
2 eggs
2 cups sugar
2 cups grated zucchini (approximately 2 small zucchini)
1/2 cup unsweetened applesauce
1/2 cup chopped pecans
1/2 cup golden raisins

Preheat oven to 350 degrees.  Spray two 8" loaf pans with baking spray.  In a large mixing bowl combine flour, cinnamon, soda, baking powder, salt, and nutmeg.  Stir to combine.  In a second mixing bowl, whisk eggs until lightly beaten, add sugar, zucchini, and applesauce.  Make a well in the center of the flour mixture and mix in wet ingredients all at once.  Stir just until moistened.  Add pecans and raisins to the mixture and fold in.  Divide batter evenly between pans and bake for 50-55 minutes or until a wooden skewer inserted in the center comes out clean.  Cool in pan for about 15 minutes, run a knife around the edges to loosen and remove from pan.  Cool completely on a wire rack.  Wrap tightly in plastic wrap to store or freeze.

Monday, July 16, 2012

Berries and Cherries Fruit Salad


I have a hard time deciding which season is my favorite - summer or fall.  The abundant sunshine, time at the pool, beach vacations, and fresh fruit everywhere make me love summer.  But I love fall because I can wear jeans and boots, football season, the lack of humidity and 100 degree temperatures and anything with apples and cinnamon so it's a tie in my mind.  But while summer is here, I love to take advantage of all the fresh fruit that is in season.  The grocery store is full of cheap, fresh, local fruits that are delicious.  Why not use it to make a super simple, healthy side dish?  This fruit salad is the result of a Kroger sale on fresh berries last week and some gorgeous cherries that I had to buy.  It would also be good with the addition of fresh pineapple, kiwi, grapes, apples, etc.  Really anything goes, just add what you like.

This is perfect for a summer potluck or picnic too since it doesn't require refrigeration.  It's great for adults and kids, although remember that it is recommended that kids under one year of age shouldn't have honey.  My toddler absolutely loved this, but I did make sure I chopped the fruit a bit smaller than I normally would have if it was just being served to adults.

This also makes for a great dessert spooned over vanilla ice cream or with a dollop of whipped cream if you are going for a healthier option.

Berries and Cherries Fruit Salad

2 cups sliced strawberries
1 cup blackberries
1 cup raspberries
1 cup pitted, sliced cherries
1 tsp lime zest
2 T lime juice
2 T honey

In the bottom of a medium size bowl, whisk together lime juice, zest, and honey.  Add sliced fruit and gently stir to coat with sauce.  Refrigerate for at least one hour to allow the flavors to combine.  The juices from the fruit will add to the sauce as well.  Stir gently just before serving.

Monday, June 4, 2012

Blueberry Crumb Cake


My baby girl loves fruit - and sometimes she's a little bit picky when it comes to anything else.  And by a little bit picky, I mean she eats fruit and that's it lately.  So I've been trying to find more fruits that she'll eat to add some variety and also trying to come up with some variety in what I use the fruit in.  She used to eat anything you gave her, up until the past few weeks, now she turns down her former favorites, unless its fruit.

Sure we have plenty of bananas, strawberries, yogurt with fruit, cottage cheese with fruit, melon, pineapple, and applesauce, but I figure at least fruit is good for you, she could have been even more like her mama and decided the only food she would eat for several months running was French toast - yes I went through that phase when I was about the same age she is now.  The quirks of toddlers... she'll move on eventually, everyone does.  For now, I'm making things like banana bread, strawberry muffins, and this blueberry crumb cake.  And hey, it's delicious, so I recommend you try it, fruit addiction or not.

And if you have any tips on getting a picky toddler to branch out a bit or you have some great fruit suggestions, I would love them.

Blueberry Crumb Cake
Slightly adapted from Dorie Greenspan's Baking: From My Home to Yours


Cake:
2 cups flour, plus 2 tsp for berries
2 tsp baking powder
1/2 tsp baking soda
1/4 tsp salt
1/2 tsp ground cinnamon
1/4 tsp grated nutmeg
6 T unsalted butter, at room temperature
2/3 cup sugar
1 tsp grated lemon zest
2 large eggs
1 tsp vanilla extract
1/4 tsp lemon extract
1/2 cup buttermilk
2 cups fresh or frozen blueberries

Crumb topping:
1/3 cup brown sugar
1/4 cup sugar
1/3 cup flour
1/4 tsp salt
1/2 tsp ground cinnamon
4 T unsalted butter, cold

Coat an 8x8 baking pan or Pyrex dish with butter or baking spray and preheat oven to 350 degrees.  In a medium bowl, combine 2 cups flour, baking powder, baking soda, salt, cinnamon, and nutmeg and stir to combine.  In a mixing bowl, combine butter, sugar and lemon zest and cream on medium speed for 2-3 minutes until light and fluffy.  Add eggs, one at a time, mixing for about one minute after each addition.  Add vanilla and lemon extracts and mix to combine.  Add 1/2 of the flour mixture, mix until just combined.  Add buttermilk and mix until combined then remaining flour mixture, mixing until incorporated.  Finally, lightly toss blueberries with remaining 2 tsp flour and fold into the batter.  Pour batter into prepared dish and smooth the top.

In a small bowl, combine sugars, flour, salt, and cinnamon for crumb topping.  Add butter and cut in with a fork, a pastry blender or your fingers until it forms a crumbly mixture.  Sprinkle liberally on top of batter and bake for approximately one hour, until a knife inserted in the center comes out clean.  Cool slightly and serve warm or at room temperature.  Keep any leftovers covered once it's fully cooled.

Monday, May 21, 2012

Hummingbird Cake


Have you ever had hummingbird cake?  Think tropical carrot cake full of pineapple and coconut.  It may sound weird but this is a quick and easy cake that will give you ridiculously good results.  This works equally well as  a quick bundt cake to serve coffee cake style or as a layer cake sandwiched with layers of cream cheese frosting, just double the recipe.


Hummingbird Cake
Adapted from Annie's Eats

Cake:
2 cups all purpose flour
1 tsp baking powder
1 tsp baking soda
1/2 tsp salt
1/2 tsp cinnamon
1/2 cup unsalted butter, at room temperature
1 cup sugar
2 eggs
1 tsp vanilla extract
1 tsp coconut extract
1 cup vanilla greek yogurt
2 ripe bananas, mashed - approximately 1 cup
2/3 cup shredded coconut
1 cup crushed pineapple, drained

Icing:
3 oz cream cheese, at room temperature
2 T milk
1/2 tsp vanilla extract
3/4 cup powdered sugar
1/3 cup shredded coconut

Preheat oven to 350 degrees and grease and flour a bundt pan.

Combine flour, baking soda, powder, salt and cinnamon in a medium bowl and whisk to combine.  Separately cream butter and sugar for 2-3 minutes until light and fluffy.  Add eggs, one at a time, mixing until thoroughly combined.  Add in extracts and yogurt and mix to combine.  Add 1/2 of the flour mixture, mixing on low speed until just combined.  Mix in the bananas and then follow with the remaining flour mixture.  Once combined, stir in coconut and pineapple.  Transfer to prepared pan, smooth out the top and bake about 45-55 minutes until a knife or skewer comes out clean.

Cool in pan for about 20 minutes.  Cover a cooling rack with parchment paper, place on top of bundt pan and invert cake and cool completely.

For icing, whisk cream cheese until smooth, whisk in milk and vanilla.  Add powdered sugar and mix until smooth.  Add more powdered sugar if necessary to reach desired thickness.  Stir in coconut.  Spoon over the top of the cooled cake, cut and serve.


Friday, April 20, 2012

My baby girl turned One!

Yes it was two months ago... and I'm just now getting around to sharing a few of the details.  I know, life has been a little crazy around here as we prepare for baby number 2... can't believe she'll be here in another 6 weeks or so, and try to finish up all the remodeling projects - the new nursery and master bathroom being at the top of the list.  But even in those two months, I still can't believe my baby girl is over a year old, walking, jabbering constantly and really developing quite the personality.


For Aubrey's party - we did a little bit of a circus/carnival theme - I'll admit largely due to the fact that I was slightly obsessed with the pennant flag banners that are popping up all over the place right now.  I just love them and thought they would make adorable party decor.  My sister Nikki, of Doodle Dog Advertising, made some adorable invitations for the party featuring a cute little elephant that I decided to use for the cookies too.

Photo by DoodleDog Advertising

I combined the elephants with some friendly little lions inspired by cookies that I had bookmarked quite a while ago from Bridget at Bake at 350.  I love the way they turned out, but a word of warning, don't ever try to layer your cookies with wax paper when you run out of parchment paper at 10 pm, the wax paper stuck to the frosting in several places and I had to do some minor cookie reconstructive surgery the day of the party.  My go to sugar cookie recipe can be found here.


For the cakes, I knew I wanted to make Aubrey a simple smash cake and I tied the main cake back to our circus theme with a mini-pennant banner strung from plastic carnival stripe straws.


I used a basic white cake recipe (also seen here) from Magnolia Bakery for both to keep things simple and filled and frosted them with a simple buttercream.  Sprinkles and a fun corkscrew candle were all the decoration the smash cake needed and a simple dot pattern adorned the main cake.


Finally I made a 3rd cake (2nd smash cake) for a photo shoot with Dede Holman Photography the following week so we could have some adorable pictures to document the occasion.

Photo by Dede Holman Photography

For other food at the party I stuck with some simple spins on carnival food - spicy whiskey BBQ sliders (slightly modified from Pioneer Woman - I used ground turkey instead of beef and cut out the majority of the butter and served them on Hawaiian roles), kettle corn, fruit skewers on a stick and animal crackers with a vanilla honey yogurt dip (a simple combination of vanilla yogurt, a little honey for sweetness and some lime zest), nachos with cheese dip and guacamole, mini corndogs muffins (recipe found on Iowa Girl Eats) and veggies and dip.

Traditional White Birthday Cake
Recipe slightly adapted from Magnolia Bakery Cookbook

Cake:
1/2 cup unsalted butter, at room temperature
1 1/2 cups sugar
2 cups self-rising flour
1 cup whole milk
2 tsp vanilla extract
4 egg whites

Preheat oven to 350 degrees. Spray 3 8" baking pans baking spray and line the bottoms with parchment rounds.

Cream the butter on medium high speed until smooth. Add the sugar gradually, beating until light and fluffy, about 3 minutes. Combine milk and vanilla in a measuring cup. Add flour in 3 parts, alternating with the milk, beating well after each addition, beginning and ending with flour. Set batter aside.

Add egg whites to a clean mixing bowl and begin beating on low speed, gradually increasing speed to high as egg whites thicken. Beat until the egg whites make soft peaks. Gently fold into cake batter, 1/3 at a time.

Bake 22-25 minutes until a toothpick inserted in the center of the cake comes out clean. Cool in pans for about 5 minutes, loosen the edges with a knife if necessary, and turn out onto a wire rack to cool completely.


Note: this recipe will make 2 2-layer 6" smash cakes or 1 3 layer 8" cake, so double the recipe if you want to make the 2-tier cake and a smash cake.  In the pictures above, the smash cakes are each built with 2 6" cakes cut in half horizontally to make 4 total thin layers and then torted with buttercream.  The 2-tier cake is done the same way with a 6" cake over an 8" cake.  I did use small wooden dowels for stability when stacking the tiers.


Buttercream Icing

1 cup unsalted butter, at room temperature
1 tsp vanilla extract
1/4 cup heavy cream
1 lb powdered sugar

Beat butter in a large mixing bowl for 2-3 minutes until smooth and creamy, add in vanilla and cream and mix on low speed until incorporated.  Add powdered sugar in a several additions to prevent it from making a giant cloud of sugar all over your kitchen.  Mix on low speed until incorporated and increase speed gradually to medium high and whip an additional 1-2 minutes.  Icing should be thick but easily spreadable. 

Note: this will make enough icing to torte and ice at least one smash cake but you will need more to do all of the cakes above.

Wednesday, January 11, 2012

Caramel Praline Cheesecake


Yes I know, everyone is on a diet right now.  Oh wait, I mean "lifestyle change."  Taking a break from rich desserts, cookie jars, and cheese-filled appetizers.  Well, I'm not going to lie, we kind of are too, and I actually made this way back at Thanksgiving, I just haven't had a chance to share it with you yet.  But despite that, I'm still going to tell you to find an occasion to make this cheesecake.  A birthday, an anniversary, a special dinner for Valentine's Day, Saturday... you know, whatever works in your life.  I'm not the biggest cheesecake lover, but this one is good.  Rich and creamy and topped with a delicious caramel sauce and candied pecans... it doesn't get much better.  And go ahead, use the 1/3 less fat cream cheese if you want, I used it for two of the four packages and it turned out perfectly. 

The best part for those of you Type A dessert makers, the caramel sauce will hide any cracks that you might have.  I got lucky with this one though and it came out perfectly without a crack.

Caramel Praline Cheesecake
Adapted slightly from Taste of Home

Crust:
1 package (about 10) graham crackers
1 T sugar
6 T unsalted butter, melter

Filling:
4 8 oz packages cream cheese, softened
1 1/2 cups sugar
1/4 cup all purpose flour
5 large eggs
2 cups sour cream (16 oz)
1/4 cup milk
1 T bourbon vanilla extract

Topping:
1 cup sugar
1/4 cup water
1 cup heavy whipping cream
1 T unsalted butter
1 tsp pure vanilla extract
10-12 pecan halves

Spray a 10-inch springform pan with baking spray and place on a double layer of aluminum foil big enough to fold up around the pan.  Wrap the overhanging foil around the sides of the pan to seal it. 

In a food processor, combine the graham crackers and sugar for the crust.  Pulse 5-6 times until fine and crumbled.  Add melted butter and pulse 2-3 more times until the mix begins to hold together slightly.  Pour mix into prepared pan and press into the bottom in an even layer.  Refrigerate for 30 minutes.

Preheat oven to 325 degrees.  Heat a few cups of water in a tea kettle or microwave in a large measuring cup.  In a large bowl, beat cream cheese and sugar for 3-5 minutes on medium speed until smooth.  Beat in flour and then eggs, one at a time, mixing on low speed just until combined.  Add sour cream, milk, and vanilla and mix to combine.  Pour mixture into crust.  Place the springform pan inside another larger pan (like an 11"x13" baking pan or a 12" cake pan) and pour the hot water around the outside of the springform pan to a depth of approximately 1" to form a water bath.

Bake for about 75 minutes, until the center appears dull.  The cake should still jiggle slightly in the center.  Remove springform pan from the water bath and transfer to a wire rack.  After about 10 minutes, run a knife around the edge of the pan to loosen and continue to cool about 1 hour.  Transfer to the refrigerator and chill at least 4 hours or overnight.

For the topping, stir together sugar and water in a heavy saucepan over medium heat.  Stir constantly with a wooden spoon until the sugar is melted.  Cook approximately 15 minutes more without stirring until golden brown.  Reduce heat to low and gradually add the heavy cream.  Cook and stir until the sugar is completely melted and smooth.  Using a candy thermometer, increase heat to medium and cook, stirring constantly until the temperature reaches 225 degrees.  Remove from the heat and add butter and vanilla.  Cool to room temperature.  Pour evenly over the cheesecake. 

In a small skillet, toast pecan halves over medium heat for a few minutes just until fragrant.  Press one pecan into each slice of the cheesecake or garnish as desired.

Friday, December 30, 2011

2011's Top 11 Recipes

As 2011 comes to a close (how is that possible?? Didn't it just start?) I'm going to share this year's most popular recipes.  There are a few repeats from last year as some of the "greatest hits" continue to pop up. 

The number one recipe is this White Cheddar Chicken Pasta.  This recipe has become a staple around here and is a quick and easy dinner to throw together.  It's also super versatile.  No wonder it remains a hit.


In the number two spot is this recipe for Chicken Enchilada Soup.  Perfect on a chilly fall or winter day, this soup can be made on the stovetop or in a crockpot. 


In third place is another all-time favorite still sticking with the spicy trend... Spicy Chicken Tortilla Roll-ups.  These are a perfect appetizer for a New Year's or Superbowl party.  They come together quickly and you can make them in advance too.


For fourth place, you moved on to dessert and like these S'mores Cupcakes as the top cupcake recipe I've posted over the last three years.  And I can understand why, they are quite impressive especially when you break out the kitchen torch to give them the marshmallow frosting that toasted look and taste.  If you haven't made these yet, you really should try them.


Coming in fifth is another easy weeknight pasta dish.  These lasagna roll-ups are the perfect solution to a classic Italian dish without all the work and without three days of leftovers in the fridge if you're not cooking for a crowd.  Plus these can be made with so many variations.  Try using chicken, beef or Italian sausage in place of the turkey, an alfredo sauce or pesto cream sauce in place of the marinara.  There are all kinds of options to keep these fun.


New to the list of favorites this year is another appetizer that I originally made for the Superbowl this year.  These classic soft pretzels with jalapeno cheese sauce are easier than you might think and make a fantastic weekend snack or party appetizer.  The cheese sauce can be used with the pretzels or use at a queso dip for chips or pour it over enchiladas for even more cheesy goodness.  If you want to experiment with some pretzels, compare this classic method which uses bread flour and boils the pretzels in a baking soda bath to this latest version of Cheese-Stuffed Everything Pretzels that I just tried which uses all-purpose flour and skips the baking soda bath with fantastic results.


In seventh place, a cookie recipe that mimics those super soft grocery store sugar cookies.  Made with a cake mix, this isn't your standard sugar cookie recipe but it does yield delicious cookies and it takes about five minutes to mix up.  You don't have to roll and cut anything and decorations are as easy as a few colored sprinkles if you want them.  I know it's past "cookie season" but these Soft and Thick Sugar Cookies are worth it.


The list is rounded out with cupcake recipes. 

In eigth place, Snickers Cupcakes, a rich chocolate cupcake, filled with caramel and topped with caramel buttercream and chopped Snickers bar pieces.  I've since decided I prefer to add a little chopped candy bar to the caramel filling in the center as well as it helps hold the cupcake together a little better. 


Next up is another chocolate favorite, Chocolate Cherry Coke Cupcakes.  Again these start out with a chocolate cupcake base but this time they get filled with a cherry filling, topped with a Coke glaze and frosted with whipped cream frosting.  A cute little cherry on top make these an adorable and nostalgic favorite.


Next on the list, is a cupcake that could be breakfast or dessert.  Apple Cinnamon Roll Cupcakes are a delicious, portable (although still sticky) cinnamon roll baked up in cupcake form.  The method is the same as a classic cinnamon roll but the cupcake presentation adds a cute touch for a brunch or other gathering.


Finally, the last favorite of the year is a cupcake I baked up for my husband for his birthday this year.  These Orange Creamsicle Cupcakes would definitely make my short list of favorites as well.  The cake is super moist and has a light orange flavor.  The combination of orange buttercream and marshmallow cream filling give the cupcake that creamsicle flavor that takes these over the top.


That wraps up the list of 2011 reader favorites.  All in all, 2011 was a great, although extremely busy, year for my family. 

Of course, my favorite thing I "baked" in 2011 was our daughter, Aubrey, who arrived in February.  I can't believe it's time to start planning her first birthday party now.


From there the year was a blur of selling our house, weddings, vacations, and buying and remodeling our new house that still hasn't really ended but as the year comes to a close, I'm trying to appreciate what we have and live more in the moment rather than rushing to get to the next big thing.  Happy New Year to all my wonderful readers, thanks for putting up with a lot more sporadic posting than I would have liked this year.  Although I don't see 2012 calming down any, I'm hoping I can squeeze in some recipes with a bit more regularity.  I've got some great ones to share with you.

Wednesday, December 28, 2011

White Chocolate Cinnamon Crunch Popcorn


Want some gourmet popcorn that you can make right at home?  It's easier than you might think.  But it probably involves more butter than you think so make this before your New Year's resolutions take effect.  This would actually be a perfect snack for a New Year's Eve party. 

However, if you make your popcorn in the microwave, I hope you'll reconsider.  It is so much better when you make it on the stove top.  You don't end up with all the chemicals and it's super easy.  All you need is a large sauce pan with a tight fitting lid, a little canola or vegetable oil, and some popcorn kernels.  Personally I've replaced my popcorn pan with a Whirleypop, a switch I made a few years ago when we upgraded our stove to a glass top instead of coil burners.  I didn't want to scratch the stove top shaking the pan so I bought the Whirleypop which has the same result but since it has a mechanism to stir the popcorn inside the pan, you don't have to shake it.  It was a worthwhile investment for us since I'm a popcorn lover and it was only about $30. 


Anyway, back to the recipe, you can make your popcorn on the stove or in an air popper, or if you must use the microwave, at least make sure you are using the natural popcorn without butter or other flavorings. 

White Chocolate Cinnamon Crunch Popcorn
Recipe adapted from Right at Home

2/3 cup popcorn kernels (about 16 cups popped)
1 1/4 cups brown sugar
1 1/4 tsp cinnamon
1/3 cup light Karo syrup
1/2 cup butter
1 1/2 tsp vanilla
3/4 tsp baking soda
3 squares almond bark

Preheat oven to 250 degrees.  Line two large baking sheets with parchment paper. 

Pop popcorn and set aside in large bowls, make sure to leave yourself room to mix in the bowls or it will get very messy.

Combine brown sugar, cinnamon, butter, and corn syrup in a large microwave safe bowl.  (If your butter is straight out of the refrigerator, cut it into chunks before adding it to the bowl to help it melt faster.)  Microwave on high for about 30 seconds and then stir to combine everything.  Microwave an additional two minutes and stir and return to microwave for two more minutes.  Add vanilla and baking soda and stir to combine, the mixture will foam and rise when you add the baking soda.  Divide hot caramel mixture evenly among the popcorn bowls and quickly stir to coat the popcorn.  Continue to gently mix until topping is well distributed. 

Pour popcorn mixture onto prepared pans and bake for approximately 30 minutes, stirring every ten minutes.  Lay out another large sheet of parchment paper on your counter.  Remove the popcorn from the oven and spread out on parchment paper.  Melt almond bark (I like to use a double boiler method as it scorches very easily in the microwave but you can use whatever method you prefer) and drizzle over popcorn.  Let popcorn cool and then break into chunks and serve or store in an airtight container. 

(Whirleypop has not sponsored this post in anyway, these are my own opinions.)

Sunday, December 25, 2011

Merry Christmas


Merry Christmas from my family to yours...

Thanks for reading, I'll be back soon with some new recipes. 

Tuesday, December 20, 2011

Cheese Stuffed Everything Pretzels

It only takes one word to describe these pretzels... awesome! 


Of course, I will continue to type because I can't actually just stop at the one word.  Soft pretzels are delicious on their own, this recipe adds cheese to the middle and then adds poppy seeds, garlic, and minced onion to the normal sea salt topping.  Takes them to a whole new level.  Just look at the oozy cheese, the crunchy toppings... yummm...

This is also a super easy recipe for those of you who are afraid of yeast... there is no rising, punching, etc.  This recipe also skips the normal soft pretzel step of boiling the dough in a baking soda bath before cooking as well.  This makes for an incredibly quick pretzel recipe.  I think I had these mixed, rolled, shaped, and baked in under an hour. 


Cheese Stuffed Everything Pretzels
Adapted from Guy Fieri, via the Food Network

Dough:
1 1/2 cups warm water (approx. 110 degrees)
2 packets active dry yeast
4 cups all purpose flour
1 tsp sea salt
1 T sugar
1/4 tsp cayenne pepper
1 tsp garlic powder
1/2 cup grated Parmesan cheese
1 egg
3 cups shredded colby jack cheese

Toppings:
1 egg
2 T milk
1 tsp poppy seeds
1 tsp garlic powder
1 tsp minced onion
1 tsp sea salt

In a large measuring cup, heat water and sprinkle yeast over the water.  Stir to combine and let sit for about 10 minutes until frothy.  Meanwhile, in a food processor fitted with a dough blade, combine all dry ingredients and pulse to combine.  Add egg and yeast mixture and pulse in short bursts until the dough comes together.  Do not over mix, you just want the dough to come together.  Turn out onto a lightly floured surface and knead a few times with your hands.  If dough feels sticky, add a little more flour.  Form the dough into a ball and cut in half.

Roll out 1/2 of the dough into a large rectangle, approximately 12"x17", sprinkle about 3/4 cup of the colby jack cheese down the center 1/3 of the dough.  Fold one edge over the cheese, sprinkle with another 3/4 cup cheese, and fold over the remaining 1/3.  Pinch the edges of the dough to seal the cheese inside.  Roll out the dough again into a rectangle about 11"x15".  Cut the dough into six strips approximately 1 1/2" wide.  Roll each strip into a tube and form into a pretzel shape by looping and crossing the ends over each other, then tuck back onto the loop and pinch to seal.  Transfer to a baking sheet covered with parchment paper.  Repeat with remaining half of dough. 

Preheat oven to 425 degrees.  In a small bowl, combine remaining egg and milk.  Whisk to combine and set aside.  In another small bowl, combine poppy seeds, garlic, onion, and salt.  Brush the pretzels liberally with the egg wash, then sprinkle with spice mixture.  Bake 18-20 minutes until light golden brown.  Transfer pretzels to a wire rack to cool.

Wednesday, November 2, 2011

Pizza Bread

The next time you need a simple appetizer for an event, let me recommend this one.  There are endless variations and it takes next to no time at all to throw together.  It works for football games, it works for kids, it works for girls' nights... why?  Because it's easy, delicious, and adaptable.

I originally spotted this idea on Pinterest... it's my latest internet obsession and I've pinned about 4,000 things and made about five of them.  In honor of the "Pinterest Challenge" (see the details here, here, here, or here and check out all the other Pinterest projects), I had to get this posted today so I could play along. 

There are several variations of this appetizer floating around, anything from a warm and gooey cinnamon roll version that I figure would be great for a brunch, to the "bloomin' onion" spin-off, to the bacon-loaded "crack bread" version.  I opted to go with a pizza version this time around.  Of course, I modified it a bit, I don't like pepperoni so I used Italian sausage.  It takes about five minutes of hands-on prep time and a little patience while it's in the oven.  You may need to adjust the quantities slightly depending on the size of the bread boule you buy.  (Did you know boule is a fancy way of saying round when referring to bread?)  You can also try several different types of bread but I used an Italian bread for this one.  Depending on the flavors you add to it, you may want to consider sourdough or other types.


Pizza Bread
Adapted from The Girl Who Ate Everything

1 unsliced Italian bread boule (or whatever type you prefer)
2 cups shredded mozzarella cheese
1/2 pound mild Italian sausage
3 T butter, melted
1/2 tsp garlic powder
1/2 tsp dried oregano
1/4 tsp crushed red pepper flakes
1 T Parmesan cheese
Pizza sauce for serving

In a medium skillet, brown sausage and crumble as it cooks.  Drain well and set aside.  Prepare a baking pan by lining it with aluminum foil.  Preheat oven to 350 degrees. 

Carefully slice the bread in long slices, taking care not go all the way through.  Turn the bread 90 degrees and cut slices the opposite direction, again leaving the bottom connected.  The second set of cuts will be a little more difficult to make.  If your bread is very soft, you may want to put it in the refrigerator for about thirty minutes before you try to cut it so it is a little easier.  The cuts don't have to be perfect though so don't worry if your lines aren't straight and such.

Next start tucking the crumbled sausage and the shredded cheese into the cuts in the bread, pack it in as much as possible.  In a small bowl, combine the melted butter, garlic, oregano, red pepper flakes and Parmesan cheese.  Pour butter mixture over the top of the bread.  Cover the bread with another piece of foil, molding it down around the bread, and bake about fifteen minutes, uncover and continue baking about ten more minutes until the top is golden and the cheese is all melted.  Serve warm with pizza sauce.

Wednesday, October 12, 2011

Beer Cheese Macaroni

As I've mentioned a time or two in the past, macaroni and cheese is definitely up there on my list of favorite foods.  In my mind, it's pretty much the perfect comfort food.  While I definitely have a favorite traditional mac and cheese recipe, I also like to experiment with variations.  Check out these other macaroni recipes I've posted previously - Spicy Crab Macaroni and Cheese, Baked Mac and Cheese, Stovetop Mac and Cheese, and this chicken version - White Cheddar Chicken Pasta.


Well when I saw this beer cheese soup turned mac and cheese recipe on Pinterest, I couldn't pass it up.  I figured it would be perfect for our tailgating party for the upcoming game.  Let me tell you, don't wait to make this one.  This is some fantastic pasta.  The beer combines perfectly with the smoked and sharp cheddar cheeses and whole wheat pasta.  I used a Sam Adams Oktoberfest beer but any decent beer should work, I think I would avoid the light beers for this recipe, as you want something with a bit more flavor.


Feel free to adjust the cheeses but I think the blend of 1/3 smoked cheddar, 1/3 sharp white cheddar, and 1/3 mild cheddar, along with a little American cheese gives great flavor.  I added the American cheese slices because I like the creaminess that it adds.  I just used slices from the deli but you could shred it as well.  The recipe that I used baked the mac and cheese but I opted not too for this one since it was so creamy straight from the stovetop.  If you want to bake it, I recommend adding a bread crumb topping.

Beer Cheese Macaroni and Cheese
Adapted from HowSweetEats

12 oz uncooked whole wheat elbow or shell pasta
2 T unsalted butter
2 T flour
1 cup milk
1 cup beer
4 oz smoked cheddar cheese, grated
4 oz sharp white cheddar cheese, grated
4 oz mild cheddar cheese, grated
6 slices American cheese
1/4 tsp smoked paprika
1/4 tsp mustard powder
1/4 tsp dried thyme
salt and pepper, to taste
10 basil leaves

Heat a large pot of water to boiling, add a liberal amount of salt when boiling and add pasta.  Cook to just al dente, according to package directions.  Drain and return to pan or crock pot if you want to keep it hot for a while (you don't want to cook it in the crock pot but it can stay on low for a short while, if you plan to leave it in the crock pot for an extended time, you'll want to cook your pasta just shy of al dente so it doesn't turn mushy.)

Meanwhile, melt butter in a saucepan over medium heat.  Add flour and whisk to make a roux.  Continue whisking until the roux start to turn golden and bubbles, about two minutes.  Add milk and beer, stirring constantly.  Cook for about five minutes until the mixture begins to thicken slightly.  Reduce heat to low and add cheeses by the handful, stirring to melt and incorporate.  The sauce will thicken slightly but will not be as thick as regular mac and cheese at this point.  Add paprika, mustard, thyme, and salt and pepper to taste.  Pour sauce over pasta and stir to distribute.  Chiffonade basil leaves by stacking and rolling tightly, then use a sharp knife to cut thin slices to form ribbons.  Stir basil into pasta and serve. 

Friday, September 23, 2011

Buffalo Chicken Burgers

It's football season!  Finally, it's time for Saturday's spent at the stadium, tailgating, cooler weather, sweatshirts... the list goes on and on, I love fall.  While summer is full of fresh fruits and vegetables, sunshine, and pool time, it also requires (at least in my world) air conditioning and bug spray.  While summer is great while it lasts, by August I'm always impatiently waiting for fall to make an appearance.


To kick off the home football season this year (sort of, technically I missed the first game - college football shouldn't happen on Thursday nights) I brought buffalo chicken burgers to our tailgate.  These burgers were pretty tasty - so much so in fact that I made them again just a couple nights later.  Full disclosure - the speediness was partially so I could take the picture that I forgot to take in the parking lot but it was also at the request of my husband.  For tailgating, I made these as sliders (aka mini burgers) but at home I made them full size.  Take your pick, although I prefer the sliders, just because they are more fun in my opinion.

In my mind there are two choices for condiments when it comes to buffalo chicken, ranch or blue cheese.  If you side with me on this one, top your burgers with a dollop of ranch dressing and a slice of cheddar cheese.  If you disagree, top them with some blue cheese crumbles and blue cheese dressing.

Buffalo Chicken Burgers

Burgers:
1 lb ground chicken
3-4 green onions, diced
1/4 cup Frank's Red Hot sauce (plus more for serving)
1 egg
2 cloves garlic, minced
1-2 slices day old bread or 1/4 cup breadcrumbs
1/2 tsp celery salt
1/2 tsp dried thyme
1/2 tsp freshly ground black pepper

To serve:
Ranch and/or blue cheese salad dressing
Frank's Red Hot sauce
Cheddar cheese slices or crumbled blue cheese
Pickles
8 small rolls or 4 hamburger buns

Prepare grill to medium heat or preheat a cast iron skillet if cooking indoors.  If you are using day old bread, quickly tear into chunks and pulse in a food processor to make crumbs.  In a large bowl, add all of the burger ingredients and gently mix until just incorporated.  (Don't skip the egg and breadcrumbs, they will really help the patties stay together.)  Form into four patties for full size burgers or eight small patties for sliders.  Make each patty slider larger than the bun and slightly thinner in the center (this is more important for full size burgers.)  Cook finished patties about five - seven (three to four for sliders) minutes per side (you want these cooked all the way through since it's poultry and not beef but don't overcook them or they will be dry), flip once and cook through.  Just before the finished, top with cheddar slices if desired.  Serve on hamburger buns topped with condiments of your choice.

Monday, August 15, 2011

Mango Date Muffins

Knock, knock, knock... is anyone still here?  Anybody?  Good news... I'm alive and I have a kitchen again.  Oh wait, I didn't tell you about the fact that we didn't have kitchen for a while because we sold our house!  Oh yeah that was a couple of months ago, we sold our house at the end of May and started what may have been some of the busiest weeks ever. 


We went to Maryland (twice actually) for my friend Michelle's bridal shower and wedding.  I did make some cute personalized sugar cookies (see the recipe here), a bunch of cupcakes (Triple Lemon and Lemon Meringue - lemon's her favorite) and a devil's food chocolate cake with coconut cream filling and frosting - of course I don't have any good pictures.


The next week we packed up our whole house into a Pod container, closed on our house and left for Jamaica for a week for my cousin Blake's wedding - welcome to the family Summer! 


When we got home from Jamaica we were supposed to move into an Extended Stay America for two weeks but as luck would have it, Todd's cousins offered up their house in exchange for petsitting while they went on vacation so we moved there instead. 


Finally mid-June rolled around and we closed on our new house.  Of course the work didn't stop there as we've since been busy remodeling and modernizing our 40ish year old house that was a little bit stuck in the 70's. 

Painting paneling and beams, built-ins and trim, adding French doors, new sectional... it was so much work but worth it and I'm really glad we kept the panelling.

So far we've finished (is a room ever really finished?) the family room and Aubrey's room.


New beadboard and chair rail and soft yellow walls with the pink curtains from her nursery at our first house to make a cozy little girl's room.  We still need some pictures for those frames and to paint and move the chandelier from the dining room.

So the good news is that things are starting to calm down ever so slightly so I'm not making any promises at this point but hopefully I'll get back to blogging with a little bit more regularity.  I do have several recipes that I want to share that have been piling up even though it seems like I'm only cooking when we have guests these days.

For now, I'm going to share one of my favorites from the past couple of months. 


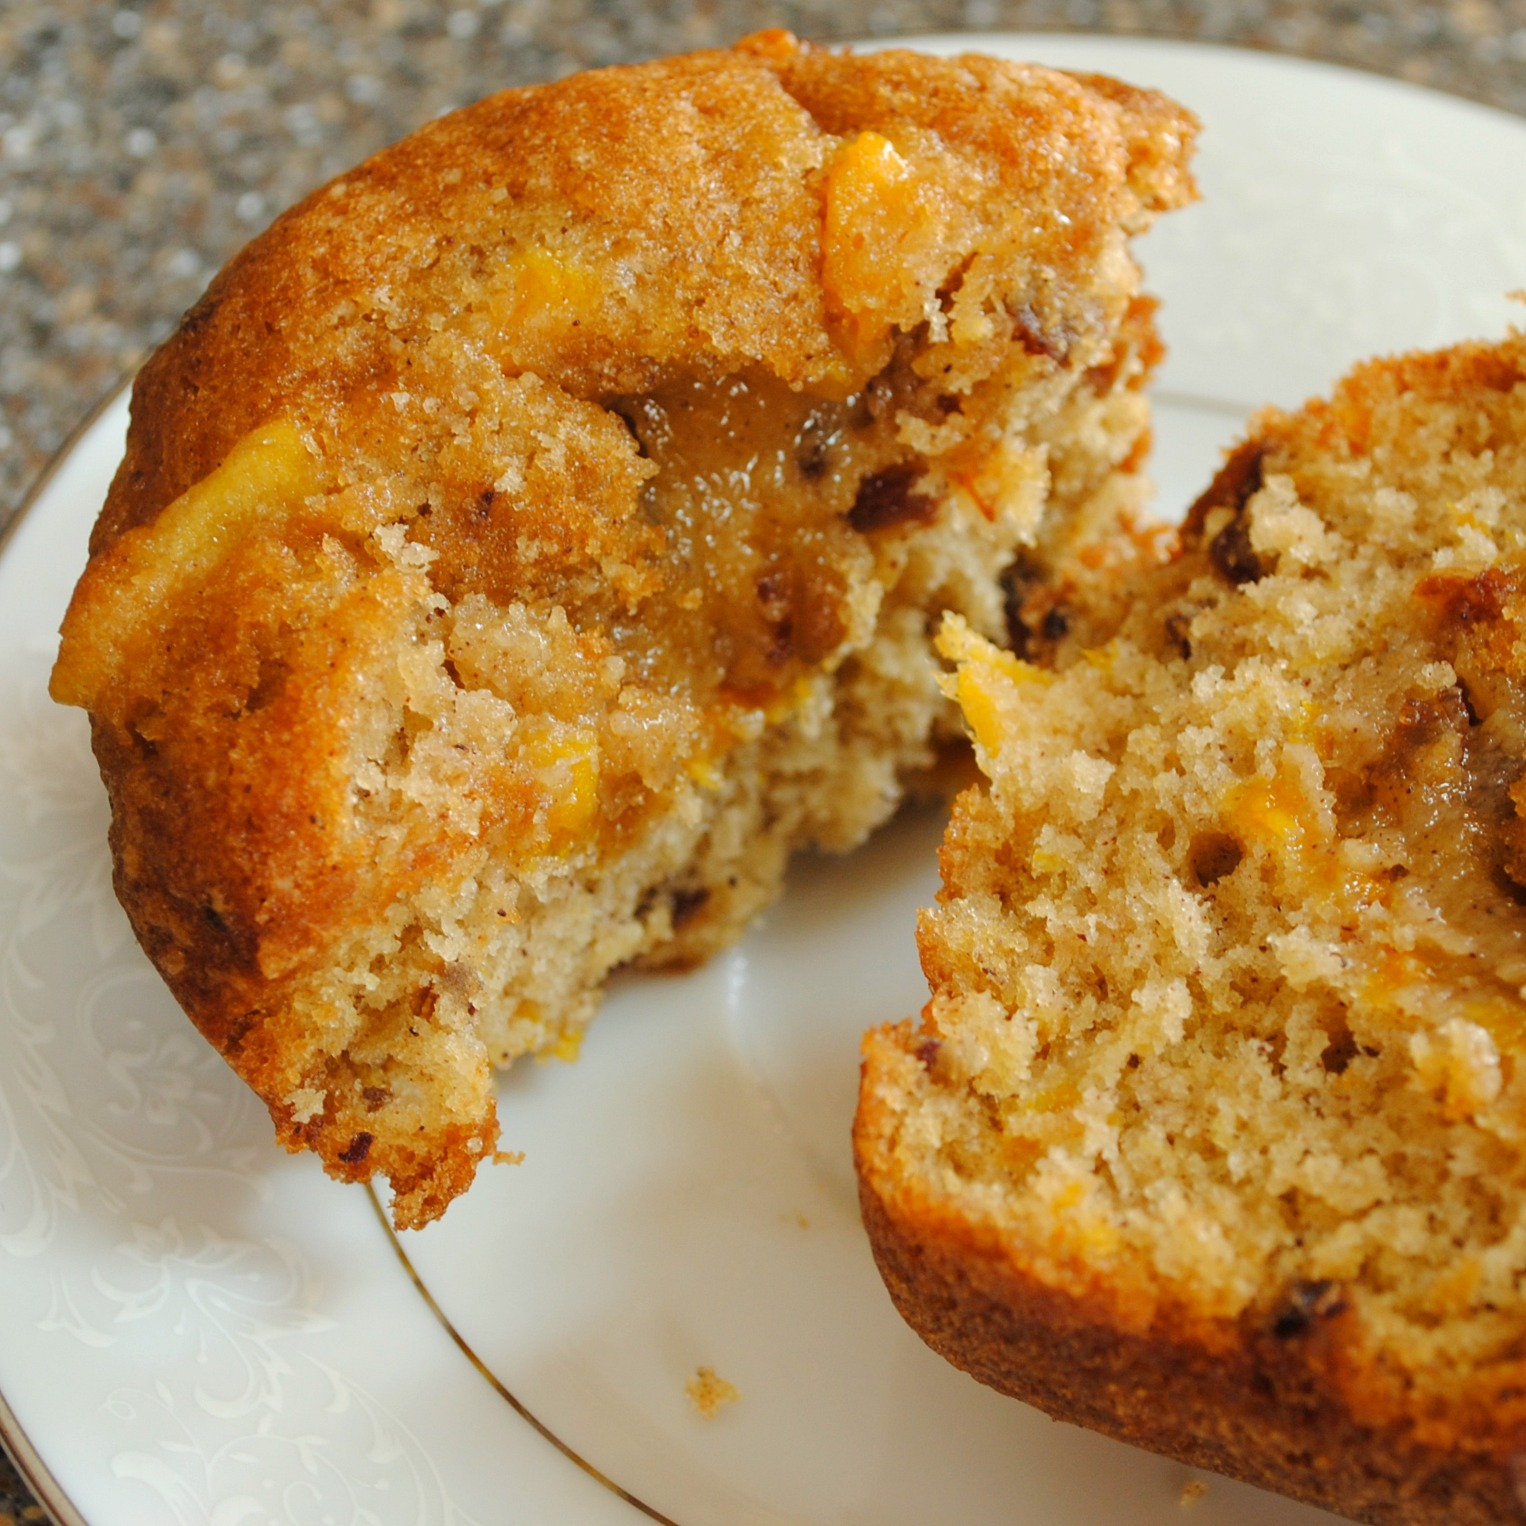
I baked these as jumbo muffins but they could be baked in regular size muffin tins as well.  They are reminiscent of a spice cake or carrot cake but with delicious chunks of mango.  Although the decision to make these muffins was an improvisation with leftover ingredients mostly because I had a couple of mangoes around because of plans to make mango peach salsa that didn't materialize, they turned out to be one of my favorite things I've made this summer.  I've definitely added the recipe to the list for repeat desserts.  And since they are muffins, I vote they even work for breakfast - just hold the ice cream.


Mango - Date Muffins
Inspired by Fresh Mango Bread from Baking: From My Home to Yours by Dorie Greenspan
Yields 18 jumbo muffins

4 eggs + 1 egg yolk
1/3 cup canola oil
3 3/4 cups flour
1 1/2 cups sugar
3/4 cup brown sugar, firmly packed
1 1/2 tsp baking powder
1 1/2 tsp baking soda
2 tsp ground ginger
1 1/2 tsp cinnamon
1/4 tsp nutmeg
1/2 tsp salt
2 1/2 - 3 cups diced, peeled mango (about two mangoes)
1/3 cup diced dried dates
2 T dark rum
1 T orange zest

Soak chopped dates in dark rum in a small dish until softened.  Preheat oven to 350 degrees.  Spray muffin tins with baking spray or butter and flour.  Whisk together eggs and oil in a small bowl.  In a large mixing bowl, combine flour, sugars, baking powder, baking soda, and spices.  Pour the egg mixture over the dry ingredients and stir just until combined, either by hand with a wooden spoon or on low speed in mixer.  The batter will be thick.  Drain dates and add along with mango and orange zest and stir to distribute.  Spoon batter into muffin tins, filling about 2/3 of the way full. 

Bake the muffins about 25 minutes until golden brown.  A toothpick inserted in the center should come out clean.  Cool for about five minutes in the pan and then transfer muffins to a wire rack to finish cooling.  These muffins are excellent served slightly warm with a scoop of vanilla ice cream.

Related Posts with Thumbnails