Pin It button on image hover
Showing posts with label Holidays. Show all posts

Saturday, June 15, 2013

A Book Baby Shower

My little sister is having her first baby - literally any day now - and we had an absolutely adorable shower for her a couple of months ago.   Yes, it was in April, and I'm just now posting about it - it happens.

I started out on Pinterest to find some ideas and quickly had about four different themes planned when I realized that they all revolved around children's books.  Reading with my kids is one of my favorite moments of the day and they both love books.  I hope that Nikki will enjoy reading with baby Colton just as much and we wanted to get her library started for him.

I love how this shower turned out and was so happy to get to throw it -- now I just can't wait to meet baby Colton!!


I took a few shortcuts with the food on this shower since I was travelling by plane to get there.  We ordered the cake from a bakery and everything on the menu was quick and easy to prepare.


For the invitations, I just put together some images of the characters in several of the books we were using.  I made coordinating signs for each of the dishes on the menu as well to tie the food into the book theme.

The menu and book pairings included:

Sam I Am's Green Deviled Eggs - complete with the egg whites dyed green instead of the egg yolks - based on a Pinterest tutorial I found here, you can dye eggs any color you want and it doesn't affect the flavor at all.


Guess How Much I Love You Veggies and Hummus - it was a stretch but it's "bunny food" and I love this book.


The Very Hungry Caterpillar's Fruit and Yogurt Dip


Where The Wild Things Are & Max's Turkey "Muenster" Sandwiches - a simple sandwich with shaved turkey breast, muenster cheese, baby spinach and mustard.


Cloudy with a Chance of Meatballs - with a quick chili sauce and grape jelly sauced meatball.


If You Give a Mouse a Snickerdoodle - we subbed in Snickerdoodles since they are my sister's favorite.


Jamberry Pies - if you've never heard of the book Jamberry you should look it up, such a cute rhyming story.  I made mini cherry, lemon and apple pies in a muffin tin taking some help from refrigerated pie crust for this one.


And from Giraffe's Cant Dance, Gerald's (non-alcoholic of course) Jungle Juice.


We also used Good Night Moon as a guest book, asking guests to leave a message for Mom or baby.


I made a simple diaper cake and added signs from the book Little Blue Truck and found some animal baby toys to add in for extra fun.


One of the best things about the baby shower was the onesie decorating station we set up outside in lieu of playing traditional shower games.  We had so much fun decorating onesies with fabric paint and stencils and iron-on transfers and they turned out so cute!

Sunday, March 17, 2013

Spiced Brown Sugar Shamrock Cookies


I hope you enjoyed your St. Patrick's Day!  Times have changed a bit for us from green beers to green cookies for daycare parties but when your two year old is super excited about "my cookies" these still make it a great day.  These shamrock cookies are Spiced Brown Sugar Cookies with a simple buttercream frosting.

Spiced Brown Sugar Cookies
Originally posted here
Yields approximately 2 dozen large cookies

3 cups all purpose flour
2 tsp baking powder
3/4 tsp cinnamon
1/4 tsp ginger
1/4 tsp nutmeg
1/8 tsp. allspice
1/2 tsp salt
1/2 cup sugar
1/2 cup light brown sugar, firmly packed
1 cup unsalted butter, at room temperature
1 large egg
1 1/2  tsp vanilla extract

Powdered sugar for rolling

Combine flour, baking powder, and spices in a large bowl and whisk to combine.  In a mixing bowl, cream sugar, brown sugar and butter on medium speed until light and fluffy, about three minutes.  Add egg and vanilla and beat until well incorporated.  Slowly add flour mixture, mixing on low speed.  The dough will be very stiff.  Lay out a large sheet of plastic wrap and turn dough out on to plastic.  Form into a disk and wrap tightly.  Chill approximately one hour.  

Remove dough from refrigerator and let stand five to ten minutes at room temperature.  Preheat oven to 350 degrees.  Line baking sheets with parchment paper or Silpats.  Generously sprinkle powdered sugar over work area and rolling pin.  Roll dough to about 1/4" - 1/2" thick and cut into desired shapes.  Transfer to prepared pans and bake about 9-12 minutes.  Cookies shouldn't really brown but will firm up.  Remove from the oven, let stand about one minute on the baking sheet and then transfer to a wire rack to cool completely.  When completely cool, frost as desired.

Sunday, March 10, 2013

Aubrey's Elmo Birthday Party

My daughter Aubrey turned two in February.  I still can't believe I have a two year old.  She's grown up so much and changed so fast in these past few months.  Her vocabulary has exploded and she's becoming a little parrot.


Although it took her a while to start saying a lot of the words she knew, one that she's had down for a long long time is "Elmo".  The red furry monster is definitely a favorite for her.  Although Sesame Street is now vying for the top TV request with "the Mouse" I think it's safe to say Elmo will be a favorite for a while.  When it came time to think about a theme for Aubrey's second birthday, there was no question that Elmo and friends would be perfect.


I started with an invitation that my sister, Nikki of Doodle Dog Advertising designed for me.  From there Pinterest and Party City helped me out with a few ideas.  My friend Sarah of Sarah's Shirts made Aubrey's adorable Elmo shirt.  I just love how it turned out and it's one of her favorites in her closet.

Elmo invitations from Doodle Dog Advertising

Aubrey was in awe when she came downstairs the morning of the party to see that Elmo was everywhere.  We had hung a great big mural of Sesame Street characters on the wall and Aubrey loved them.  I made Elmo and Cookie Monster cookies that she loved, all we heard was "cookie pleeeeease mama."  I haven't worked with fondant in a long time and need to practice a bit more, I ran out of time towards the end on the cake but I think it turned out pretty cute although I would have done a few things differently next time.  The fruit and vegetable trays were one of my favorite ideas I found on Pinterest, they turned out so cute!  We made thank you bags for the kiddos... I just picked up some small red paper bags and filled them with some Sesame Street bubbles, a character medal, some Elmo tattoos, a Memory game, and some candy.  I printed out thank you labels on the Sesame Street sign and folded them over the tops of the bags to close them.

Elmo and Cookie Monster Cookies
Sugar cookie recipes can be found here - I used royal icing to decorate these in layers.  I drew the eyeballs on with an edible marker.  Although they take a bit of time, I love decorating cookies with royal icing.

Sesame Street Cake

I baked this cake, it's one of my favorites as it's a very traditional yellow cake recipe.  I think it's perfect for a kid's party, nothing fancy but it's delicious and it stays so moist.  I brush the layers with a simple syrup before frosting to lock in moisture and use vanilla bean paste instead of extract to add even more flavor.  I filled it with a simple vanilla buttercream and used the same to crumb coat and frost the outside before covering it with fondant.  The fondant is homemade marshmallow fondant, see this post for the recipe and tips.  While it's a little more work, it tastes so much better than the storebought kind.


Oscar and Elmo vegetable and fruit platters
 Oscar is made crispy kale chips, black olives for a mouth, carrots for a nose, and sliced portabello mushrooms for eyebrows.  Some garlic hummus in small plastic cups make up his eyes.  Elmo's face is made up of sliced strawberries.  Sliced purple grapes make his wide mouth and peeled orange slices are his nose.  His eyes are cups filled with marshmallow cream cheese fruit dip.

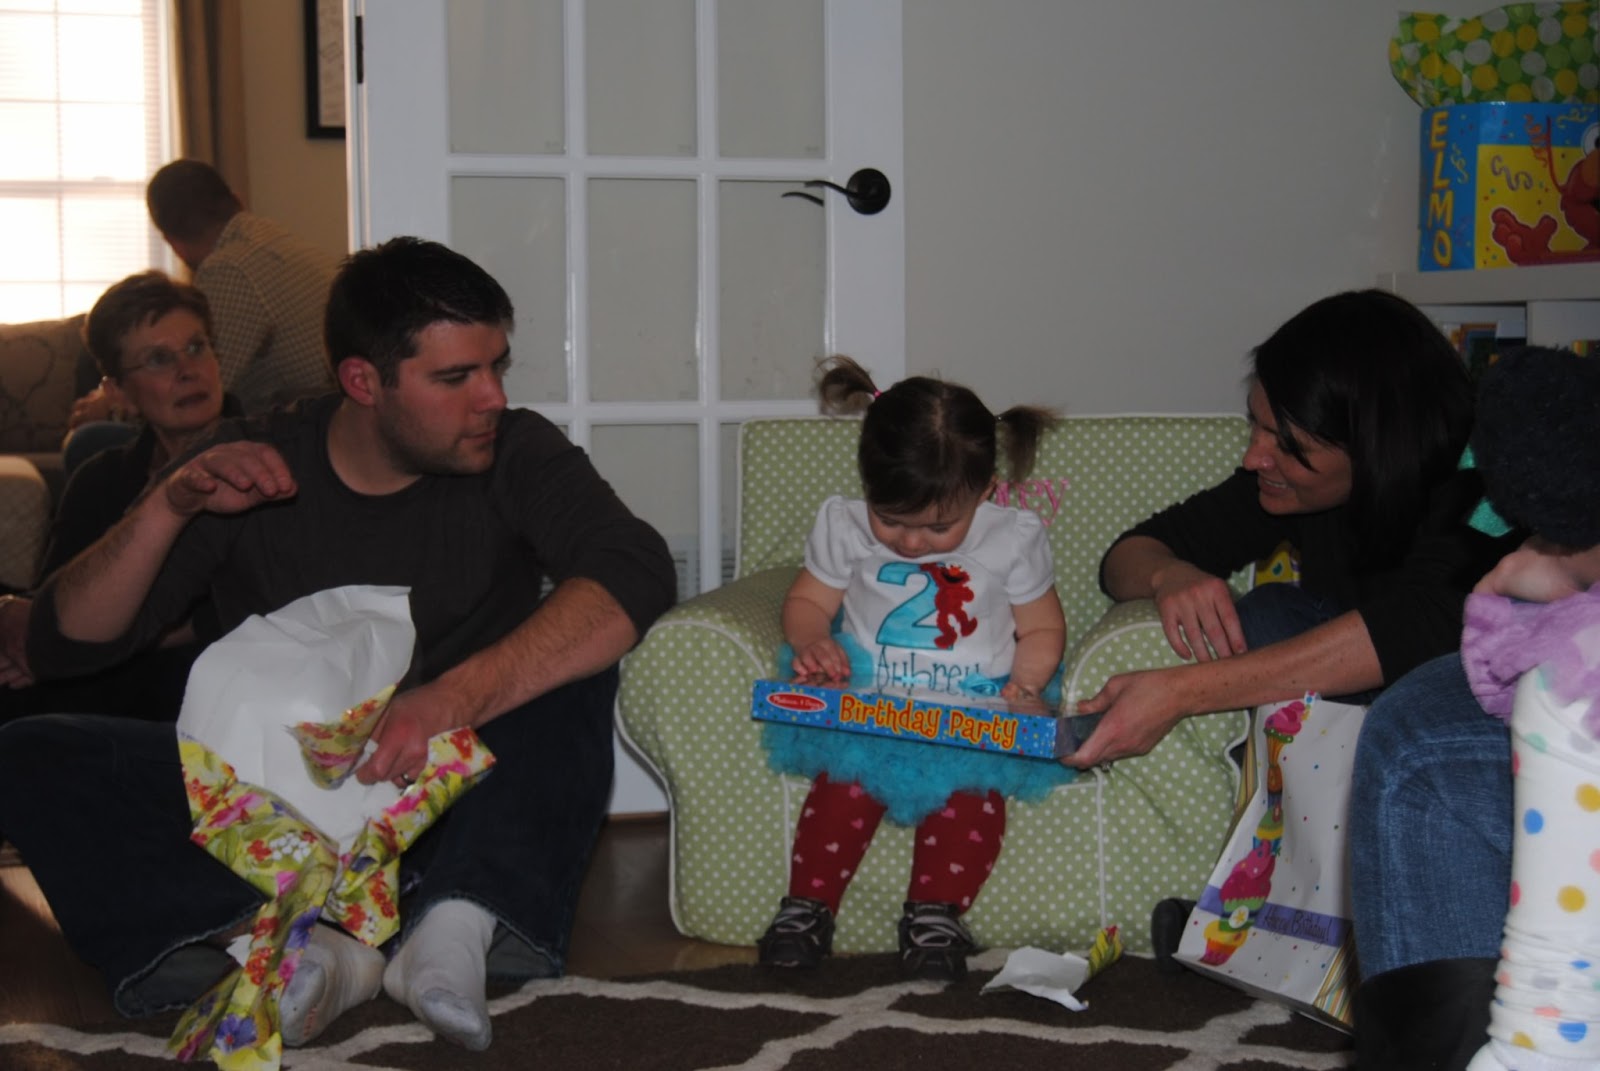
Opening presents - she had so much fun with it this year!

Pin the Nose on Elmo - stickers are lots of fun for Aubrey and her best buddy Hannah


Aubrey and Madeleine loved the huge "scene setter" I picked up from Party City.  It's actually about 5' by 5' or something huge so it was fun for the girls to see the great big characters in their living room.  Definitely worth the $6 price tag at Party City - I can't believe how nice this was for the cheap price tag.

We had so much fun celebrating with so many friends and family members.  Thank you so much to all of you who came to celebrate my baby girl turning two!

Happy birthday Aubrey!  I can't believe how much you have grown and changed over the past two years.  You continue to amaze me every day with how much goes through your curious little mind.  You are constantly learning and sharing new things.  While these past two years have flown by, it also seems like you've been a part of my life forever.  I love you little girl!

Monday, March 4, 2013

Cinnamon Roll Pancakes

 
I've only recently started to really appreciate breakfast, I think mostly because it's more fun when your two year old requests "pan-caks" every weekend.  While she gets her share of the Bisquick variety, every once in a while I decide to make some that are a little fancier than the standard.  Making pancakes from scratch really isn't any harder than the box mix, but I'll admit these have a few more steps.  But they are certainly fun for special occasions.  And they are definitely delicious.  I would go so far as to say they might be a tie for the best pancakes I've ever had.

A couple of tips you should read before you begin:
  • Make the cinnamon swirl mixture and the frosting before you start cooking, it will go fast once you put the batter on the griddle.  Plus, letting the mixture sit for a few minutes while you make the batter allows it to thicken slightly which will make it easier to work with.
  • Keep your pan on medium-low to medium, they might take an extra minute to cook but you don't want them to burn.
  • Make the cinnamon swirl mixture a bit on the thick side, like thick maple syrup.  A squeeze bottle works perfectly for this, but you can use a ziploc if you don't have one.
  • Wait until you see bubbles all around the edges of pancakes, then add the swirl.
  • When you swirl the cinnamon mixture, don't get too close to the edge or it will bubble out of the pancake.
  • Don't skip the glaze, it really delivers the cinnamon roll flavor.
  • Extra pancakes are perfect to pop in the freezer - put them in a freezer ziploc and then just pop in the toaster to reheat.


Cinnamon Roll Pancakes
Recipe slightly adapted from RecipeGirl

Cinnamon Swirl:
6 T unsalted butter, melted
1/2 cup brown sugar, packed
1 tsp cinnamon

Cream Cheese Glaze:
4 T unsalted butter, room temperature
3 ounces cream cheese, room temperature
3/4 - 1 cup powdered sugar
1/2 tsp vanilla extract
1 T milk

Pancakes:
2 cups all purpose flour
4 tsp baking powder
1 tsp salt
2 cups milk (I've used either skim or 2% without issues)
2 large eggs
2 T canola oil

Start by mixing the melted butter, brown sugar and cinnamon in a small bowl and whisk until smooth.  Transfer to a squeeze bottle or ziploc baggie and set aside to thicken.

Next make the glaze, beat together softened butter and cream cheese until smooth.  Add 3/4 cup powdered sugar, vanilla extract and milk and beat until light and creamy.  Add additional powdered sugar if the mixture is too thin.  Set aside until ready to serve.

Heat a large nonstick griddle over medium-low to medium heat. Add a little butter or oil to the pan and pour out approximately 1/4 - 1/3 cup pancake mix, giving them plenty of room to spread a bit so it's easier to flip.  Once bubbles begin to form around the tops of the pancakes, add a thick swirl of the cinnamon mixture.  Once the bubbles begin to pop, quickly flip each pancake.  Cook until golden brown.  It should take about 2-3 minutes per side to cook.  Stack and top with cream cheese glaze and serve.  This recipe should yield approximately 16 4-inch pancakes.  

Thursday, January 3, 2013

Eggnog Crumb Cake


Have some leftover eggnog from Christmas in your fridge?  Forget about spiked drinks, make this cake.  You didn't really want to start that January diet yet anyway.  And you can't just throw it away, it's eggnog.  Despite a few individual pieces, this cake comes together very quickly and easily.  Don't skip the crumb topping - it gives it that NY-style coffee cake topping.  I don't know about you, but I always fight for piece of coffee cake with the most crumb topping, it's my favorite part.  The spiced rum glaze adds a bit of adult sophistication to this cake to take it to the next level.  But if you are serving it to little ones, you can leave out the rum or substitute rum extract (at least I hear this is a viable option but not one I've tried myself).


This will make 2 regular loaf cakes or 4 mini cakes if you have the small loaf pans.  I made two pans, one to take to a Christmas party with my in-laws and one for our wonderful neighbors across the street.  You may have noticed the much improved pictures of this cake -- well my wonderful neighbor happens to be pretty good with her camera and sent me these fantastic shots.  She does family pictures as well as promotional/product photography - check her out at Willow Tree Photography or visit her Facebook page.  I'm going to have to figure out how to work my camera one of these days so I can step up my game on my own pictures.

Enjoy!


Eggnog Crumb Cake with Spiced Rum Glaze
Recipe adapted from Culinary Concoctions by Peabody

Cake:
1/2 cup unsalted butter, at room temperature
1 cup sugar
2 large eggs
2/3 cup Greek yogurt (I used vanilla because it's what I had but you could also use plain)
1 1/3 cups eggnog
1 tsp vanilla extract
1/2 tsp ground nutmeg
1/2 tsp ground cinnamon
2 1/2 cups cake flour
2 tsp baking powder
1/2 tsp baking soda
1/4 tsp salt

Crumb Topping:
1/3 cup sugar
1/3 cup brown sugar, firmly packed
1/4 tsp salt
3/4 tsp cinnamon
1 3/4 cups cake flour
1/2 cup unsalted butter, melted

Glaze:
2 T eggnog
2 T spiced rum
2 T unsalted butter, melted
1 - 1 1/4 cups powdered sugar

For the cake, preheat oven to 325 degrees and spray 2 regular loaf pans or 4 mini loaf pans with baking spray or butter and flour.

In a large mixing bowl or stand mixer, combine butter and sugar and beat until light and fluffy, about 3 minutes on medium speed.  Add eggs, one at a time, mixing until incorporated and then mix in yogurt. In a measuring cup, combine eggnog and vanilla extract.  In another bowl, combine nutmeg, cinnamon, cake flour, baking powder, baking soda, and salt and whisk or sift to mix.  Alternate additions of 1/3 of the flour mixture with 1/2 of the eggnog mixture, mixing until each addition is just incorporated, beginning and ending with the flour mixture.

Divide batter evenly among pans and set aside while you prepare the crumb topping.

For the topping, combine sugar, brown sugar, salt, cinnamon, and cake flour in a mixing bowl.  Pour in melted butter and stir with a fork, pastry cutter, or your hands until the mixture forms a crumbly topping.  Evenly spread over prepared cake batter.

Baking will take 30-35 minutes for 4 mini loaves and about 40-45 minutes for 2 regular loaves, the cake is done when a wooden skewer inserted in the center comes out clean.  If necessary cover with foil if the topping starts to brown before the cake is set.

Once cakes are removed from the oven, allow to cool fully before topping with the glaze.  To make the glaze, whisk together eggnog, rum, and butter in a bowl.  Slowly add powdered sugar, whisking until smooth.  The glaze should be about the consistency of maple syrup when you pour it over the cakes.

Monday, December 24, 2012

Carrot Cake Pancakes for Christmas Morning

To begin with, Merry Christmas!!! I can't even believe that it's Christmas already, how did that happen, shouldn't it still be September or so?  This year has absolutely flown by.  But it's Christmas, which is one of my favorite times of the year.  We are home with my parents in Iowa right now and since the house is full of family, we've been having some fancier than normal breakfasts.

Photos by Dede Holman Photography

If you are in the mood to do the same for a special occasion, I totally recommend these pancakes.  Oh-my-god-good.  So delicious.  The pancakes have a super moist carrot cake flavor and don't skip the cream cheese anglaise, it takes them to a whole new level.  It's not overly sweet like a frosting but it's rich and creamy and a perfect addition.

Excuse the Instagram Pic... no one wanted to wait for pictures

I hope you and your family have a wonderful Christmas and a great New Year!

Carrot Cake Pancakes
Adapted from Southern Living

1 3/4 cups flour
1 1/2 tsp baking powder
1 tsp baking soda
1 1/2 tsp cinnamon
1 tsp salt
2 cups buttermilk
1/3 cup firmly packed brown sugar
1/4 cup unsalted butter, melted
2 large eggs
2 tsp vanilla extract
2 cups finely grated carrots

Heat a nonstick griddle or skillet over medium heat and add a little oil or nonstick spray.

Stir together flour, baking powder, baking soda, cinnamon, and salt in a large bowl.  Separately combine buttermilk, sugar, butter, eggs, and vanilla.  Stir wet ingredients into dry until just combined.  Don't over mix, batter should be lumpy.  Fold in carrots.  (You can also add golden raisins at this point or chopped pecans if you would like, I left out both but the original recipe included 1/2 cup of each.)

Pour approximately 1/4 cup of batter into rounds on skillet and cook until bubbles appear all around the pancake, then flip and cook until golden brown. 

Cream Cheese Anglaise

1 1/2 cups milk (I used 2%)
4 oz cream cheese, softened (I used 1/3 less fat)
1/3 cup sugar
3 egg yolks
1 tablespoon cornstarch
1/8 tsp salt
2 tablespoons butter
1 tsp vanilla extract

Combine milk, cream cheese, sugar, egg yolks, and cornstarch in a blender or a large bowl and use an immersion blender to process until smooth.  Heat mixture in a saucepan over medium heat and bring to a boil, whisking regularly.  Boil for approximately one minute, whisking constantly, mixture should thicken.  Remove from heat and add butter and vanilla and whisk to combine.  Pour over pancakes to serve.

Monday, November 19, 2012

Fresh Cranberry Cake


What's on your Thanksgiving menu this year?  I may have to go buy more cranberries so this cranberry cake can be a late addition to mine.  For the most part, I'm sticking with classic recipes this year but adding in a few new items as well.


Mashed Potatoes
Sweet Potato Casserole - I'm doing a cross between this recipe and a copycat Ruth's Chris Steakhouse version
Dressing with apples and cranberries


Cranberry Sauce

Classic Pumpkin Pie


If you haven't nailed down your desserts yet, I've got a new one for you to try.  This takes about 20 minutes of prep time, but with a stand mixer about half of that time is just running the mixer.  It's so simple and likely the only thing you don't already have in the pantry are fresh cranberries.  Take advantage of the cheap fresh berries in every grocery store and make this cake while they are in season.  The tart cranberries are perfect with the sweetness of the cake and the light glaze.  Served with a scoop of vanilla ice cream, this is a great finish to Thanksgiving dinner.


Fresh Cranberry Cake

Cake:
2 cups sugar
3 eggs
3/4 cup unsalted butter, slightly softened
1 1/2 tsp vanilla extract
1/2 tsp almond extract
1 T orange zest
2 cups flour
1 tsp cinnamon
2 1/2 cups cranberries

Glaze:
1 cup powdered sugar
2-3 T milk
1/2 tsp vanilla extract

Preheat oven to 350 degrees.  Spray a 10" springform pan or 9"x13" baking pan with baking spray and set aside.

Combine sugar and eggs in the bowl of a stand mixer or a large mixing bowl.  Mix 6-8 minutes on medium speed until pale yellow and doubled in volume.  Add in butter and extracts and zest and mix two more minutes.  Add flour and cinnamon and stir until combined.  Fold in cranberries.  Transfer batter to prepared pan.  If you are baking in a springform pan, put the pan on a cookie sheet and put in the oven.  Bake approximately one hour (about 45 minutes in a 9"x13" pan).  Cool completely and remove ring from pan.

Put powdered sugar in a small bowl, add milk one tablespoon at a time, whisking until smooth.  Add vanilla and drizzle over cake.

Sunday, December 25, 2011

Merry Christmas


Merry Christmas from my family to yours...

Thanks for reading, I'll be back soon with some new recipes. 

Wednesday, March 16, 2011

A Little Leprechaun's Pot of Gold Cake


So having a new baby has been an excuse to celebrate all the little holidays, "it's her first..." has commonly been my rationale.  So making a St. Patrick's Day cake - for a 1 month old baby who can't eat it - didn't seem at all over the top in my mind.  Especially when I had a great idea for a cake to try.  Now if only I could celebrate with things like baby carrots and salad maybe I would be more prepared for Aubrey's first trip to the beach but we'll get there -- and let's be honest, cake is way more fun than carrots and salad. 
  

This cake was a spin off of this cookies and cream cake I made for my husband last year for his birthday.  I tried these Golden Oreos at my in-laws house a couple of months ago and thought they were delicious.  When I saw the spring Oreos in the store the other day, I thought they were cute with the green filling but my mind went back to these.  


This yellow cake recipe isnt the usual one I use, simply because I wanted something quick and this one didn't require beating the egg whites and folding them in separately and also used buttermilk and all purpose flour rather than cake flour.  The result - a quick easy yellow cake recipe, it works great in this instance because its not too soft to hold up to the filling.  


Pot of Gold Cake

Cake:
Recipe from The Modern Baker
3/4 cup unsalted butter, softened
1 cup sugar
2 tsp vanilla extract
3 large eggs
1/3 cup buttermilk
1 3/4 cup all purpose flour
2 tsp baking powder
1/2 tsp salt

Preheat oven to 350 degrees and spray two 8" cake pans with baking spray or butter and flour and line with parchment paper and spray paper. 

Cream together butter and sugar in a mixing bowl on medium speed about 2-3 minutes until light and fluffy.  Add vanilla and eggs, one at a time, mixing about 1 minute after each addition until well incorporated.  Add half of the flour, half of the baking powder and the salt.  Mix on low speed until just incorporated.  Add buttermilk and mix until incorporated and add remaining flour and baking powder.  Increase the speed to medium and beat an additional 2 minutes. 

Divide batter evenly between pans and bake about 25 minutes until golden brown and a toothpick inserted in the center comes out clean.  Cool about 5 minutes in the pan and then turn out on wire racks, flip them over so they are top side up.  Cool completely then slice each cake layer in half horizontally to make 4 thin layers and assemble.

Golden Oreo Cream Filling
2 cups heavy cream
1 tsp vanilla extract
1/2 package Golden Oreo cookies, crushed

Process cookies in a food processer until they are fine crumbs.  Add heavy cream to a cold mixing bowl (putting the bowl in the freezer for a few minutes prior to mixing will speed up the process) fitted with the whisk attachment and beat 2-3 minutes until cream forms stiff peaks.  Add vanilla extract and blend until mixed.  Gently fold in crushed cookies.  Add 1/3 of the cream mixture in between each layer of cake.

Frosting:
1/2 cup unsalted butter
1 tsp vanilla extract
3-4 T heavy cream
3 cups powdered sugar

Cream butter on medium speed until light and fluffy, about 2-3 minutes.  Add vanilla and cream and mix until well incorporated.  Add powdered sugar, one cup at a time, mixing on low speed until frosting reaches desired thickness.  Increase speed to medium and whip about 1 minute until smooth.  Tint with gel food coloring as desired and frost cake.  Cover and refrigerate cake if not serving within a couple of hours.

Thursday, December 23, 2010

Spiced Brown Sugar Christmas Cookies

I had to make another batch of Christmas cookies, and since it was my 4th batch of sugar cookies in as many weeks, I decided to go for something a little different this time around.  For the dough, I made a spiced brown sugar cookie dough.  They turned out to be sort of a cross between a gingerbread cookie and a sugar cookie.   They are prepared the same way as traditional roll and cut cookies, making them convenient to do in parts.  You can (and should by at least an hour or two) make the dough ahead of time and refrigerate.  Then when you are ready to bake them, roll out the dough, cut and bake.  This dough is a little bit more particular than my normal sugar cookie dough.  I had to let it sit on the counter about ten minutes before I was able to roll it out.  But don't let it sit out too long, if it becomes too warm, the dough will be sticky. 


For icing, I used royal icing again, you can find the recipe here.  If you are going to color your royal icing, I recommend using gel food colorings.  I especially like the Americolor brand if you can find them; they come in convenient squeeze bottles which is more convenient than the Wilton jars.  Around here, I can find Wilton at several different places but can only get the Americolor at Hobby Lobby or online.  If you try to use the normal liquid food colorings, it will change the consistency of your icing or you wont be able to add enough to get saturated colors.  If you are having trouble finding meringue powder, check out a craft store like Michaels or Hobby Lobby - again, I can only find the Wilton brand.  You may also be able to find it at large grocery stores, sometimes in the baking aisle and sometimes it's in a craft section if you are at a store like Walmart or Meijer. 


This is my first attempt at marbling with royal icing so I'll tell you what I did and recommend that you google a tutorial -- Bridget from Bake at 350 has tips and so does Marian of Sweetopia.  To do the peppermint candies, I outlined and flooded my cookies like normal, doing about a dozen cookies at a time.  I then used the red outline consistency icing in a piping bag with a Wilton tip #3 to pipe a swirl onto the center of the candy.  I gently tapped the cookies to let the swirl settle into the flood icing.  Then used a toothpick to drag through the swirl to create the marble effect. 


Spiced Brown Sugar Cookies
Recipe slightly adapted from Bake at 350

3 cups all purpose flour, plus extra for rolling
2 tsp baking powder
1/2 tsp cinnamon
1/4 tsp ginger
1/4 tsp nutmeg
1/8 tsp. allspice
1/2 tsp salt
1/2 cup sugar
1/2 cup light brown sugar, firmly packed
1 cup unsalted butter, at room temperature
1 large egg
1 1/2  tsp vanilla extract

Combine flour, baking powder, and spices in a large bowl and whisk to combine.  In a mixing bowl, cream sugar, brown sugar and butter on medium speed until light and fluffy, about three minutes.  Add egg and vanilla and beat until well incorporated.  Slowly add flour mixture, mixing on low speed.  The dough will be very stiff.  Lay out a large sheet of plastic wrap and turn dough out on to plastic.  Form into a disk and wrap tightly.  Chill approximately one hour. 

Remove dough from refrigerator and let stand five to ten minutes at room temperature.  Preheat oven to 350 degrees.  Line baking sheets with parchment paper or Silpats.  Generously flour work area and rolling pin.  Roll dough to about 1/4" thick and cut into desired shapes.  Transfer to prepared pans and bake about 9-12 minutes.  Cookies shouldn't really brown but will firm up.  Remove from the oven, let stand about one minute on the baking sheet and then transfer to a wire rack to cool completely.  When completely cool, frost as desired.

See other examples here:
Thanksgiving cookies
Christmas Cookies
Gingerbread Snowflakes 
More Christmas Cookies

Wednesday, December 22, 2010

Rasberry Pochettes

These are a simple little treat with an indulgent cream cheese crust filled with jam.  You can use whatever flavor you have on hand, I thought the raspberry would be pretty and it's one of my favorite flavors of jam.  That and my husband won't use it for peanut butter and jelly sandwiches so we weren't out of it when I went to make these.  Use jelly or preserves for these, it doesn't matter.  I prefer preserves so that's what I used here.


I used a flower cookie cutter to cut these out because I liked the rounded edges and added decoration.  You can use any shape you like or a simple 3" round cookie cutter.  One thing to note, with the flower cookie cutter, you'll have more leakage because the edges won't line up quite as perfectly as a round cut-out would.  I recommend baking these on parchment paper so you don't end up with a sticky mess of burnt jelly to clean up when you are done. 


Raspberry Pochettes
Recipe adapted from Melissa D'Arabian via Food Network

1 cup unsalted butter, at room temperature
8 oz cream cheese, at room temperature
2 cups all purpose flour
1/4 tsp salt
Approximately 1/2 cup raspberry jam
1 egg white
Sanding sugar

Combine butter and cream cheese in a mixing bowl and beat until light and fluffy, about three minutes.  Slowly add the flour and salt, beating on low speed until just combined.  Lay out a large sheet of plastic wrap and turn the dough out onto the plastic.  Form into a disk, wrap tightly and refrigerate at least one hour. 

Preheat the oven to 375 degrees.  Line a large baking sheet with parchment paper.  Generously flour your work surface and a rolling pin.  Roll out the dough to about 1/8" thick.  Cut out rounds or shapes as desired.  Add about a half a teaspoon of jam to one side of each cookie.  Brush the edges lightly with water.  Fold the dough over and press to seal.  Crimp the edges with a fork.  Re-roll scraps and continue with remaining dough. 

Beat egg white with approximately one tablespoon of water, brush over cookies and sprinkle cookies with sanding sugar.  Bake until golden, about 18 - 20 minutes.  Transfer to a wire rack to cool completely and serve. 

Tuesday, December 21, 2010

Peanut Butter Fudge


If candy-making intimidates you, this is the perfect recipe for you to try.  You don't even need your stove, no thermometers are involved, you barely need a pan.  This fudge can be made completely in the microwave and only takes about five minutes.  It's a perfect recipe to round out your holiday baking when you are short on time. 

Peanut Butter Fudge
Recipe via Erin's Food Files from Alton Brown

1 cup of butter
1 cup peanut butter
1 tsp vanilla extract
1 lb powdered sugar

Prepare a pan by covering it in wax paper and spraying with nonstick cooking spray, leaving at least one inch overhang of wax paper around all edges.  You can use an 8x11" baking sheet with a one inch rim or an 8x8" square pan if you want thicker fudge. 

In a microwave safe bowl, combine butter and peanut butter.  Microwave on high two minutes, stir and microwave two additional minutes.  Stir in vanilla and powdered sugar.  Mix with a wooden spoon until well combined and smooth.  Pour into prepared pan, smooth, and cover with another sheet of wax paper pressed directly against the surface of the fudge.  Refrigerate at least two hours and cut into one inch squares.

Monday, December 20, 2010

Rocky Road Fudge


Fudge is a classic Christmas dessert but not one I have a ton of experience with.  I've made a couple of different types in the past and found it to be much easier than I expected and this recipe ended up being very easy as well.  The most time consuming part is chopping up the chocolate.  

If you haven't finished your Christmas baking yet, here are some other candy recipes you may be interested in.


And check back tomorrow for Peanut Butter Fudge!

Rocky Road Fudge
Recipe slightly adapted from Dinner and Dessert

18 oz semi-sweet chocolate, roughly chopped
1/2 tsp baking soda
1/8 tsp salt
14 oz (1 can) sweetened, condensed milk
1 T vanilla extract
1 cup mini marshmallows
1 cup salted peanuts, roughly chopped
1/2 cup semi-sweet chocolate chips

Line an 8x11 inch baking sheet with aluminum foil leaving at least 1" overlap on all sides.  You want to use a baking sheet that has at least a 1" high rim.  Spray foil with nonstick spray.

Set up a double boiler with a couple inches of water over medium heat.  In a heat proof boil or double boiler, toss chopped chocolate with baking soda and salt until well distributed.  Stir in sweetened condensed milk and vanilla.  Set bowl over simmering water, making sure that bowl doesnt touch the water.  Stir continuously with a rubber spatula until chocolate is almost fully melted.  It will likely take about 2-4 minutes to melt, remove bowl from heat when there are just a few remaining pieces and stir until smooth. 

Stir in marshmallows, peanuts, and chocolate chips.  Mixture will be quite thick.  Quickly transfer mixture to prepared pan and smooth into an even layer.  Refrigerate until set, at least two hours.  Use foil overhang to remove fudge from pan, peel off foil and chop into approximately 1" square pieces. 

Thursday, December 16, 2010

Sugar Cookies for Christmas

Frosted sugar cookies are a staple on almost everyone's Christmas baking list.  I've made them lots of different ways over the years but my favorite recipe is this one.  These cookies bake up without changing shape so its easy to see the details from the cookie cutter.  They stay fresh for quite a while and don't turn rock hard as long as you keep them in an airtight container.  The almond and vanilla extracts give them great flavor without being too sweet. 


Royal icing is necessary if you want cookies that you can decorate in layers and it dries hard so you can stack the finished cookies without ruining them.  Royal icing requires a little practice but it's pretty quick and easy once you get the hang of it.  The recipe below will give you the right consistency to outline your cookies.  I generally use a piping bag and a Wilton tip #2 or #3 to outline my cookies.


Once you've outlined the cookies, thin the icing by adding a little bit of water (a teaspoon or less) at a time until it reaches the consistency of a thick syrup.  In my opinion, the easiest way to fill in the cookies is to fill a squeeze bottle with the thinned icing and flood the cookies, using a toothpick to pop any air bubbles and spread icing out to the outline.  You'll want to let the outlines dry for about an hour minimum before you fill them in.  Then let the thinned icing dry overnight before stacking the cookies and packaging.

Sugar Cookies
Recipe slightly adapted from Annie's Eats

1 cup butter, at room temperature
1 cup powdered sugar
1 egg
1 tsp almond extract
1 1/2 tsp vanilla extract
1 tsp salt
2 1/2 cups all purpose flour, plus more for rolling out cookies

Cream butter in a large mixing bowl on medium high speed, about two minutes.  Add powdered sugar and beat until well incorporated. Add in egg, almond and vanilla extracts, and salt and mix until well incorporated.  Add in flour and beat on low speed just until mixed.  Transfer dough to a large sheet of plastic wrap, form into a disc and wrap well.  Refrigerate dough for at least one hour. 

Preheat oven to 350 degrees.  Line cookie sheets with parchment paper or silpats.  Flour counter to roll out cookies.  Also flour rolling pin.  Roll to approximately 1/4" thick and cut with cookie cutters as desired. Transfer cookies to prepared pans and bake about 8 - 10 minutes.  Cookies should not brown.  Gather scraps and re-roll.  If dough becomes sticky, return to refrigerator briefly before rolling.  Recipe yields about 4 dozen cookies depending on size of cookie cutters. 

Royal Icing
Recipe from Bake at 350

4 T meringue powder
Scant 1/2 cup water
1 lb powdered sugar, sifted
1 tsp corn syrup
1/4 tsp almond extract

Combine water and meringue powder in mixing bowl.  You can make royal icing without a stand mixer but its a lot easier with one, your arm will get tired with a hand mixer!  Beat until slightly foamy.  Add powdered sugar, corn syrup and extract, beat on low speed until combined.  Increase speed to medium high and beat about five minutes until stiff peaks form and icing is glossy.  Divide icing into small containers to color.  Add gel coloring as desired and press a piece of plastic wrap directly against the surface of the icing and cover with a lid. 

To do the shimmery snowflakes, I added sanding sugar over the thinned icing after letting the cookies stand about five minutes.  For the Christmas trees, I let the flood icing dry completely before piping on the swirl lines with the original outline icing.  If you leave the outline icing in the piping bag, make sure you cover it with a damp towel to keep it from drying out.

This recipe should be enough for the above cookie recipe unless you need to use lots of colors/layers of icing. 

See other examples here:
Thanksgiving cookies
Christmas Cookies
Gingerbread Snowflakes

Related Posts with Thumbnails