Pin It button on image hover

Wednesday, October 12, 2011

Beer Cheese Macaroni

As I've mentioned a time or two in the past, macaroni and cheese is definitely up there on my list of favorite foods.  In my mind, it's pretty much the perfect comfort food.  While I definitely have a favorite traditional mac and cheese recipe, I also like to experiment with variations.  Check out these other macaroni recipes I've posted previously - Spicy Crab Macaroni and Cheese, Baked Mac and Cheese, Stovetop Mac and Cheese, and this chicken version - White Cheddar Chicken Pasta.


Well when I saw this beer cheese soup turned mac and cheese recipe on Pinterest, I couldn't pass it up.  I figured it would be perfect for our tailgating party for the upcoming game.  Let me tell you, don't wait to make this one.  This is some fantastic pasta.  The beer combines perfectly with the smoked and sharp cheddar cheeses and whole wheat pasta.  I used a Sam Adams Oktoberfest beer but any decent beer should work, I think I would avoid the light beers for this recipe, as you want something with a bit more flavor.


Feel free to adjust the cheeses but I think the blend of 1/3 smoked cheddar, 1/3 sharp white cheddar, and 1/3 mild cheddar, along with a little American cheese gives great flavor.  I added the American cheese slices because I like the creaminess that it adds.  I just used slices from the deli but you could shred it as well.  The recipe that I used baked the mac and cheese but I opted not too for this one since it was so creamy straight from the stovetop.  If you want to bake it, I recommend adding a bread crumb topping.

Beer Cheese Macaroni and Cheese
Adapted from HowSweetEats

12 oz uncooked whole wheat elbow or shell pasta
2 T unsalted butter
2 T flour
1 cup milk
1 cup beer
4 oz smoked cheddar cheese, grated
4 oz sharp white cheddar cheese, grated
4 oz mild cheddar cheese, grated
6 slices American cheese
1/4 tsp smoked paprika
1/4 tsp mustard powder
1/4 tsp dried thyme
salt and pepper, to taste
10 basil leaves

Heat a large pot of water to boiling, add a liberal amount of salt when boiling and add pasta.  Cook to just al dente, according to package directions.  Drain and return to pan or crock pot if you want to keep it hot for a while (you don't want to cook it in the crock pot but it can stay on low for a short while, if you plan to leave it in the crock pot for an extended time, you'll want to cook your pasta just shy of al dente so it doesn't turn mushy.)

Meanwhile, melt butter in a saucepan over medium heat.  Add flour and whisk to make a roux.  Continue whisking until the roux start to turn golden and bubbles, about two minutes.  Add milk and beer, stirring constantly.  Cook for about five minutes until the mixture begins to thicken slightly.  Reduce heat to low and add cheeses by the handful, stirring to melt and incorporate.  The sauce will thicken slightly but will not be as thick as regular mac and cheese at this point.  Add paprika, mustard, thyme, and salt and pepper to taste.  Pour sauce over pasta and stir to distribute.  Chiffonade basil leaves by stacking and rolling tightly, then use a sharp knife to cut thin slices to form ribbons.  Stir basil into pasta and serve. 

Friday, September 23, 2011

Buffalo Chicken Burgers

It's football season!  Finally, it's time for Saturday's spent at the stadium, tailgating, cooler weather, sweatshirts... the list goes on and on, I love fall.  While summer is full of fresh fruits and vegetables, sunshine, and pool time, it also requires (at least in my world) air conditioning and bug spray.  While summer is great while it lasts, by August I'm always impatiently waiting for fall to make an appearance.


To kick off the home football season this year (sort of, technically I missed the first game - college football shouldn't happen on Thursday nights) I brought buffalo chicken burgers to our tailgate.  These burgers were pretty tasty - so much so in fact that I made them again just a couple nights later.  Full disclosure - the speediness was partially so I could take the picture that I forgot to take in the parking lot but it was also at the request of my husband.  For tailgating, I made these as sliders (aka mini burgers) but at home I made them full size.  Take your pick, although I prefer the sliders, just because they are more fun in my opinion.

In my mind there are two choices for condiments when it comes to buffalo chicken, ranch or blue cheese.  If you side with me on this one, top your burgers with a dollop of ranch dressing and a slice of cheddar cheese.  If you disagree, top them with some blue cheese crumbles and blue cheese dressing.

Buffalo Chicken Burgers

Burgers:
1 lb ground chicken
3-4 green onions, diced
1/4 cup Frank's Red Hot sauce (plus more for serving)
1 egg
2 cloves garlic, minced
1-2 slices day old bread or 1/4 cup breadcrumbs
1/2 tsp celery salt
1/2 tsp dried thyme
1/2 tsp freshly ground black pepper

To serve:
Ranch and/or blue cheese salad dressing
Frank's Red Hot sauce
Cheddar cheese slices or crumbled blue cheese
Pickles
8 small rolls or 4 hamburger buns

Prepare grill to medium heat or preheat a cast iron skillet if cooking indoors.  If you are using day old bread, quickly tear into chunks and pulse in a food processor to make crumbs.  In a large bowl, add all of the burger ingredients and gently mix until just incorporated.  (Don't skip the egg and breadcrumbs, they will really help the patties stay together.)  Form into four patties for full size burgers or eight small patties for sliders.  Make each patty slider larger than the bun and slightly thinner in the center (this is more important for full size burgers.)  Cook finished patties about five - seven (three to four for sliders) minutes per side (you want these cooked all the way through since it's poultry and not beef but don't overcook them or they will be dry), flip once and cook through.  Just before the finished, top with cheddar slices if desired.  Serve on hamburger buns topped with condiments of your choice.

Monday, August 15, 2011

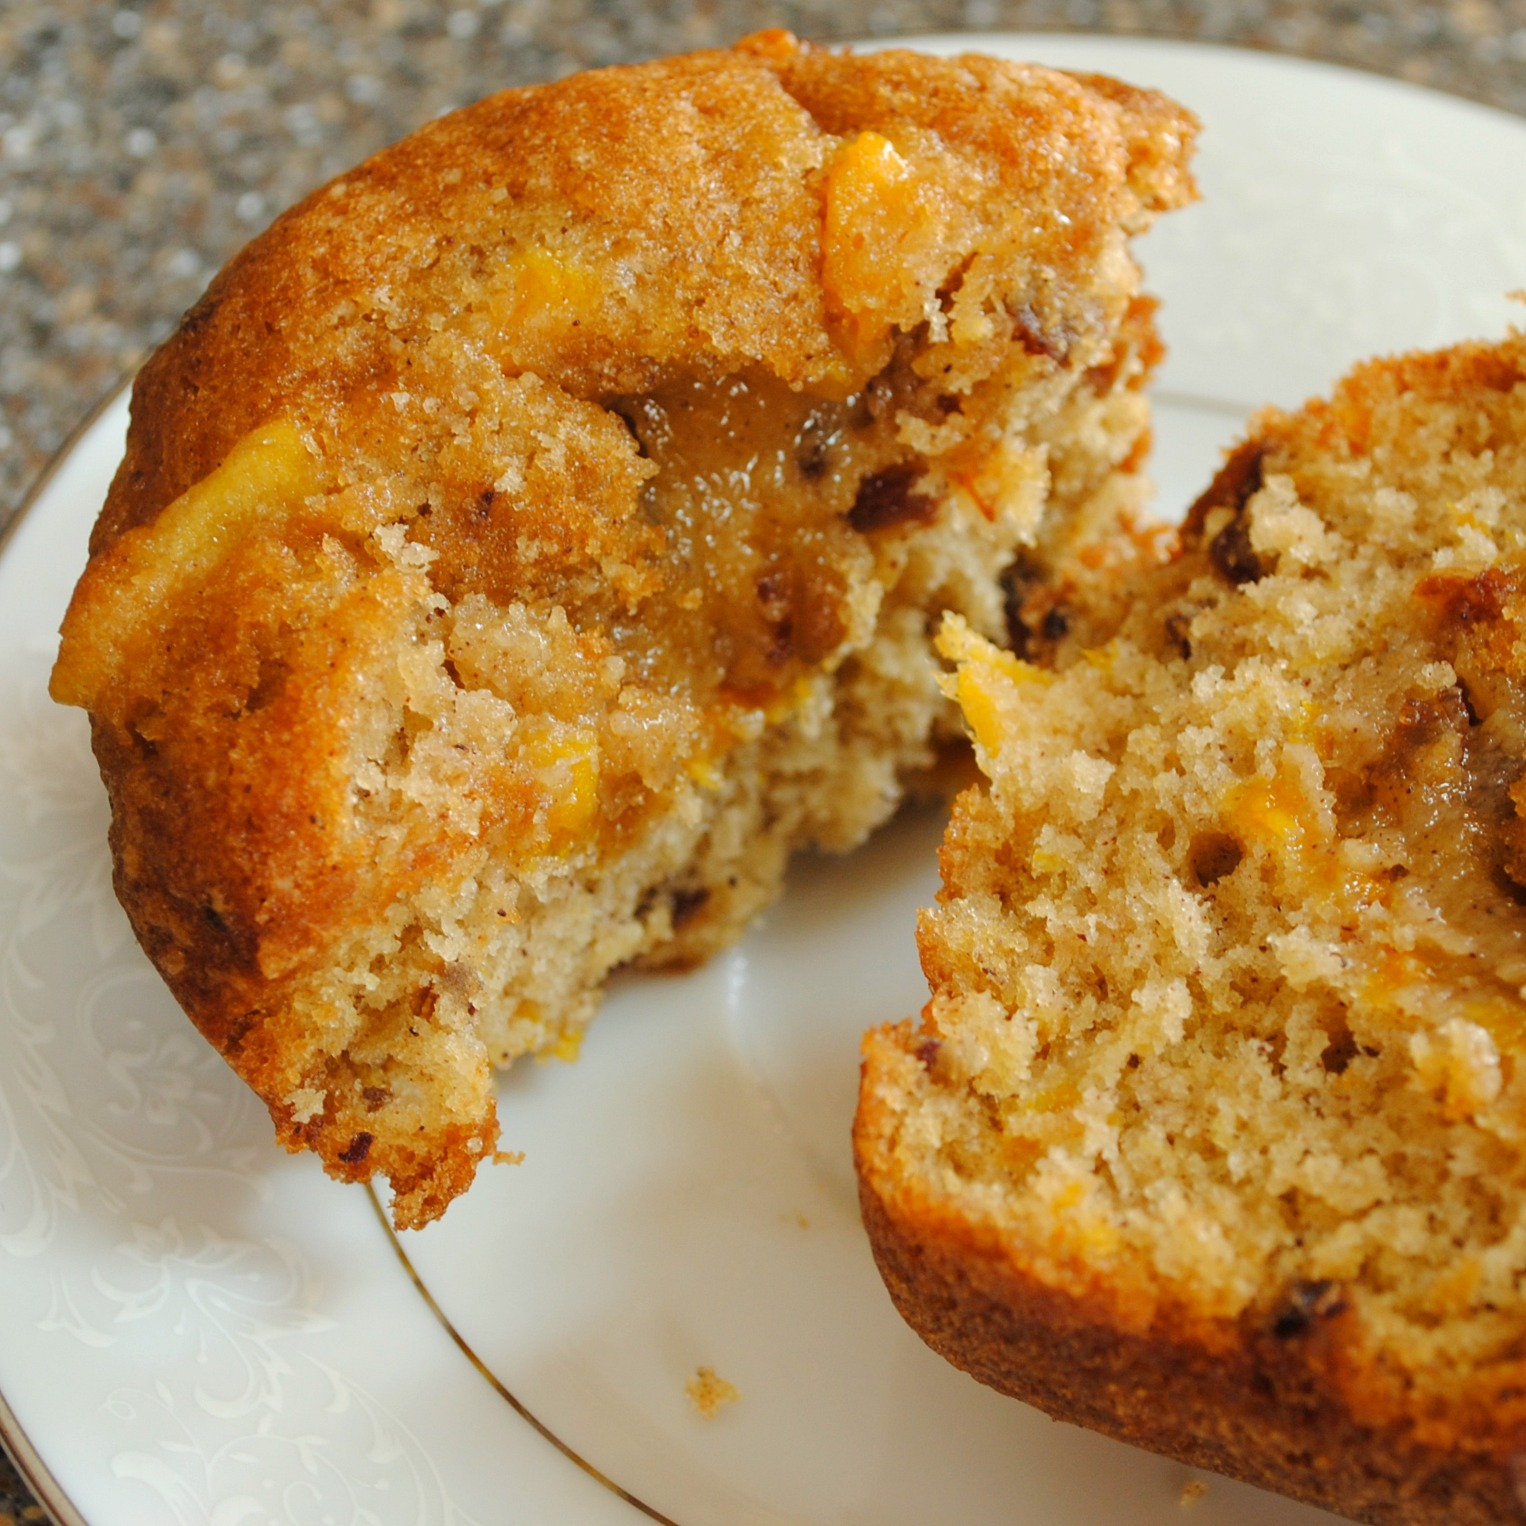
Mango Date Muffins

Knock, knock, knock... is anyone still here?  Anybody?  Good news... I'm alive and I have a kitchen again.  Oh wait, I didn't tell you about the fact that we didn't have kitchen for a while because we sold our house!  Oh yeah that was a couple of months ago, we sold our house at the end of May and started what may have been some of the busiest weeks ever. 


We went to Maryland (twice actually) for my friend Michelle's bridal shower and wedding.  I did make some cute personalized sugar cookies (see the recipe here), a bunch of cupcakes (Triple Lemon and Lemon Meringue - lemon's her favorite) and a devil's food chocolate cake with coconut cream filling and frosting - of course I don't have any good pictures.


The next week we packed up our whole house into a Pod container, closed on our house and left for Jamaica for a week for my cousin Blake's wedding - welcome to the family Summer! 


When we got home from Jamaica we were supposed to move into an Extended Stay America for two weeks but as luck would have it, Todd's cousins offered up their house in exchange for petsitting while they went on vacation so we moved there instead. 


Finally mid-June rolled around and we closed on our new house.  Of course the work didn't stop there as we've since been busy remodeling and modernizing our 40ish year old house that was a little bit stuck in the 70's. 

Painting paneling and beams, built-ins and trim, adding French doors, new sectional... it was so much work but worth it and I'm really glad we kept the panelling.

So far we've finished (is a room ever really finished?) the family room and Aubrey's room.


New beadboard and chair rail and soft yellow walls with the pink curtains from her nursery at our first house to make a cozy little girl's room.  We still need some pictures for those frames and to paint and move the chandelier from the dining room.

So the good news is that things are starting to calm down ever so slightly so I'm not making any promises at this point but hopefully I'll get back to blogging with a little bit more regularity.  I do have several recipes that I want to share that have been piling up even though it seems like I'm only cooking when we have guests these days.

For now, I'm going to share one of my favorites from the past couple of months. 


I baked these as jumbo muffins but they could be baked in regular size muffin tins as well.  They are reminiscent of a spice cake or carrot cake but with delicious chunks of mango.  Although the decision to make these muffins was an improvisation with leftover ingredients mostly because I had a couple of mangoes around because of plans to make mango peach salsa that didn't materialize, they turned out to be one of my favorite things I've made this summer.  I've definitely added the recipe to the list for repeat desserts.  And since they are muffins, I vote they even work for breakfast - just hold the ice cream.


Mango - Date Muffins
Inspired by Fresh Mango Bread from Baking: From My Home to Yours by Dorie Greenspan
Yields 18 jumbo muffins

4 eggs + 1 egg yolk
1/3 cup canola oil
3 3/4 cups flour
1 1/2 cups sugar
3/4 cup brown sugar, firmly packed
1 1/2 tsp baking powder
1 1/2 tsp baking soda
2 tsp ground ginger
1 1/2 tsp cinnamon
1/4 tsp nutmeg
1/2 tsp salt
2 1/2 - 3 cups diced, peeled mango (about two mangoes)
1/3 cup diced dried dates
2 T dark rum
1 T orange zest

Soak chopped dates in dark rum in a small dish until softened.  Preheat oven to 350 degrees.  Spray muffin tins with baking spray or butter and flour.  Whisk together eggs and oil in a small bowl.  In a large mixing bowl, combine flour, sugars, baking powder, baking soda, and spices.  Pour the egg mixture over the dry ingredients and stir just until combined, either by hand with a wooden spoon or on low speed in mixer.  The batter will be thick.  Drain dates and add along with mango and orange zest and stir to distribute.  Spoon batter into muffin tins, filling about 2/3 of the way full. 

Bake the muffins about 25 minutes until golden brown.  A toothpick inserted in the center should come out clean.  Cool for about five minutes in the pan and then transfer muffins to a wire rack to finish cooling.  These muffins are excellent served slightly warm with a scoop of vanilla ice cream.

Saturday, April 30, 2011

Orange Creamsicle Cupcakes


For my husband's birthday last month, Aubrey and I surprised him by visiting him at work with a dozen cupcakes to share with his office.  I wanted to do something different and I was inspired by a new drink that my sister and her husband introduced us to - a cocktail of orange Fanta and whipped vodka.  The cupcakes were a little more acceptable for the office, although I'm sure the vodka would have been appreciated!


The recipe is a combination of a few different sources - I adapted the recipe on I Heart Cuppycakes who adapted the recipe from Martha Stewart's Cupcakes and Dulcedo.  The cake is really moist and don't skip the orange zest because it adds so much flavor and I love seeing the little bits of zest in the cake.  The marshmallow cream is a great addition to these cupcakes, it really gives it the creamsicle flavor instead of just an orange cupcake. 

Orange Creamsicle Cupcakes
Recipe adapted from I Heart Cuppycakes
Cupcakes:
1/2 cup unsalted butter, at room temperature
2 T citrus olive oil
1 cup sugar
2 T vanilla
2 eggs
Zest of 1 orange
2 cups all purpose flour
1/4 tsp baking soda
1/4 tsp baking powder
1/4 tsp salt
3/4 cup heavy cream
1/4 cup orange juice, freshly squeezed

Preheat oven to 350 degrees and line muffin pans with paper liners.  (This made 16 cupcakes for me.)

Combine butter, olive oil and sugar and mix on medium high speed about three minutes until light and fluffy.  Add vanilla and eggs and mix about one more minute until well incorporated.  Stir in orange zest.  In a separate bowl, sift together flour, baking soda, baking powder and salt.  Separately combine heavy cream and orange juice.  Add 1/3 of the flour mixture, followed by 1/2 of the cream mixture and repeat, finishing with the flour.  Mix until just incorporated after each addition. 

Scoop batter into prepared liners, filling about 2/3 of the way full.  Bake about twenty minutes until a toothpick inserted in the center comes out clean.  Cool in pans about five minutes and then transfer to wire racks to cool completely.

Marshmallow Cream Filling:
7 oz marshmallow fluff
1/2 cup unsalted butter, at room temperature

Cut butter into small pieces and add to fluff in a mixing bowl.  Beat on medium speed until smooth and creamy.  Cut a small cone shape into the top of each cupcake and spoon marshmallow cream into wells allowing the cream to puddle on top of the cupcake slightly.  (Don't add too much, when you add the buttercream, it will cause the cream to move out toward the edges of the cupcakes.)

Orange Buttercream:
1/2 cup unsalted butter, at room temperature
1/8 - 1/4 cup orange juice, freshly squeezed
Zest of 1 orange
1/4 tsp vanilla extract
4 cups powdered sugar

Beat butter on medium speed until light and fluffy, about three minutes.  Add orange juice, zest, and vanilla and mix until well combined.  Add powdered sugar, one cup at a time, mixing until incorporated to reach desired consistency.  Whip on medium high speed about two minutes until smooth and creamy.  Transfer to a piping bag fitted with desired tip and pipe onto cupcakes. 

Thursday, April 7, 2011

Strawberry Banana Smoothie

Lately anything that can be made in five minutes or with one hand is what I'm making for breakfast, lunch or dinner.  These smoothies fit the bill - with a bonus that I only need one hand to drink it too.  Things involving forks and knives haven't been happening too often lately. 


This "recipe" is more of a method, you can change out the fruit to whatever you like best.  The yogurt is a must have for me - but feel free to use plain or vanilla or even another flavor if you prefer - but it really adds to the creamy smooth texture of the smoothie.  I also always combine fruit juice and milk instead of just milk to add some extra flavor.  Orange juice is my favorite but I also sometimes use cranberry juice - it's especially good with blueberries in your smoothie.  My final tip is frozen berries - using frozen berries means you don't have to add ice.  Your smoothie will have so much more flavor if you use frozen fruit instead of ice which dilutes the smoothie.  Occasionally I use frozen banana too - it's a great way to use up bananas that are almost past their prime, peel them, cut them into big chunks and freeze in a Ziploc bag and then use throw them in smoothies.


If you want to add some extra protein to your smoothie, mix in a scoop of protein powder and its a great post workout snack.  I prefer to mix the milk, OJ and powder by itself before adding the fruit because I think it gets rid of the grittiness that can sometimes result from adding protein powder to things.

Strawberry Banana Smoothie

8-10 large frozen strawberries
1 banana
1/2 cup milk (I use skim)
1/2 cup orange juice
1/2 cup vanilla yogurt

Put all ingredients in a blender and blend on high for about two minutes until smooth.  Pour and serve.  This makes 2-4 smoothies depending on the serving, for breakfast I usually split this between my husband and I, as a snack, it would serve four.

Wednesday, March 16, 2011

A Little Leprechaun's Pot of Gold Cake


So having a new baby has been an excuse to celebrate all the little holidays, "it's her first..." has commonly been my rationale.  So making a St. Patrick's Day cake - for a 1 month old baby who can't eat it - didn't seem at all over the top in my mind.  Especially when I had a great idea for a cake to try.  Now if only I could celebrate with things like baby carrots and salad maybe I would be more prepared for Aubrey's first trip to the beach but we'll get there -- and let's be honest, cake is way more fun than carrots and salad. 
  

This cake was a spin off of this cookies and cream cake I made for my husband last year for his birthday.  I tried these Golden Oreos at my in-laws house a couple of months ago and thought they were delicious.  When I saw the spring Oreos in the store the other day, I thought they were cute with the green filling but my mind went back to these.  


This yellow cake recipe isnt the usual one I use, simply because I wanted something quick and this one didn't require beating the egg whites and folding them in separately and also used buttermilk and all purpose flour rather than cake flour.  The result - a quick easy yellow cake recipe, it works great in this instance because its not too soft to hold up to the filling.  


Pot of Gold Cake

Cake:
Recipe from The Modern Baker
3/4 cup unsalted butter, softened
1 cup sugar
2 tsp vanilla extract
3 large eggs
1/3 cup buttermilk
1 3/4 cup all purpose flour
2 tsp baking powder
1/2 tsp salt

Preheat oven to 350 degrees and spray two 8" cake pans with baking spray or butter and flour and line with parchment paper and spray paper. 

Cream together butter and sugar in a mixing bowl on medium speed about 2-3 minutes until light and fluffy.  Add vanilla and eggs, one at a time, mixing about 1 minute after each addition until well incorporated.  Add half of the flour, half of the baking powder and the salt.  Mix on low speed until just incorporated.  Add buttermilk and mix until incorporated and add remaining flour and baking powder.  Increase the speed to medium and beat an additional 2 minutes. 

Divide batter evenly between pans and bake about 25 minutes until golden brown and a toothpick inserted in the center comes out clean.  Cool about 5 minutes in the pan and then turn out on wire racks, flip them over so they are top side up.  Cool completely then slice each cake layer in half horizontally to make 4 thin layers and assemble.

Golden Oreo Cream Filling
2 cups heavy cream
1 tsp vanilla extract
1/2 package Golden Oreo cookies, crushed

Process cookies in a food processer until they are fine crumbs.  Add heavy cream to a cold mixing bowl (putting the bowl in the freezer for a few minutes prior to mixing will speed up the process) fitted with the whisk attachment and beat 2-3 minutes until cream forms stiff peaks.  Add vanilla extract and blend until mixed.  Gently fold in crushed cookies.  Add 1/3 of the cream mixture in between each layer of cake.

Frosting:
1/2 cup unsalted butter
1 tsp vanilla extract
3-4 T heavy cream
3 cups powdered sugar

Cream butter on medium speed until light and fluffy, about 2-3 minutes.  Add vanilla and cream and mix until well incorporated.  Add powdered sugar, one cup at a time, mixing on low speed until frosting reaches desired thickness.  Increase speed to medium and whip about 1 minute until smooth.  Tint with gel food coloring as desired and frost cake.  Cover and refrigerate cake if not serving within a couple of hours.

Wednesday, March 9, 2011

Chipotle Chicken Sliders

Well here's an idea of how far behind I am on blogging -- I actually made these sliders for the Superbowl.  The fact that it's a month later and I'm just now getting around to posting them says nothing about the quality of these sliders but is really just an idea of how crazy my life has been.  Truthfully, I've got even more recipes to post that I made well before these. 


I love sliders -- they are the perfect size for a party so you don't have to commit to just eating a burger.  I quickly made these sliders because I had an open can of chipotles in adobo from my chipotle chicken pasta that I wanted to use some more of rather than freezing.  I used a nice sharp cheddar cheese to top these but I think a monterey jack or pepper jack cheese would also be delicious.  Get some nice fresh rolls from a bakery for these - I used some sourdough rolls that were great.  A little red onion and a cilantro lime mayo are the finishing touches for a great little sandwich.

Chipotle Chicken Sliders

Burgers:
2 T olive oil
1 pound ground chicken
2 chipotle peppers in adobo sauce, finely chopped + 1 T of the sauce
1/4 cup finely diced red onion
2 cloves garlic, minced
2 T lime juice
1 tsp ground cumin
1/2 tsp salt
1/2 cup unseasoned breadcrumbs
1 egg
8 rolls
8 ounces sharp cheddar cheese
8 thin slices of red onion

Mayo:

1/2 cup mayo
1 T lime juice
1/4 cup cilantro
Chop cilantro finely and stir into mayo with lime juice and set aside. 


Preheat a grill pan or skillet over medium high heat and add oil.  Combine all remaining ingredients except rolls, cheese, and onion slices in a large bowl, gently mix until just combined.  Divide mix into eight equal portions and form into small patties, thinning just slightly in the center.  Transfer patties to hot pan, cooking about 2-3 minutes per side until cooked through. 

Meanwhile preheat broiler on low.  On a large sheet pan, cut rolls in half and lay out evenly.  Add burgers and cheese to bottom of rolls.  Broil until cheese is melted and rolls are golden brown.  Spread tops of rolls with mayo and top burgers with onion slices and serve.

Sunday, March 6, 2011

King Cake


First of all, I want to say thank you if you are still reading my blog - sorry for the three week interruption in posting but we've been a little busy.  Three weeks ago we welcomed our daughter, Aubrey to the world.  She was born at just over eight pounds the night before Valentine's Day.  Since then life has been an amazing mix of staring at our beautiful baby girl, family and friends visiting and a little sleep deprivation so I haven't spent much time in the kitchen.  I promise I won't turn this into a blog about Aubrey but I have to share a couple pictures to introduce my little girl. 
Photo by Dede Holman Photography

Photo by Dede Holman Photography

As for a recipe - I finally got around to making a king cake yesterday... something that's been on my list of things to make for at least two years.  I always seemed to run out of time during Mardi Gras "season" but got one made just in time this year.  We get a few king cakes delivered to the office every year at work which is where I originally discovered this treat.  It's essentially like a giant cinnamon roll but baked into a ring-shaped cake and decorated with bright purple, yellow and green sugars for festive Mardi Gras flavor.


The dough itself is an easy yeast recipe but it does take a little time.  The initial mixing is very simple but make sure to allow about three hours total for rising time.  The filling is a slightly modified cinnamon and sugar mixture spiked with a little bourbon and raisins.  The icing adds a tart lemon flavor which is a nice mix with the sweetness of the powdered sugar.


King Cake
Recipe adapted from All Recipes

Dough:
1/2 cup half and half
2 T butter
1 package active dry yeast (.25 ounce)
1/3 cup warm water (approx 110 degrees F)
1/4 cup sugar
1 egg
3/4 tsp salt
1/4 tsp nutmeg
2 3/4 cups all purpose flour plus more for rolling
Zest of 1 lemon

Scald half and half over medium heat, remove from heat and add butter.  While mixture cools, stir together warm water, yeast and 1 T of the sugar in bowl of a stand mixer and let stand until foamy.  When half and half mixture is cooled, add to yeast mixture.  Add remaining sugar and egg and beat until well incorporated.  Add salt, nutmeg and flour one cup at a time.  Stir in lemon zest and switch to dough hook attachment.  Knead with dough hook for about 5-7 minutes until dough is smooth and elastic.  It will still be fairly sticky.  Oil a deep bowl and transfer dough to bowl, cover with plastic wrap and set in a warm place to rise for about 1 1/2 to 2 hours until doubled in size. 


Filling:
3/4 cup brown sugar
1 T cinnamon
1/4 cup flour
1/4 cup melted butter
2 T bourbon
1/2 cup raisins

Combine bourbon and raisins in a small bowl and set aside.  Mix together brown sugar, cinnamon and flour and then stir in melted butter. 

Punch down dough and turn out onto a heavily floured surface.  Roll dough out into a large rectangle about 12x16 inches.  Line a large baking sheet with parchment paper.  Spread filling mixture over dough in a thin layer leaving about a one inch edge free around the whole rectangle.  Drain raisins and sprinkle over filling.  Begin rolling dough like a jelly roll from the wide edge.  Roll tightly and transfer to baking sheet.  Form dough into an oval, seam side down and pinch edges to seal.  Using a sharp knife or cooking scissors, cut slices into top of dough about every two inches approximately 1/3 of the way through dough.  Cover with a towel and let rise an additional 45 minutes in a warm place.

Preheat oven to 375 degrees and bake approximately 30 minutes until golden brown. 


Icing:
2 cups powdered sugar
2 T lemon juice
2 T half and half
3/4 cup demerara sugar
Food coloring in green, yellow and purple

Whisk together powdered sugar, lemon juice and half and half until smooth.  Pour over cooled king cake.

In a small bowl, combine 1/4 cup sugar and a couple drops of yellow food coloring and stir together.  Transfer to a small bowl or plate.  Add 1/4 cup sugar and a couple drops of green food coloring and stir together.  Transfer to a small bowl or plate.  Add last cup of sugar and purple food coloring and stir to combine.  Sprinkle sugar over icing as desired.

Saturday, February 12, 2011

Breakfast in Bed for Your Valentine

Take advantage of the weekend this year and make your sweetheart breakfast in bed.  But take a couple of shortcuts so you don't have to get up at the crack of dawn to get it done.  These recipes can be made in advance the night before and then just pop them in the oven when you're ready to make them. 

This first recipe is one that we make all the time in my family for holidays and I have to admit that we change up the add-ins pretty much every time we make it.  But the basics stay the same.  This makes a big 9x13 casserole so you may want to cut the recipe back for just a couple people or you'll be eating breakfast casserole for breakfast, lunch and dinner.  This is how we made it on Christmas morning this year.  The recipe was originally adapted from old cookbook that my mom has had for years that I believe was put together by local women as a fundraiser for the country club about 30 years ago. 


Ham and Swiss Breakfast Casserole
Family recipe

8 eggs
2 cups milk
1 tsp salt
1 tsp fresh ground pepper
8 slices sandwich bread
2 cups thawed frozen spinach
1 roasted red pepper, diced
1 onion, diced
2 cloves garlic, minced
8 oz ham, cut into 1/2" chunks
8 oz Swiss cheese, grated

Preheat oven to 375 degrees (if you are going to bake right away).  Spray a 9x13 casserole pan with cooking spray or grease with butter.  In a mixing bowl, beat eggs and milk together.  Add salt and pepper and set aside. 

Cut or tear the bread into about one inch pieces and toss in the pan.  Add vegetables, make sure your frozen spinach is well drained - add it to a double layer of paper towels and wrap it up and squeeze out all the water.  Add garlic and ham and toss everything together in the pan.  Pour egg mixture over the top, pushing everything down if it floats up.  Top with grated cheese.  At this point, you can cover the casserole with aluminum foil and refrigerate overnight if desired.

Bake covered for about 30 minutes, remove foil and continue baking an additional 15 to 30 minutes until casserole is set and golden brown.  Let stand about 10 minutes before cutting. 

Some other recipes to try or serve along with your casserole:


Enjoy -- Happy Valentine's Day!

Monday, February 7, 2011

Soft Pretzels with Jalapeno Cheese Sauce

Well the Superbowl didn't have the outcome that I was hoping for, my team had too many turnovers, I wasn't a fan of the halftime show and the commercials weren't anything exciting, but the food was good at least.  For me these soft pretzels were the highlight of the night.


I debated between a couple different recipes - one from Baking Illustrated and one from Alton Brown.  Although similar the main differences were in the type of flour and the type of sweetener.  The Baking Illustrated recipe used bread flour which has a higher gluten content and therefore creates a chewier dough.  Pretzels are supposed to be chewy so I decided to stick with the bread flour.  The Baking Illustrated recipe also used honey and after reading their explanation, I decided to go with that - it also meant I didn't have to open a package of brown sugar for a couple tablespoons - so it made it a fairly easy decision.  The other key to the recipe which both versions did is to boil the pretzels in a baking soda solution, so make sure you don't skip this step.

The pretzels are best eaten the day they are made or you can freeze them right away and then warm in the oven when you want them.  Don't store them in a covered container on your counter top though or they will end up a little soggy.


I made a simple spicy, garlicky cheese sauce to dip these in because it sounded good and I was already chopping jalapenos and garlic for guacamole and sliders that I was making.  It turned out to be a great dipping sauce for the pretzels adding a spicy kick to the slightly sweet and salty pretzel dough.  They would also be good with mustard or a cheddar cheese sauce.  Of course you can also sub cinnamon and sugar for the salt sprinkled on before baking and make more dessert-like pretzels if you prefer.

Soft Pretzels
Recipe slightly adapted from Baking Illustrated

Dough:
1 package rapid-rise yeast
1/4 cup honey
1 tsp salt
3 cups bread flour (16 1/2 ounces)
1 cup water, at approximately 110 degrees
Approximately 1 T olive oil

Baking Soda Solution:
Approximately 6 cups water
3 T baking soda
Salt for sprinkling on pretzels

In the bowl of a stand mixer fitted with the dough hook, combine all ingredients for the dough.  Make sure you are using rapid rise yeast, or you will need to proof your yeast before mixing.  Mix on low speed until combined and then knead about 5-7 minutes on low speed until the dough is smooth and elastic.  Prepare a separate bowl by coating with olive oil, transfer dough to bowl, turning to coat evenly.  Cover the bowl with plastic wrap and set in a warm place to rise for about one hour or until doubled in size.  Punch dough down, recover and let rise approximately 30 minutes more.

In a large low pan (a 12" skillet with deep sides or a small dutch oven will work perfectly) bring water and baking soda to a boil over medium high heat.  Preheat oven to 450 degrees and line a large baking sheet with parchment paper. 

Separate dough into 12 approximately 2 ounce pieces.  Roll each piece into a long string, about 20 inches in length.  Fold pretzels into shape, twisting the ends over each other and pressing lightly to seal dough into shape.  Transfer pretzels, a few at a time to boiling water, cook 30 seconds on each side, turning with a slotted spoon, drain and transfer to prepared baking pan.  Sprinkle with coarse salt and repeat until all the pretzels have been boiled.  They don't need much room on the baking sheet as they won't spread much in the oven.  Bake approximately 12-14 minutes until dark golden brown.  Transfer to a wire rack to cool and serve.

Jalapeno Cheese Sauce

1 T unsalted butter
1 T flour
3/4 cup milk
1 clove garlic, finely grated or minced
1 jalapeno pepper, finely minced
1 cup Colby Jack cheese
1/2 -1 tsp cayenne pepper

In a small sauce pan, melt butter over medium heat.  Add flour and whisk to combine, cooking about one minute until smooth.  Add milk, whisking to incorporate.  Add garlic and jalapeno.  Switch to a wooden spoon and stir frequently until thickened, about 15 minutes.  The sauce should begin to coat the back of the spoon.  Remove from heat and stir in cheese.  Add cayenne pepper to taste. 

Wednesday, February 2, 2011

Steelers are going to the Superbowl!

Here we go, Steelers, here we go!


Obviously this is old news but I'm a little behind on starting this Superbowl recipe post.  Since half the fun of the Superbowl is making a bunch of appetizers and snacking all day (at least that's half the fun for me) I've got some great recipes to share with you. 

To start off - here are six recipes from the archives in honor of each of the Steelers past Superbowl victories!


Since the Steelers are attempting to win their 7th championship game, here's a 7th recipe for spicy sausage pizza roulade. 


This recipe is really easy and essentially a rolled up pizza, so you can change up the filling to whatever your favorite pizza toppings are.  I would recommend staying away from things with a high water content though, like pineapple if it's on the top of your list, so that you don't end up with soggy bread.  You can use any bread dough you want for this - a standard pizza crust from scratch or even roll out a dough like Pillsbury's French bread dough, they even have one that doesn't contain any high fructose corn syrup or trans fats.  That's what I used for this one since I didn't have any pizza dough ready to go and I had a coupon to try their Simply Rustic French bread dough


Spicy Sausage Pizza Roulade

12 oz hot ground Italian sausage
1 green bell pepper, diced
1/2 red onion, diced
1 clove garlic, minced
1 pizza or french bread dough
1 tsp pizza seasoning
1/2 tsp crushed red pepper flakes
1 cup shredded pizza or mozzarella cheese
1/4 cup shredded Parmesan cheese
2 T butter, softened
1 tsp garlic powder
Pizza sauce for serving

Preheat oven to 350 degrees.  Spray a baking sheet with baking spray or line with parchment paper.

Heat a large skillet over medium high heat.  Add sausage and crumble as it browns.  After about 2 minutes, add onions, peppers and garlic.  Cook until sausage is just cooked through and vegetables are softened.  Remove from heat and drain any grease off the sausage.  Lightly flour a smooth counter surface and roll out dough into a large rectangle, about 12x18 inches.  Evenly sprinkle pizza seasoning and crushed red pepper flakes over dough.  Spoon sausage mixture onto bottom third to half of the long edge of the dough, leaving an edge of about one inch open at the outside.  Next add cheeses directly next to the sausage mixture on the 2nd third of the dough, a little overlap is fine.  The final third should be open. 

Begin rolling from sausage side, rolling the dough gently into a long tube.  Pinch the seams to seal the dough and place the dough seam side down on prepared pan.  Fold the ends under slightly, pinching to seal the ends.  Bake about 25 minutes and remove from oven.  Add garlic powder to melted butter and brush over the top of the bread dough and return to the oven for about five more minutes until golden brown.  Cool at least 5-10 minutes before slicing into 1/2 inch thick slices.  Serve with warmed pizza sauce.

Related Posts with Thumbnails