Pin It button on image hover

Saturday, February 12, 2011

Breakfast in Bed for Your Valentine

Take advantage of the weekend this year and make your sweetheart breakfast in bed.  But take a couple of shortcuts so you don't have to get up at the crack of dawn to get it done.  These recipes can be made in advance the night before and then just pop them in the oven when you're ready to make them. 

This first recipe is one that we make all the time in my family for holidays and I have to admit that we change up the add-ins pretty much every time we make it.  But the basics stay the same.  This makes a big 9x13 casserole so you may want to cut the recipe back for just a couple people or you'll be eating breakfast casserole for breakfast, lunch and dinner.  This is how we made it on Christmas morning this year.  The recipe was originally adapted from old cookbook that my mom has had for years that I believe was put together by local women as a fundraiser for the country club about 30 years ago. 


Ham and Swiss Breakfast Casserole
Family recipe

8 eggs
2 cups milk
1 tsp salt
1 tsp fresh ground pepper
8 slices sandwich bread
2 cups thawed frozen spinach
1 roasted red pepper, diced
1 onion, diced
2 cloves garlic, minced
8 oz ham, cut into 1/2" chunks
8 oz Swiss cheese, grated

Preheat oven to 375 degrees (if you are going to bake right away).  Spray a 9x13 casserole pan with cooking spray or grease with butter.  In a mixing bowl, beat eggs and milk together.  Add salt and pepper and set aside. 

Cut or tear the bread into about one inch pieces and toss in the pan.  Add vegetables, make sure your frozen spinach is well drained - add it to a double layer of paper towels and wrap it up and squeeze out all the water.  Add garlic and ham and toss everything together in the pan.  Pour egg mixture over the top, pushing everything down if it floats up.  Top with grated cheese.  At this point, you can cover the casserole with aluminum foil and refrigerate overnight if desired.

Bake covered for about 30 minutes, remove foil and continue baking an additional 15 to 30 minutes until casserole is set and golden brown.  Let stand about 10 minutes before cutting. 

Some other recipes to try or serve along with your casserole:


Enjoy -- Happy Valentine's Day!

Monday, February 7, 2011

Soft Pretzels with Jalapeno Cheese Sauce

Well the Superbowl didn't have the outcome that I was hoping for, my team had too many turnovers, I wasn't a fan of the halftime show and the commercials weren't anything exciting, but the food was good at least.  For me these soft pretzels were the highlight of the night.


I debated between a couple different recipes - one from Baking Illustrated and one from Alton Brown.  Although similar the main differences were in the type of flour and the type of sweetener.  The Baking Illustrated recipe used bread flour which has a higher gluten content and therefore creates a chewier dough.  Pretzels are supposed to be chewy so I decided to stick with the bread flour.  The Baking Illustrated recipe also used honey and after reading their explanation, I decided to go with that - it also meant I didn't have to open a package of brown sugar for a couple tablespoons - so it made it a fairly easy decision.  The other key to the recipe which both versions did is to boil the pretzels in a baking soda solution, so make sure you don't skip this step.

The pretzels are best eaten the day they are made or you can freeze them right away and then warm in the oven when you want them.  Don't store them in a covered container on your counter top though or they will end up a little soggy.


I made a simple spicy, garlicky cheese sauce to dip these in because it sounded good and I was already chopping jalapenos and garlic for guacamole and sliders that I was making.  It turned out to be a great dipping sauce for the pretzels adding a spicy kick to the slightly sweet and salty pretzel dough.  They would also be good with mustard or a cheddar cheese sauce.  Of course you can also sub cinnamon and sugar for the salt sprinkled on before baking and make more dessert-like pretzels if you prefer.

Soft Pretzels
Recipe slightly adapted from Baking Illustrated

Dough:
1 package rapid-rise yeast
1/4 cup honey
1 tsp salt
3 cups bread flour (16 1/2 ounces)
1 cup water, at approximately 110 degrees
Approximately 1 T olive oil

Baking Soda Solution:
Approximately 6 cups water
3 T baking soda
Salt for sprinkling on pretzels

In the bowl of a stand mixer fitted with the dough hook, combine all ingredients for the dough.  Make sure you are using rapid rise yeast, or you will need to proof your yeast before mixing.  Mix on low speed until combined and then knead about 5-7 minutes on low speed until the dough is smooth and elastic.  Prepare a separate bowl by coating with olive oil, transfer dough to bowl, turning to coat evenly.  Cover the bowl with plastic wrap and set in a warm place to rise for about one hour or until doubled in size.  Punch dough down, recover and let rise approximately 30 minutes more.

In a large low pan (a 12" skillet with deep sides or a small dutch oven will work perfectly) bring water and baking soda to a boil over medium high heat.  Preheat oven to 450 degrees and line a large baking sheet with parchment paper. 

Separate dough into 12 approximately 2 ounce pieces.  Roll each piece into a long string, about 20 inches in length.  Fold pretzels into shape, twisting the ends over each other and pressing lightly to seal dough into shape.  Transfer pretzels, a few at a time to boiling water, cook 30 seconds on each side, turning with a slotted spoon, drain and transfer to prepared baking pan.  Sprinkle with coarse salt and repeat until all the pretzels have been boiled.  They don't need much room on the baking sheet as they won't spread much in the oven.  Bake approximately 12-14 minutes until dark golden brown.  Transfer to a wire rack to cool and serve.

Jalapeno Cheese Sauce

1 T unsalted butter
1 T flour
3/4 cup milk
1 clove garlic, finely grated or minced
1 jalapeno pepper, finely minced
1 cup Colby Jack cheese
1/2 -1 tsp cayenne pepper

In a small sauce pan, melt butter over medium heat.  Add flour and whisk to combine, cooking about one minute until smooth.  Add milk, whisking to incorporate.  Add garlic and jalapeno.  Switch to a wooden spoon and stir frequently until thickened, about 15 minutes.  The sauce should begin to coat the back of the spoon.  Remove from heat and stir in cheese.  Add cayenne pepper to taste. 

Wednesday, February 2, 2011

Steelers are going to the Superbowl!

Here we go, Steelers, here we go!


Obviously this is old news but I'm a little behind on starting this Superbowl recipe post.  Since half the fun of the Superbowl is making a bunch of appetizers and snacking all day (at least that's half the fun for me) I've got some great recipes to share with you. 

To start off - here are six recipes from the archives in honor of each of the Steelers past Superbowl victories!


Since the Steelers are attempting to win their 7th championship game, here's a 7th recipe for spicy sausage pizza roulade. 


This recipe is really easy and essentially a rolled up pizza, so you can change up the filling to whatever your favorite pizza toppings are.  I would recommend staying away from things with a high water content though, like pineapple if it's on the top of your list, so that you don't end up with soggy bread.  You can use any bread dough you want for this - a standard pizza crust from scratch or even roll out a dough like Pillsbury's French bread dough, they even have one that doesn't contain any high fructose corn syrup or trans fats.  That's what I used for this one since I didn't have any pizza dough ready to go and I had a coupon to try their Simply Rustic French bread dough. 


Spicy Sausage Pizza Roulade

12 oz hot ground Italian sausage
1 green bell pepper, diced
1/2 red onion, diced
1 clove garlic, minced
1 pizza or french bread dough
1 tsp pizza seasoning
1/2 tsp crushed red pepper flakes
1 cup shredded pizza or mozzarella cheese
1/4 cup shredded Parmesan cheese
2 T butter, softened
1 tsp garlic powder
Pizza sauce for serving

Preheat oven to 350 degrees.  Spray a baking sheet with baking spray or line with parchment paper.

Heat a large skillet over medium high heat.  Add sausage and crumble as it browns.  After about 2 minutes, add onions, peppers and garlic.  Cook until sausage is just cooked through and vegetables are softened.  Remove from heat and drain any grease off the sausage.  Lightly flour a smooth counter surface and roll out dough into a large rectangle, about 12x18 inches.  Evenly sprinkle pizza seasoning and crushed red pepper flakes over dough.  Spoon sausage mixture onto bottom third to half of the long edge of the dough, leaving an edge of about one inch open at the outside.  Next add cheeses directly next to the sausage mixture on the 2nd third of the dough, a little overlap is fine.  The final third should be open. 

Begin rolling from sausage side, rolling the dough gently into a long tube.  Pinch the seams to seal the dough and place the dough seam side down on prepared pan.  Fold the ends under slightly, pinching to seal the ends.  Bake about 25 minutes and remove from oven.  Add garlic powder to melted butter and brush over the top of the bread dough and return to the oven for about five more minutes until golden brown.  Cool at least 5-10 minutes before slicing into 1/2 inch thick slices.  Serve with warmed pizza sauce.

Saturday, January 29, 2011

Chipotle Chicken Pasta


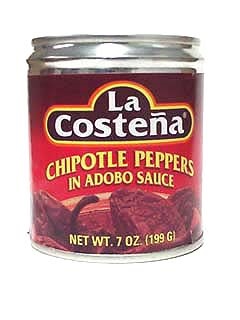
Have you ever used the chipotle in adobo peppers you can usually find the Mexican or ethnic aisle of your grocery store?  I absolutely love them.  They have such awesome flavor.  I add them to chili, salsa, taco meat, and all kinds of things.  The adobo sauce adds such a great smoky heat.  Chipotles in adobo are dried, smoked jalapeno peppers cooked in a sauce of spices like cumin and garlic among other things, vinegar, tomato sauce and ancho chilis, there is often a little brown sugar added too. They are spicier than a jalapeno though so be careful.  If they are too hot for you, you can scrape out the seeds to cut down on the heat.  The ones I buy come in a small can that looks like this.
Picture of La Costena Chipotle Peppers in Adobo Sauce 7 oz. - Item No. 1349

As for this pasta, I wanted a spicy pasta with a light cream sauce.  I added lots of bell peppers, onions, and cilantro to give it extra flavor.  I let the chicken marinate in a little lime juice, cilantro and spices for about half an hour before cooking it to give it some extra flavor.  I used whole wheat pasta to make it a little healthier.  I've cut back on the chipotles in this recipe from the way I made it the first time.  Although I was fine with using three chipotle peppers, my husband thought it was just too spicy so I would start with one pepper and taste it along the way.  That way you get the flavor but adjust the heat to suit your own tastes.  I didn't take out the seeds.  Remember though that it will get a little hotter as it cooks.  I used farfalle or bowtie pasta but feel free to substitute whatever shortcut pasta you would like.  This makes a lot of pasta - about 8-10 servings.


Chipotle Chicken Pasta

2-3 skinless, boneless chicken breasts (about 2 lbs)
1/4 cup lime juice
3 cloves garlic, minced
1/2 cup cilantro, finely chopped
1 tsp ancho chili powder
1 tsp salt
2 T olive oil
1 lb farfalle pasta
1 large red bell pepper, diced
1 large green bell pepper, diced
1 red onion, diced
1 chipotle pepper + 1 T of adobo sauce, minced
1/2 cup chicken stock
1/2 cup heavy cream
1/4 cup Parmesan cheese

Trim fat from chicken breasts and cut into bite-size pieces.  Combine lime juice, 1/2 of minced garlic, 1/2 of cilantro, chili powder, and salt and mix together.  Pour over chicken to coat and marinate chicken about 30 minutes. 

Heat a large pot of water to boiling.  Add generous amount of salt and add pasta.  Cook according to package directions until al dente.  Drain and set aside.  Meanwhile, add olive oil to large saute pan and heat over medium heat.  Add chicken, bell peppers, onions and remaining garlic and cook about 6-8 minutes until chicken is cooked through and vegetables are softened.  Add chicken stock and chipotle pepper and adobo sauce and cook until stock is reduced by about 1/3.  Reduce heat to low and add cream and cheese.  Stir to combine and return pasta to sauce pan and toss to evenly coat with sauce.  Cook about 5 minutes and top with remaining cilantro and serve.

Tuesday, January 25, 2011

We have a winner!

Thank you to everyone who participated in my contest this week to win a copy of Michael Chiarello's cookbook Bottega and some lemon-pepper panko breadcrumbs to try courtesy of General Mills and MyBlogSpark.  Thank you to all of you for reading and following my blog!


There were 48 comments telling me about what they would make with panko breadcrumbs -- I got a few new ideas to use from them.  I chose the winner via a random number generator and the winning number was entry number seven.

Amber from Texas Tales said...
How exciting! I love exploring new recipes and reading cookbooks. Would love to win. In the meantime, I'll have to try out these panko bread crumbs. I enjoy cooking our tilapia or catfish in seasoned bread crumbs, and it might be time to mix it up a little!

Amber - I think you'll like the panko -- it will make an extra crispy crust on your fish!  Enjoy the cookbook and thank you for reading my blog!  I've sent you an email with the details. 

Sunday, January 23, 2011

Carrot Cake

So for at least the past week I have been wanting carrot cake -- I'm not sure why but I'm chalking it up to pregnancy cravings.  I finally had a halfway decent excuse to make one since we were having friends over for dinner.  While I love the carrot cake cupcakes I've made in the past, I wanted to try a new recipe that used pineapple since I had some crushed pineapple in the fridge that I needed to use up.  (The cupcakes are a great recipe to try if you prefer your carrot cake sans additions.)  It was an excellent decision, I found an Ina Garten recipe that used pineapple (although it called for fresh but I subbed in the canned that I already had) and it also added in raisins and walnuts (although I made another substitution and used pecans since I had those in the pantry).  Just make sure if you do use canned pineapple that you get the kind packed in its own juice not heavy syrup, you don't need to add extra sugar to the recipe.  It turned out to be really moist and topped with a cream cheese frosting, a perfect choice to satisfy my craving.


This cake is really forgiving, there's no complicated mixing instructions, you don't have to sift flour and most of the ingredients you probably have on hand.  I also added some extra spices to the recipe.  It originally called for cinnamon but I added some ginger and nutmeg as well.  A thick cream cheese frosting is always a good combination for carrot or other spice cakes and is really easy to whip up.  I used my normal cream cheese frosting which has a 1:1 ratio of cream cheese to butter.  To that, I add vanilla, milk or cream and powdered sugar.  Make sure you whip the frosting really well to incorporate plenty of air, this will help give it a light texture and make it the right consistency to frost your cake.  I did end up with about an extra cup of frosting even after converting this from a 2-layer to 3-layer cake. 


The original instructions were to use 2 8-inch pans but unless your cake pans are deeper than standard cake pans, I think you would have overflow problems, I split it into 3 8-inch pans and thought the layers were still pretty substantial.  They do bake up pretty flat so there was no trimming required to assemble.

Carrot Cake
Recipe adapted from Ina Garten via Food Network

Cake:
2 cups sugar
1 1/3 cups canola or vegetable oil
3 eggs
1 tsp vanilla extract
2 1/2 cups flour, plus 1 T
2 tsp baking soda
2 tsp cinnamon
1/4 tsp ginger
1/4 tsp nutmeg
1 1/2 tsp salt
1 cup raisins
1 cup chopped pecans
1 pound carrots, peeled and grated
1/2 cup crushed pineapple, drained

Preheat oven to 350 degrees.  Butter and flour three 8-inch round cake pans (or you can use baking spray) and line with parchment paper if desired (I didn't and it came out just fine but with a more delicate cake or if I'm not just making it for myself, I usually do). 

Combine sugar, oil, eggs, and vanilla in a mixing bowl and mix on medium speed for about two minutes until light yellow in color.  In a separate bowl, combine flour, soda, cinnamon, ginger, nutmeg and salt and whisk together.  Add to mixing bowl and mix on low speed until just incorporated.  Batter will be pretty thick at this point.  Toss raisins and pecans with remaining one tablespoon of flour.  Fold raisins, pecans, carrots and pineapple into batter until well distributed.   Divide batter evenly among pans and bake about 30 minutes until a toothpick inserted in the center comes out clean.  Cool in pans about ten minutes and then transfer to wire racks to cool completely. 

Frosting:
1 package cream cheese (I used 1/3 less fat), at room temperature
1 cup unsalted butter, at room temperature
1 tsp vanilla extract
3-4 T milk
1 pound powdered sugar

Combine cream cheese and butter in mixing bowl and beat on medium-high speed about three minutes until light and fluffy.  Add vanilla and first three tablespoons of milk and mix on low to incorporate.  Slowly add powdered sugar, mixing on low until incorporated.  Increase speed and whip about two minutes, adding additional milk if necessary to reach desired consistency.  When cakes are completely cool, spread about 1/4 of the frosting on top of the first layer, spread evenly, top with 2nd layer, add another 1/4 of the frosting and top with remaining layer.  Add a generous amount of frosting to the top of the cake and smooth working out with a spatula to the edges and down the sides of the cake. 

Friday, January 21, 2011

A Giveaway and an Easy Weeknight Dinner

***This contest is now closed - Thank you for participating!***

Well it's a good thing I didn't make a New Year's resolution to blog more often -- oh wait I did that??  FAIL!  These last couple of weeks have really just gotten away from me.  In a bit of good news, I have gotten a lot done, work has been busy, the nursery is finished and all the baby's laundry is cleaned and put away, and my freezer is full of meals frozen for easy dinners once she arrives.  So there's my excuse.  To make it up to you -- here's a GIVEAWAY for a beautiful cookbook, Bottega by Michael Chiarello Chef Chiarello is the host of Easy Entertaining on the Food Network and chef at Bottega Napa Valley Restaurant.  Along with this great cookbook, you'll also receive a box of the Progresso Lemon-Pepper Panko Breadcrumbs that I used in the recipe below to try out.


To enter the contest, simply leave a comment at the bottom of this post telling me what you would like to try to make or what your favorite dish using panko breadcrumbs is.  For a second chance to win, "like" Homemade by Holman on Facebook by clicking on the link in the side bar of this page and leave a separate comment telling me you're a fan.  All entries must be made before Tuesday, January 25 at 6 pm Eastern and must include a valid email address to be eligible. 


Speaking of the recipe... I promised a quick and easy dinner and this definitely meets those qualifications.  You can have all this ready to go in about twenty minutes.  If you have never used panko breadcrumbs before, they make a much crisper breading than traditional breadcrumbs.  I generally just buy the unflavored variety in the grocery store and season them up as needed but these lemon-pepper flavored breadcrumbs work great with the pesto pasta.  In the interest of full disclosure, I had pesto on hand when I decided to make this as I made a big batch this fall when I had an abundance of basil from the garden and froze it.  But pesto is really easy to make and only takes a few minutes, so I've included the recipe below (although this will make more than you need but you can freeze the extra.)  You can also find pesto in the grocery store if you want a pre-made version.


Lemon Pepper Panko Crusted Chicken with Pesto Pasta
Serves 4

Chicken:
2 large boneless, skinless chicken breasts, butterflied and cut into 4 pieces
1 egg
1/4 cup milk
1/2 tsp salt
1/2 tsp pepper
1 cup panko breadcrumbs
3 T olive oil

Pasta:
8 oz spaghetti (I used whole wheat)
1/4 cup pesto sauce
Salt

Pesto:
1 cup packed basil leaves
2 cloves garlic
1/4 cup pine nuts
1/3 cup olive oil
1 tsp salt
1/4 cup Parmesan cheese

Preheat oven to 350 degrees and line a baking sheet with foil (if desired, you can cook directly on the baking sheet but foil makes for extra easy cleanup).  For the chicken, set up two wide shallow dishes for the breading process.  In one dish, beat egg and add milk, salt and pepper and whisk to combine.  In the second dish, add breadcrumbs.  Pound chicken breasts to an even thickness approximately 1/2" thick.  Dip each piece in the egg mixture, coating both sides and letting any excess drip off before transferring to the breadcrumbs.  Coat both sides, lightly pressing the breadcrumbs into the chicken to ensure they are well-coated.  Heat a large skillet over medium high heat, add olive oil.  When the oil is hot, add chicken breasts and cook about 2-3 minutes per side until golden brown.  Transfer to baking sheet and continue cooking in the oven until cooked through, about 5-10 minutes depending on the thickness of the chicken.

For the pasta, heat a large pot of water to boiling over high heat.  Generously add salt and add pasta to boiling water.  Cook pasta to al dente according to package directions.  Drain and toss with pesto sauce.

For the pesto, combine basil, garlic and pine nuts in a food processor and pulse until coarsely chopped, slowly stream in olive oil with processor running until uniform. Stir in cheese and pour over pasta.

Please note: Giveaway provided by General Mills via MyBlogSpark.  Although these products were provided to me free of charge, the opinions above are my own and are not influenced by General Mills or MyBlogSpark.

Monday, January 3, 2011

Cranberry - Orange Muffins


So as it turns out, the very last thing I baked in 2010 ended up being one of my favorites.  I made these cranberry-orange muffins for breakfast on New Year's Eve and they were delicious.  I've been meaning to try them ever since we had a breakfast tailgate for a football game a couple of months ago and we had some muffins from a local bakery here in town.  I hate to brag, but I think mine were better.  This has convinced me once again that I need to make more recipes from The Pastry Queen cookbook.  Everything I've made out of it so far has been delicious. 


The recipe in the cookbook is for "Essence of Orange Muffins" but as suggested, I added fruit.  I used frozen cranberries (like pumpkin I tend to stock up around Thanksgiving when they go on sale).  You could substitute fresh or dried cranberries as well.  I also used an equal ratio of orange juice to milk instead of 2:1 as the recipe suggested and added a little cinnamon and ginger.  I also decided to skip the glaze and topped half with demerara or turbinado sugar and left half plain.  The extra sugar gives the tops a nice sweet crunch so I recommend adding it.  This is one baked good that its fine to use skim or 2% milk instead of whole milk without any issues as well.  I used skim milk and light sour cream with no problems. 

I baked these in a jumbo size muffin pan and the recipe yielded 12 muffins. 


Cranberry - Orange Muffins
Recipe adapted from The Pastry Queen cookbook

3/4 cup milk
3/4 cup orange juice
1/2 cup sour cream
2 eggs
1 cup unsalted butter, melted
1 cup sugar
Zest of 1 orange
3 1/2 cups all purpose flour
1 1/2 T baking powder
1/2 tsp salt
1/2 tsp cinnamon
1/4 tsp ground ginger
1 cup fresh/frozen cranberries, roughly chopped
Demerara sugar (about a tsp per muffin)

Preheat oven to 350 degrees.  Spray muffin tins with baking spray or line with paper liners.  In a medium bowl, combine milk, orange juice, sour cream, eggs, and butter and whisk until well combined.  In another mixing bowl, add sugar and orange zest.  Use your fingers to rub orange zest into the sugar until distributed and fragrant.  Add in flour, baking powder, salt, cinnamon, and ginger.  Pour the milk mixture into the dry ingredients and stir just until incorporated.  Fold in the cranberries.

Spoon batter into prepared pans (I use an ice cream scoop to make it easier) and fill each muffin cup about 2/3 of the way full.  Sprinkle about one teaspoon of demerara sugar over the top of each muffin.  Bake about 20 - 25 minutes until the tops are golden brown and spring back lightly to the touch.  Cool in pans about 5 minutes and then transfer to a wire rack to cool completely.   

Thursday, December 30, 2010

2010's Top 10

Happy New Year!  2010 was a pretty good year for me, although it sure went by quickly.  The year started and ended with lots of travelling, I think we went home to Iowa a half a dozen times this past year.  I also travelled to Texas a couple of times for my sister's wedding festivities, we went to St. Louis to celebrate our own 1st wedding anniversary, and spent a week at the beach in August with my college roommates.  We ended the year travelling for the holidays and a weekend in Chicago to celebrate my mom's birthday.  My husband started a new job this fall and I kept busy throughout the summer and fall with lots of baking jobs making hundreds of cupcakes and several birthday cakes.  

Of course the big news is that we found out we'll be having our first child in 2011, thank you all for sticking around even though it was tough to keep up with this blog when I could barely think about food for the few months.  These last few months have been busy with preparing the nursery, baby showers, and doctors appointments.  Now we're almost there and our daughter should be here mid-February! 

As we all recover from the sugar coma of the holidays, I'll be sharing some recipes from my baby shower, as well as some freezer meals as I try to stock up before the baby arrives.  For now though, I'll leave you with the most popular recipes from 2010.  Evidently the popularity of cupcakes isn't over yet!


Thursday, December 23, 2010

Spiced Brown Sugar Christmas Cookies

I had to make another batch of Christmas cookies, and since it was my 4th batch of sugar cookies in as many weeks, I decided to go for something a little different this time around.  For the dough, I made a spiced brown sugar cookie dough.  They turned out to be sort of a cross between a gingerbread cookie and a sugar cookie.   They are prepared the same way as traditional roll and cut cookies, making them convenient to do in parts.  You can (and should by at least an hour or two) make the dough ahead of time and refrigerate.  Then when you are ready to bake them, roll out the dough, cut and bake.  This dough is a little bit more particular than my normal sugar cookie dough.  I had to let it sit on the counter about ten minutes before I was able to roll it out.  But don't let it sit out too long, if it becomes too warm, the dough will be sticky. 


For icing, I used royal icing again, you can find the recipe here.  If you are going to color your royal icing, I recommend using gel food colorings.  I especially like the Americolor brand if you can find them; they come in convenient squeeze bottles which is more convenient than the Wilton jars.  Around here, I can find Wilton at several different places but can only get the Americolor at Hobby Lobby or online.  If you try to use the normal liquid food colorings, it will change the consistency of your icing or you wont be able to add enough to get saturated colors.  If you are having trouble finding meringue powder, check out a craft store like Michaels or Hobby Lobby - again, I can only find the Wilton brand.  You may also be able to find it at large grocery stores, sometimes in the baking aisle and sometimes it's in a craft section if you are at a store like Walmart or Meijer. 


This is my first attempt at marbling with royal icing so I'll tell you what I did and recommend that you google a tutorial -- Bridget from Bake at 350 has tips and so does Marian of Sweetopia.  To do the peppermint candies, I outlined and flooded my cookies like normal, doing about a dozen cookies at a time.  I then used the red outline consistency icing in a piping bag with a Wilton tip #3 to pipe a swirl onto the center of the candy.  I gently tapped the cookies to let the swirl settle into the flood icing.  Then used a toothpick to drag through the swirl to create the marble effect. 


Spiced Brown Sugar Cookies
Recipe slightly adapted from Bake at 350

3 cups all purpose flour, plus extra for rolling
2 tsp baking powder
1/2 tsp cinnamon
1/4 tsp ginger
1/4 tsp nutmeg
1/8 tsp. allspice
1/2 tsp salt
1/2 cup sugar
1/2 cup light brown sugar, firmly packed
1 cup unsalted butter, at room temperature
1 large egg
1 1/2  tsp vanilla extract

Combine flour, baking powder, and spices in a large bowl and whisk to combine.  In a mixing bowl, cream sugar, brown sugar and butter on medium speed until light and fluffy, about three minutes.  Add egg and vanilla and beat until well incorporated.  Slowly add flour mixture, mixing on low speed.  The dough will be very stiff.  Lay out a large sheet of plastic wrap and turn dough out on to plastic.  Form into a disk and wrap tightly.  Chill approximately one hour. 

Remove dough from refrigerator and let stand five to ten minutes at room temperature.  Preheat oven to 350 degrees.  Line baking sheets with parchment paper or Silpats.  Generously flour work area and rolling pin.  Roll dough to about 1/4" thick and cut into desired shapes.  Transfer to prepared pans and bake about 9-12 minutes.  Cookies shouldn't really brown but will firm up.  Remove from the oven, let stand about one minute on the baking sheet and then transfer to a wire rack to cool completely.  When completely cool, frost as desired.

See other examples here:
Thanksgiving cookies
Christmas Cookies
Gingerbread Snowflakes 
More Christmas Cookies

Wednesday, December 22, 2010

Rasberry Pochettes

These are a simple little treat with an indulgent cream cheese crust filled with jam.  You can use whatever flavor you have on hand, I thought the raspberry would be pretty and it's one of my favorite flavors of jam.  That and my husband won't use it for peanut butter and jelly sandwiches so we weren't out of it when I went to make these.  Use jelly or preserves for these, it doesn't matter.  I prefer preserves so that's what I used here.


I used a flower cookie cutter to cut these out because I liked the rounded edges and added decoration.  You can use any shape you like or a simple 3" round cookie cutter.  One thing to note, with the flower cookie cutter, you'll have more leakage because the edges won't line up quite as perfectly as a round cut-out would.  I recommend baking these on parchment paper so you don't end up with a sticky mess of burnt jelly to clean up when you are done. 


Raspberry Pochettes
Recipe adapted from Melissa D'Arabian via Food Network

1 cup unsalted butter, at room temperature
8 oz cream cheese, at room temperature
2 cups all purpose flour
1/4 tsp salt
Approximately 1/2 cup raspberry jam
1 egg white
Sanding sugar

Combine butter and cream cheese in a mixing bowl and beat until light and fluffy, about three minutes.  Slowly add the flour and salt, beating on low speed until just combined.  Lay out a large sheet of plastic wrap and turn the dough out onto the plastic.  Form into a disk, wrap tightly and refrigerate at least one hour. 

Preheat the oven to 375 degrees.  Line a large baking sheet with parchment paper.  Generously flour your work surface and a rolling pin.  Roll out the dough to about 1/8" thick.  Cut out rounds or shapes as desired.  Add about a half a teaspoon of jam to one side of each cookie.  Brush the edges lightly with water.  Fold the dough over and press to seal.  Crimp the edges with a fork.  Re-roll scraps and continue with remaining dough. 

Beat egg white with approximately one tablespoon of water, brush over cookies and sprinkle cookies with sanding sugar.  Bake until golden, about 18 - 20 minutes.  Transfer to a wire rack to cool completely and serve. 

Tuesday, December 21, 2010

Peanut Butter Fudge


If candy-making intimidates you, this is the perfect recipe for you to try.  You don't even need your stove, no thermometers are involved, you barely need a pan.  This fudge can be made completely in the microwave and only takes about five minutes.  It's a perfect recipe to round out your holiday baking when you are short on time. 

Peanut Butter Fudge
Recipe via Erin's Food Files from Alton Brown

1 cup of butter
1 cup peanut butter
1 tsp vanilla extract
1 lb powdered sugar

Prepare a pan by covering it in wax paper and spraying with nonstick cooking spray, leaving at least one inch overhang of wax paper around all edges.  You can use an 8x11" baking sheet with a one inch rim or an 8x8" square pan if you want thicker fudge. 

In a microwave safe bowl, combine butter and peanut butter.  Microwave on high two minutes, stir and microwave two additional minutes.  Stir in vanilla and powdered sugar.  Mix with a wooden spoon until well combined and smooth.  Pour into prepared pan, smooth, and cover with another sheet of wax paper pressed directly against the surface of the fudge.  Refrigerate at least two hours and cut into one inch squares.

Related Posts with Thumbnails