Pin It button on image hover

Saturday, November 6, 2010

Chicken Enchilada Soup

It’s cold and gloomy here which is perfect soup weather. Especially when that soup has a little heat of its own from some spicy jalapeno peppers. I'm not really ready for winter weather yet -- I held out as long as I could before having to turn the heat on but with temperatures getting down in the 30s and 40s, this week was the end. The beautiful fall weather is over; it’s cold and dark before 6:00 at night, which means it’s almost winter. Have I mentioned that I really don't like winter? I look forward to the holidays, my birthday, etc but after that, I pretty much look forward to spring. I could do without the snow and gloomy dark days. But anyway, you're here for the soup recipe not to listen to me complain about the weather.


I'm calling this chicken enchilada soup because the flavors remind me of the enchilada soup at Chili's. This one has a few extras in it though with some corn and black beans. I used two kinds of cheese, a grated pepperjack cheese which adds some extra heat and melts beautifully and some crumbled cotija cheese which has a very mild flavor but adds a delicious creaminess to the soup. I poached the chicken in chicken stock with some spices and then shredded the chicken and returned it to the soup later in the cooking process. You can use boneless or bone-in chicken for this just remove the skin before cooking.


You could also make this soup in a crockpot, you'll just have to extend the cooking times - expect that it will take at least 3-4 hours on high and you'll probably want to use a 5 quart crockpot.  You can cook the chicken prior to adding to the crockpot or just put it all in together using chicken breasts cut into smaller chunks.  Add everything except the cheese and cilantro and cook.  Add the cheese and most of the cilantro just before serving to allow it time to melt, serve and top with cilantro.

Chicken Enchilada Soup

3 cups chicken stock
2 skinless, chicken breasts
2 tsp ground cumin
2 tsp ancho chili powder
1/2 tsp cayenne pepper
1 28 oz can diced tomatoes
4-6 jalapeno peppers, minced
1 green bell pepper, diced
1 large onion, diced
4 cloves garlic, minced
1 15 oz can black beans, rinsed and drained
2 cups frozen corn
1/2 cup tomato paste
8 oz cotija cheese, crumbled
8 oz pepperjack cheese, divided
1 cup cilantro, chopped
Tortilla chips

In a large Dutch oven or stockpot, add chicken stock and heat over medium heat. Add chicken breasts, cumin, chili powder, and cayenne pepper. Simmer about 20-25 minutes until chicken is cooked through. Remove chicken and set aside. Add tomatoes, jalapenos, bell pepper, onion, and garlic to the pot. Simmer about 30 minutes, covered until tomatoes have begun to break down. Add black beans, corn, and tomato paste and stir to incorporate. Add cotija cheese and half of the pepperjack cheese and stir to melt. Return chicken to soup and cook about 20 more minutes until desired consistency.

If soup isn't as thick as desired, you can add strips of flour tortillas. They will dissolve into the soup to thicken the broth. Add cilantro, reserving some to top individual bowls if desired. Ladle into serving bowls and top with crushed tortilla chips, reserved pepperjack cheese and cilantro if desired.

Sunday, October 31, 2010

Happy Halloween!

Happy Halloween!


These are pumpkin cupcakes with cream cheese frosting rolled in orange sugar inspired by Hello Cupcake.

Friday, October 29, 2010

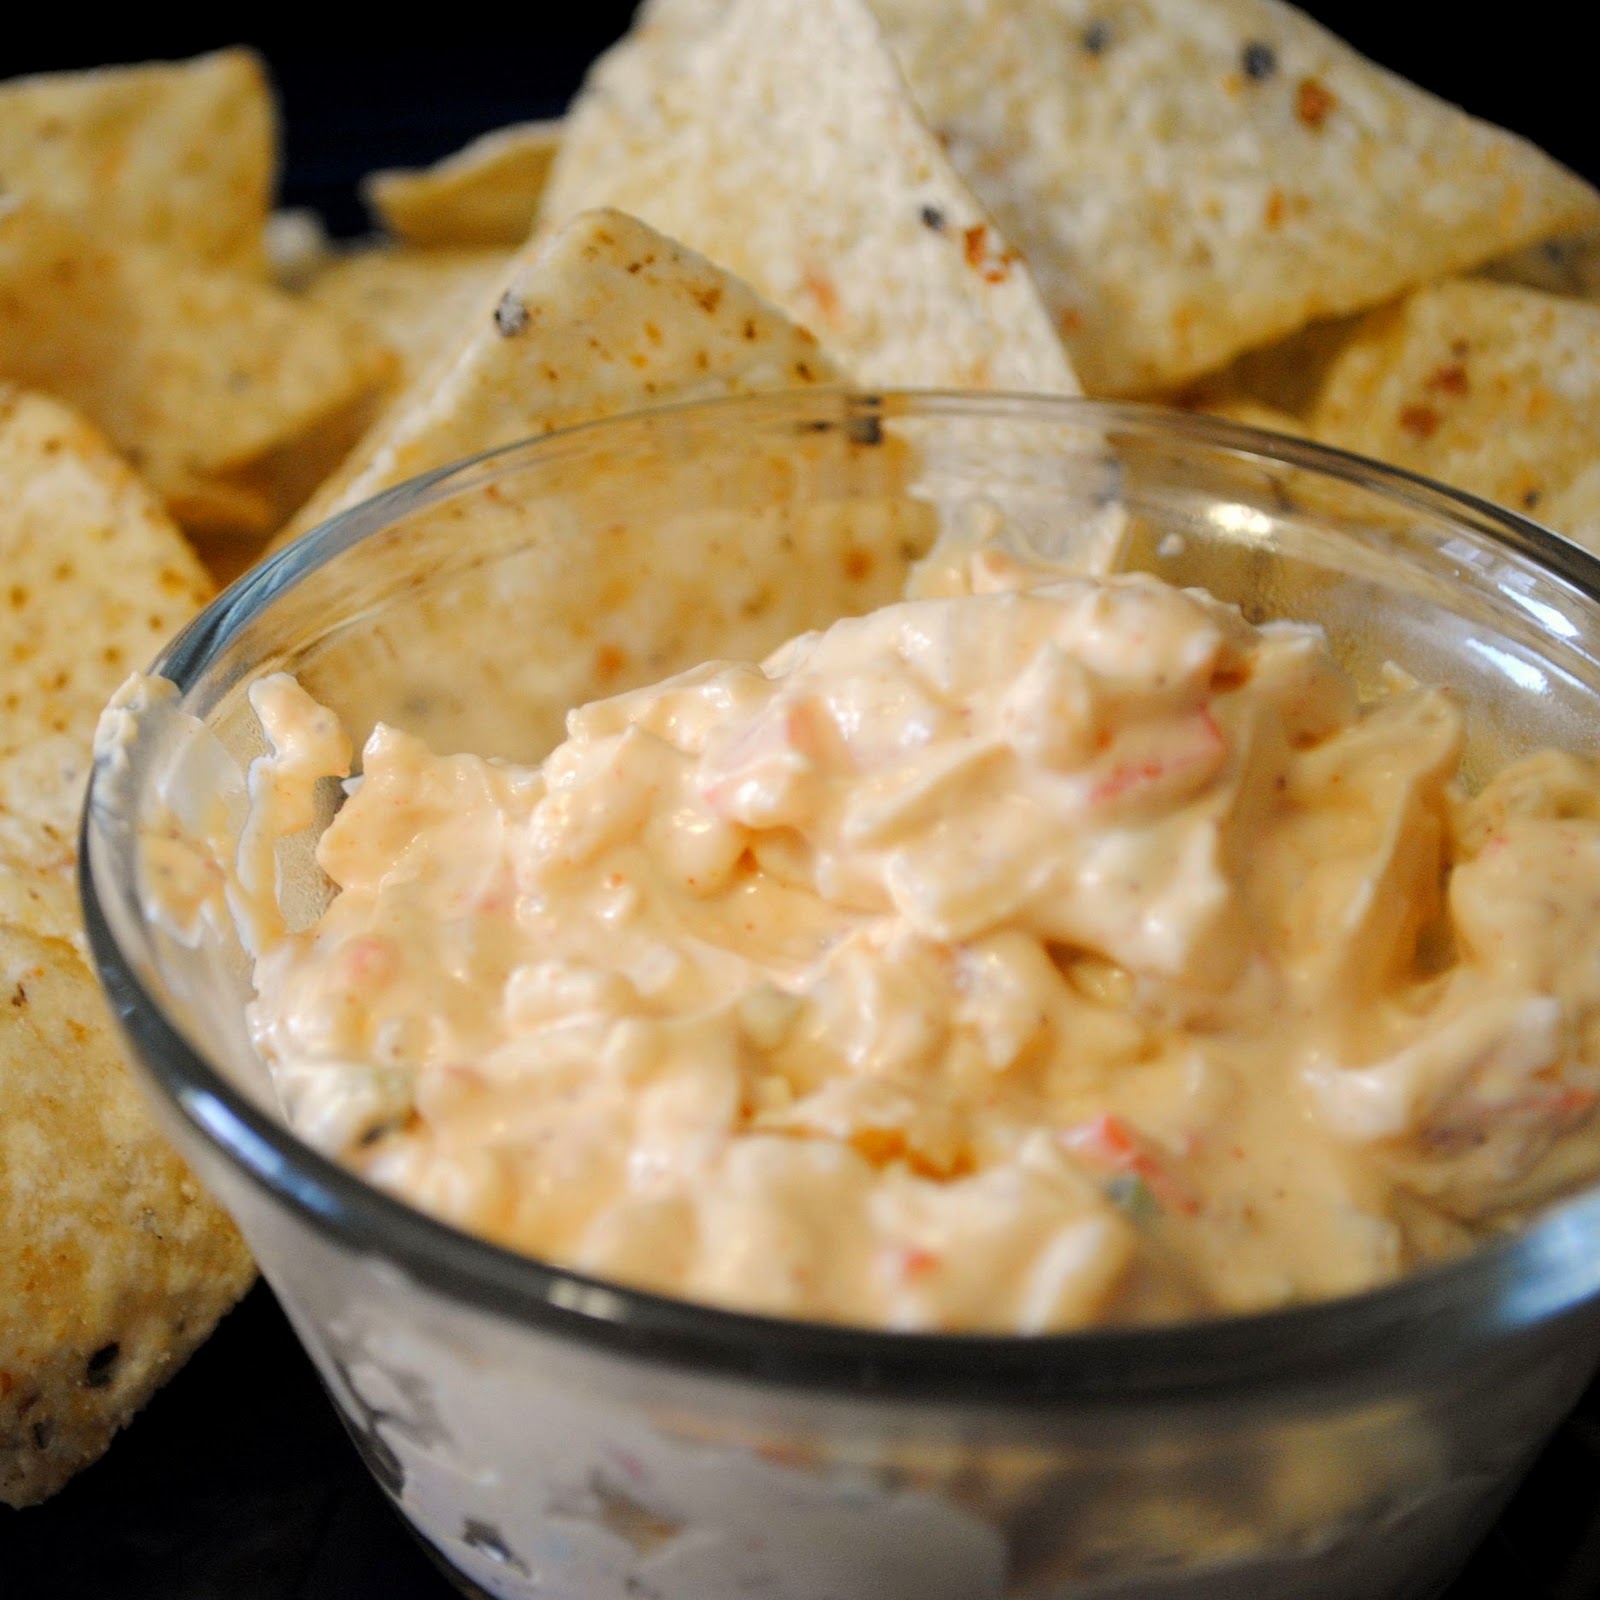
Crab Queso Dip

This is a great appetizer for a game day tailgate or any fall party.  You can make it on the stovetop and serve or transfer to a crockpot to keep warm.  It's great with tortilla chips or pita bread. 


This is one of those places that you can save a few calories and fat grams and use the reduced fat cream cheese and sour cream as well.  I don't think you'll notice the difference.  Add in plenty of jalapeno peppers to give this a good kick.  Using canned crab meat will also save you a few dollars or comes in handy if you can't get fresh.  Getting fresh quality seafood for an affordable price in Kentucky isn't always easy so I went with canned here.


Crab Queso Dip
Recipe inspired by Paula Deen

1 T olive oil
1/2 large or 1 whole small onion, diced
1 red bell pepper, diced
4-6 jalapeno peppers, minced
2 cloves garlic, minced
2 8 oz packages cream cheese, cut into 1 oz pieces (I used 1/3 less fat Neufchatel)
1 cup sour cream (I used reduced fat)
1 cup milk (I used 2%)
2 cups sharp cheddar cheese, grated/shredded
12 oz lump crab meat (I used well-drained canned crab meat)
2 tsp ancho chili powder
1 tsp ground cumin
1/2 tsp cayenne pepper
1/2 tsp freshly ground black pepper
1/2 tsp salt

In a dutch oven or deep skillet, heat olive oil over medium high heat and add onion, bell pepper, jalapenos and garlic.  Cook 3-4 minutes until slightly softened.  Reduce heat to medium and add cream cheese.  Stir to distribute and melt.  When melted, add sour cream and milk and stir to incorporate.  Mixture should be relatively smooth aside from the vegetables.  Add shredded cheese and stir to melt.  Add crab meat and spices.  Stir until well mixed and simmer an additional 5-10 minutes.

Transfer to a serving bowl and serve with chips or transfer to a crockpot and set on "warm" setting to keep hot.

Sunday, October 24, 2010

A Fall Favorite: Pumpkin Cupcakes

As I've mentioned before pumpkin desserts are some of my favorites.  I didn't use to think so, I was never a fan of pumpkin pie at Thanksgiving, I always picked apple.  But in the past couple of years, I have really developed a taste for pumpkin.  I realized that maybe it was just the traditional pumpkin pie I wasn't a big fan of; pumpkin bread, pumpkin muffins, and pumpkin cheesecake were all delicious.  These pumpkin cupcakes are my new favorite of all of them.  In fact, I think they are my new favorite cupcake overall. 


The cupcake part of these is a light and delicious cake.  The pumpkin really makes a moist cake and the spices are perfect for fall.  Your whole house will smell like fall within minutes of putting these in the oven.  I frosted these with a classic cream cheese frosting which works perfectly with the pumpkin flavors.  Top them with sprinkles, maybe some caramel sauce or those cute little candy pumpkins they sell this time of year and they are a perfect fall dessert. 


I actually found this recipe browsing at Williams-Sonoma in the mall.  They had some seasonal recipe cards in the store and with all the fall scents that pipe through that place, this recipe quickly went on my short list of things to make.  The raisins and walnuts made it seem more muffin like than cupcake like so I left those out but added a little ground ginger to the spices.  Make sure you get pure pumpkin puree for this recipe and not the pumpkin pie filling in the can. 


Pumpkin Cupcakes with Cream Cheese Frosting
Recipe adapted from Williams-Sonoma

Cupcake:
2 2/3 cups all purpose flour
2 tsp baking powder
2 tsp baking soda
2 tsp ground cinnamon
1/4 tsp ground nutmeg
1/4 tsp ground cloves
1/4 tsp ground ginger
1/2 tsp salt
1 15 oz can pumpkin puree
1 cup sugar
1 cup dark brown sugar, firmly packed
1 cup canola oil
4 eggs

Preheat oven to 350 degrees.  Line 24 muffin cups with paper liners or spray pans with cooking spray. 

Combine flour, baking powder, baking soda, and spices in a large bowl.  Whisk or sift to combine and set aside.  In mixing bowl, cream together pumpkin, sugars, and oil.  Mix on medium high speed about one minute until well combined.  Add eggs, one at a time, beating after each addition.  Add flour mixture in three additions, mixing on low speed until just incorporated after each addition. 

Fill cupcakes 3/4 of way full and bake approximately twenty minutes until a toothpick inserted in the center comes out clean.  Cool in pans about five minutes before transferring to a wire rack to cool completely.  Frost as desired.

Frosting:
1 8 oz package cream cheese, at room temperature
1/2 cup unsalted butter, at room temperature
1/4 cup heavy cream
1 tsp vanilla extract
3-4 cups powdered sugar

Combine cream cheese and butter and beat on medium speed for 2-3 minutes until light and fluffy.  Add cream and vanilla and mix in until incorporated.  Add powdered sugar, one cup at a time, mixing after each addition until well incorporated, to reach desired consistency to frost cupcakes.  Pipe or spread onto cooled cupcakes as desired.

Wednesday, October 20, 2010

Crock Pot Apple Butter

***Updated October 2010:  I added cider to the recipe per a co-worker's suggestion and added a picture of my own -- you learn a little with a little more blogging experience, like remembering to take pictures when you want to blog something.  I also increased the cinnamon and added a little nutmeg this time around.***


Such an easy treat... and a great way to use up apples - especially ones that are a little bruised or starting to get mushy.

Part 1:
About 15 apples (depends on the size of your crock pot and your apples - I used a 5 qt crock pot and had medium sized apples)
1 cup apple cider

Peel, core, and thinly slice all the apples until your crock pot is full. Turn it on high, add cider and cook for about an hour, then turn heat to low and cook about 8-10 hours.


(Picture via Google Images - I forgot to take one)
Part 2:
2 - 2 1/2 cups sugar
4 tsp cinnamon
1/2 tsp ground cloves
1/2 tsp ground nutmeg

When you take off the lid, the apples should be reduced to about half their volume and most of the chunks should be gone.  Add sugar and spices, stir until well mixed and cook on low for approximately 8 more hours. If its still not smooth, blend with an immersion blender or in a food processor or blender.  Spoon into jars and enjoy. Keep refrigerated for about 2 weeks or can by processing in a water bath.

Apple and Brie Melts


Last week I received this All-Clad griddle that I won over A Cozy Kitchen so naturally I had to try it out.  I knew I wanted to make a grilled cheese sandwich but I didnt want to just make a regular grilled cheese.  Then I saw a caramelized apple grilled cheese on Beantown Baker which looked awesome and I knew what I would do.  Unfortunately I had just used up the rest of the apples we had on hand to make a batch of crockpot apple butter, so I had to wait until I went to the grocery store to try these out.  So my pretty new pan stayed in the box all weekend long. 


But I picked up some crisp Fuji apples on Monday along with some brie that I found at the store to use for the cheese. 


I decided to use my homemade apple butter as a sauce for the sandwich - the recipe can be found here.  While it takes a little while to cook, it requires almost no effort for all of that time since its done in the crockpot.  The most time consuming part of the recipe is simply peeling, coring, and slicing the apples (which you can avoid if you have a food mill).


These sandwiches aren't a typical savory grilled cheese sandwich - you may want to switch out the brie for some sharp cheddar if that's more your style and even throw on some bacon per Jen's suggestion.  Use whatever type of bread you want, I used Italian bread because I had it on hand but I think this would be great with a crusty multigrain or wheat bread too.  Make it even sweeter by using a cinnamon-raisin bread.  These would be great appetizers made on a thin baguette of French bread for bite-sized sandwiches.

Apple and Brie Melts

4 slices of Italian bread, about 1/2" thick
1 large apple, thinly sliced
4 oz brie, thinly sliced
2 T apple butter
1 T butter

Spread apple butter on one side of bread slices.  Layer brie and apple slices on one side and top with remaining slice of bread.  Heat griddle over medium heat and melt half of the butter on the pan.  Add sandwiches and spread remaining butter on tops of bread.  Let cook about three minutes and then flip.  Cook an additional two to three minutes until cheese is melted and bread is toasted as desired.  Cut and serve.

Tuesday, October 19, 2010

Champagne Cupcakes


These champagne cupcakes make a great treat for an adult party - be it an elegant party or a bachelorette party.  You'll want to use a sweet champagne rather than dry, pink champagne would work too.  You can play with the flavors by adding fillings or different icings.  Add orange curd filling or orange-flavored buttercream for mimosa cupcakes, ice with raspberry buttercream and top with a fresh raspberry.  Top champagne cupcakes with a chocolate covered strawberry for a fancy dessert.  You could also make them mini cupcakes for a cocktail party.  The recipe below is for a classic champagne cupcake with a champagne buttercream. 


Champagne Cupcakes with Champagne Buttercream
Recipe adapted from Loves to Eat

Cupcakes:
2 3/4 cup all purpose flour
3 tsp baking powder
1 tsp salt
2/3 cup unsalted butter, at room temperature
1 3/4 cups sugar
3/4 cup champagne
1/2 tsp vanilla extract
6 egg whites

Preheat oven to 350 degrees and line muffin pan with paper liners (recipe yields about 22 cupcakes). 

Combine flour, baking powder and salt in a large bowl and whisk to combine.  In mixing bowl, cream butter and sugar on medium high speed until light and fluffy, about three minutes.  Add flour mixture in three additions, alternating with two additions of champagne combined with vanilla. 

In a clean bowl, beat egg whites on high speed until they hold stiff peaks.  Fold in about 1/3 of the egg whites to lighten the batter then gently fold in the remaining egg whites.  Transfer batter to cupcake liners, filling each about 2/3 of the way full.  Bake approximately twenty minutes, until a toothpick inserted in the center comes out clean.  Cool about five minutes in the pan and then transfer to a wire rack to cool completely.

Frosting:
1 cup unsalted butter, at room temperature
1/2 tsp vanilla extract
3-4 cups powdered sugar
3 T champagne

In a large mixing bowl, beat butter on medium high speed until smooth and fluffy, about three minutes.  Add vanilla extract and about three cups of powdered sugar.  Mix on low speed to combine.  Add in champagne and mix on low to incorporate.  Increase speed to medium and beat about one minute to whip frosting.  If frosting appears to be thin, add additional powdered sugar as necessary to reach desired consistency.  Frost cooled cupcakes as desired.

Wednesday, October 13, 2010

Devil's Food Cupcakes with Chocolate Sour Cream Frosting


I've made these devil's food cupcakes several times and they always get great reviews.  They are a great go-to cupcake when you want a rich chocolate cupcake.  They bake up nice and pretty with domed tops and the sour cream adds a bit of extra tang.  If you were curious as to what makes these different from most chocolate cakes, devil's food cake is generally made with melted butter instead of oil, according to Martha Stewart at least.  In my opinion, devil's food cake is also light and airy while many chocolate cakes are more dense. 

These cupcakes are great with a number of different frostings, this past weekend, I made them with raspberry buttercream (the recipe can be found here although I subbed milk for the lemon juice this time), cream cheese frosting and the one pictured here, a chocolate sour cream frosting. 

Devil's Food Cupcakes with Chocolate Sour Cream Frosting
Recipe adapted from Martha Stewart Cupcakes

Cupcakes:
3/4 cup cocoa powder
3/4 cup water
3 cups all purpose flour
1 tsp baking soda
1 tsp baking powder
1 1/4 tsp coarse salt
1 1/2 cups unsalted butter
2 1/4 cups sugar
4 large eggs
1 T plus 1 tsp vanilla extract
1 cup sour cream

Preheat oven to 350 degrees.  Line muffin pans with cupcake liners - this recipe yields approximately 30 cupcakes.  Heat water in the microwave about 90 seconds, stir in cocoa powder, whisking until smooth and set aside to cool.  In a separate bowl, whisk together flour, baking soda, baking powder, and salt.

Melt butter and combine in mixing bowl with sugar.  Beat on medium low speed until mixture is cooled, about five minutes.  Add eggs, one at a time, beating well after each addition.  Add vanilla and cooled chocolate mixture and mix well.  Add 1/3 of the flour mixture, alternate with 1/2 of the sour cream and repeat, beating after each addition until just combined. 

Fill each cupcake liner approximately 3/4 of the way full and bake about 20 minutes, until a toothpick inserted in a center cupcake comes out clean.  Let cool in pans about 5-10 minutes and then transfer to wire racks to cool completely. 

Frosting:
1 lb powdered sugar
1/2 cup cocoa powder
1/4 tsp salt
8 oz cream cheese, at room temperature
1/2 cup unsalted butter, at room temperature
5 oz melted semi-sweet chocolate
1 cup sour cream

Sift together sugar, cocoa powder and salt.  Beat cream cheese and butter on medium high speed in a mixing bowl for 2-3 minutes until smooth and fluffy.  Gradually add in sugar mixture, beating on low speed until combined.  Add melted chocolate and sour cream and mix until combined.  Increase speed to medium high and whip until light and fluffy.  Transfer to a piping bag and frost cupcakes as desired.

Sunday, October 10, 2010

Pumpkin Dip


Since pumpkin has returned to store shelves finally, I'm taking full advantage.  I stocked up on half a dozen cans and have plans for lots of good stuff.  I didn't have time to bake anything (or the need to) this weekend, but I decided to make a pumpkin dip for tailgating instead.  Now this might not be your typical tailgate food as it doesnt contain any buffalo sauce, cheese, or alcohol, but it was definitely addictive.  Served with apple slices, grapes, and vanilla wafers, it was a perfect gameday (or anytime) appetizer and it's really easy to put together.  If you want to make the dip ahead of time, it will keep just fine in the refrigerator.  If you prep your apple slices ahead of time, make sure you toss them with a little lemon juice to keep from browning.


Feel free to sub fat free or reduced fat cream cheese in this recipe - I can't tell the difference and neither could anyone I served it too.  You could also sub a low fat/fat free whipped topping for the whipped cream (just leave out the powdered sugar) but I used the good stuff because I dont generally have whipped topping on hand.  The whipped cream gives this dip a really light, mousse-like texture that's perfect with the fruit and cookies.

Pumpkin Dip

1 8 oz package cream cheese, at room temperature
3/4 cup brown sugar
1 cup pumpkin puree
1 tsp pumpkin pie spice
1 tsp cinnamon
1 cup heavy whipping cream
3 T powdered sugar

Beat cream cheese and brown sugar on medium speed until smooth and fluffy.  Add pumpkin and spices and mix until well blended.  Mixture will be fairly thin.

In a separate, cold bowl beat whipping cream with a whisk attachment on high speed until peaks form.  Slowly add powdered sugar, one tablespoon at a time until incorporated.  Fold whipped cream into pumpkin mixture and serve.  If not serving right away, cover and refrigerate. 

Wednesday, October 6, 2010

Buffalo Chicken Pizza


I much prefer homemade pizza to takeout or delivery - maybe I'm in the minority but to me, its much better to be able to put whatever toppings you want on the pizza and its a lot cheaper.  If you keep dough on hand in your freezer and thaw it out the night before you want to make pizza, it can also be faster than delivery.  I typically make a double batch of dough so I always have an extra crust available.  You can thaw the dough in the refrigerator and then all you have to do is roll it out and prepare your toppings.  I made this using my favorite pizza crust from The Way The Cookie Crumbles - which is awesome - but using half whole wheat flour, half bread dough to make it healthier.


So Buffalo chicken pizza was what I came up with when I thought I was all set for pizza night only to discover I had no pizza sauce.  I didn't even have any tomatoes on hand to make some pizza sauce.  But I know I've seen Buffalo chicken pizza on other food blogs with a ranch dressing type of sauce.  Of course, I didn't have ranch dressing either - that bottle got thrown away the last time I cleaned out the fridge to get rid of anything containing high fructose corn syrup.  But I had buttermilk and sour cream so making my own dressing was easy.  Adding some Frank's Red Hot, shredded chicken, onions and a combination of mozzarella and sharp cheddar completed the pizza.

It turned out to be a great improvisation and the pizza was delicious. 

Buffalo Chicken Pizza

Crust:
From this recipe with 1/2 of the flour replaced with whole wheat flour.

Preheat oven to 425 degrees.  Place pizza stone in oven to heat.  When oven is preheated, transfer shaped pizza dough on a pizza peel or parchment paper to hot stone dusted with cornmeal.  Cook about 15-20 minutes until crust begins to brown.  Meanwhile prepare toppings.

Sauce:
1/2 cup sour cream
1/4 cup buttermilk
1/2 tsp lemon juice
1 clove garlic, minced
1 T fresh parsley, finely chopped
1 T fresh chives, finely chopped
1/4 tsp dried dill
1/4 tsp freshly ground black pepper
1/2 - 1 T Frank's Red Hot or other hot sauce

Combine all ingredients in a small bowl and whisk together until smooth.  Top pizza crust with a thin layer of dressing.

Toppings:
2 chicken breasts, cooked and shredded
Frank's Red Hot, to taste
1/2 white onion, sliced into thin strips
1 cup shredded sharp cheddar cheese
1 cup shredded mozzarella cheese

Toss chicken with one to two tablespoons of hot sauce.  Top pizza with shredded chicken, cheese, and onions and return to oven.  Bake 15-20 minutes until cheese is bubbly and golden brown. 

Thursday, September 30, 2010

Apple Cinnamon Roll Cupcakes


How can it possibly be the last day of September already??  I feel like fall just started and its already going to be October?  I just turned off the air conditioner this past weekend. 


I've been meaning to get this recipe posted all week and time has just not cooperated.  We laid new flooring in our house this past weekend and instead of helping all too much, I decided to bake for the help.  These cinnamon roll cupcakes are ridiculously good... think cinnamon roll without the need for a fork.  They are still a little messy - even with the wrappers, but in a good way.  While these are perfect as a dessert, they also would make an indulgent treat for a fall brunch - I mean they do contain fruit so that means you can eat it for breakfast right?


Apple Cinnamon Roll Cupcakes
Adapted from Stephani Pollack from Cupcake Project via Paula Deen

Dough:
2 cups milk
1 packet active dry yeast
1/3 cup sugar
2 teaspoons salt
6 1/2 cups all-purpose flour, plus more for rolling
2 eggs
1/4 cup unsalted butter, room temperature

Filling:
1/4 cup unsalted butter, melted
1 cup sugar
1 cup brown sugar
3 tablespoons cinnamon
1/4 tsp ground nutmeg
1/4 tsp ground cloves
2 cups finely chopped apples (I used Golden Delicious apples)

In a small saucepan, heat milk to about 110 degrees.  Add yeast and sugar to bowl of a stand mixer and pour in the milk, stir to dissolve.  Add salt and two cups of flour and beat for two minutes.  Beat in eggs and butter.  Stir in the remaining flour half a cup at a time, beating well after each addition.  Switch to dough hook and knead about five minutes, until smooth and elastic.  Spray a large deep bowl with cooking spray, shape dough into a ball, put it in the bowl, turn once to coat and cover it with a clean towel.  Set in a warm place and allow to rise for about 40 minutes or until doubled in volume.

Meanwhile make the filling by combining the sugars, cinnamon, nutmeg, cloves and apples in a small bowl.  Melt remaining butter in a small dish. 

Dust counter top with flour and roll out dough into a long rectangle about 1/4 inch thick.  Brush with about half of the melted butter.  Top with the apple mixture, sprinkle evenly over the dough, leaving about an inch empty on all sides.
Line cupcake pans with 24 liners.  Roll dough into a log beginning on the long side of the rectangle.  Trim off both ends to remove the uneven part that doesn't have any filling.  Slice the log into approximately 24 even pieces.  Place each piece in a cupcake liner, folding the ends together to make a “C” shape. The pieces should come to about the top of the liners.  Cover the cupcake tins with a clean towel and set in a warm place to rise for another 40 minutes.

Preheat the oven to 350 F.  Brush the tops of the cupcakes with remaining melted butter.  Bake for about 20 minutes or until the tops are golden.

Glaze:
1 cup powdered sugar
About 2 tablespoons milk

In a small bowl, mix powdered sugar and milk until combined.  Start with one tablespoon of milk and add more as necessary until you have a glaze that is thick but runs easily off the spoon.  Drizzle over warm cupcakes and serve.  Store in an airtight container and reheat leftover cupcakes in the microwave for about 20 seconds before serving.

Sunday, September 26, 2010

Soft and Thick Sugar Cookies


These sugar cookies are similar to the Lofthouse sugar cookies you get at the grocery store.  They start out with a box of cake mix - which isnt usually on my grocery list but I happened to have a box in the pantry from a while back so I figured I would try them.  The recipe said to make sure you use the kind with pudding in the mix as that helps with the softness.  They turned out really, really good.  I loved the texture of these - they are so soft - and they stay that way for several days too. 


The frosting on the storebought version of these cookies is never great in my opinion, so using a homemade buttercream frosting adds a special touch.  You can decorate these however you want - they would be really cute for Halloween if you tinted the frosting orange and used some black sprinkles or nonpareils. 


Soft and Thick Sugar Cookies
Recipe adapted from Noshings

Cookies:
1 18 oz box white cake mix with pudding in the mix
2/3 cup flour
2 large eggs
1/3 cup canola oil
2 T sour cream (I used reduced fat)

Preheat oven to 350 degrees.  In a large mixing bowl, stir together cake mix and flour.  Add eggs, oil and sour cream and mix on medium speed until incorporated.  Batter will be fairly stiff.  Use a cookie scoop or roll into approximately one inch balls and bake on a baking sheet lined with a Silpat or parchment paper.  This will help keep the bottoms of the cookies from browning.  Use the heel of your hand or a glass dusted with sugar to gently flatten cookies to about a half inch thick.  You don't want the bottoms to be browned or you've overbaked these.  Bake approximately ten minutes until just set.  Let cool about one minute on the pan and then transfer to wire racks to cool completely.

Frosting:
1/2 cup unsalted butter, at room temperature
2 T heavy cream
1 T vanilla extract
3-4 cups powdered sugar
1 T meringue powder
Food coloring or sprinkles as desired

Beat butter on medium speed for about two minutes until smooth.  Add cream and vanilla and beat about one more minute to incorporate.  Add sugar, one cup at a time mixing on low speed until incorporated until you reach the desired consistency.  Add meringue powder  (this will help your frosting crust so that you can stack the cookies without smearing your frosting all over the place, I use a sheet of wax or parchment paper in between layers).  You want the frosting to be fairly stiff so that it doesnt run off your cookies.  Frost cooled cookies and decorate as desired.  Store cookies in an airtight container.

Friday, September 24, 2010

We have a winner!

The winner of the CSN $45 gift card giveaway is comment number 22 -- Manda!  Her favorite fall dish was sweet potato souffle.  Thank you to everyone who participated! 


Manda - please contact me as soon as possible with your name and address to receive your prize.

Thursday, September 23, 2010

Chicken Fajita Quesadillas


Quesadillas are a perfect weeknight meal when you need something quick and easy to put on the table.  However, quick and easy doesn't have to mean boring.  These also work great as an appetizer.

These quesadillas are full of chicken, bell peppers, onions, jalapeno, cilantro, and cheese.  The chicken is flavored with lime juice, cayenne pepper, ground cumin and garlic.  The lime juice makes for an extremely quick marinade, especially when you cut the chicken into small chunks, which also speeds up the cooking time.  Make sure you use a good quality cheese for these - grating your own cheese instead of buying the shredded stuff will add so much more flavor.  I used a blend of about half each of sharp cheddar and pepperjack but if you don't want them to be as spicy, Monterrey jack would be a good alternative.


Chicken Fajita Quesadillas

Chicken:
2 boneless, skinless chicken breasts
1/4 cup lime juice 
1 tsp cayenne pepper
1 tsp ground cumin
1 clove garlic, minced
1/2 tsp salt
Cut the chicken into approximately 1" chunks and sprinkle with salt.  In a large Ziploc, combine lime juice, garlic and spices, add chicken and let sit about 15 minutes while you prepare the remaining ingredients.

Quesadillas:
4 large flour tortillas
1 bell pepper
1/2 onion
2 jalapeno peppers
1 cup cheese
Handful of cilantro
1 T canola oil plus more if desired for cooking quesadillas

Slice bell peppers and onions into long thin strips.  Grate cheese and set aside. 

Heat a large skillet over medium high heat with 1 T canola oil, add chicken, peppers and onions and cook about five minutes, turning occasionally until cooked through.  Wipe out skillet with a paper towel and reduce heat to medium-low.  You can add a little oil to the pan, but I don't usually think its necessary and I prefer to save the calories and fat. 

You have two options for assembling the quesadillas.  You can use one tortilla and put the filling on half and fold it over - which does make it easier to flip the quesadilla - or build the quesadilla on the entire tortilla and then cover with a second tortilla.  I use both methods, it just depends on the day.  To assemble, layer on chicken, peppers, onions and jalapenos and top with cheese.  Tear cilantro and sprinkle over the top.  Fold or cover and transfer to skillet.  Cook about 3-4 minutes per side, until cheese is melted and tortilla is golden brown.  Cut into wedges and serve. 

Tuesday, September 21, 2010

Fondant Toy Story Birthday Cake

This cake was so much fun to do - the more I work with fondant, the more I really like it.  You can do so many fun things with it because it creates such a clean back drop to layer anything on.  For this cake - the birthday girl loves Toy Story's Jessie so that's what inspired the cake.  I used a couple figurines that I picked up at Walmart to top the cake since sculpting them was a challenge I didn't want to undertake for this cake.  I used toothpicks to attach these to the top of the cake since there was a small hole in the bottom of one foot of each character.


As I've mentioned before I really like to use marshmallow fondant for cakes.  Marshmallow fondant has several advantages - it tastes a million times better than the store bought stuff, it's a lot cheaper, and it can be made in just a few minutes and stored for quite a while at room temperature.  You will want to let it rest after mixing it up for at least a few hours or overnight before working with it.


One thing to keep in mind when you use fondant, is that you will likely want to do something as a border in between your cake layers.  While fondant creates a very clean cake, the edges can sometimes leave a little to be desired.  For this cake I twirled two strings of brown fondant into a rope border and rolled red fondant into tiny balls to make a border for the bottom layer. 


You can use any regular cookie cutter to make cutouts for fondant - I used several different sized stars for the base layer, a set of alphabet cookie cutters to do the writing so that everything would be a uniform size and made freehanded cutouts for the cow print using a small wheel cutter.


Depending on the humidity on the day you make this, you may have to adjust the water to powdered sugar ratio slightly but this is a good starting point from my experience.  You'll also want to have plenty of shortening on hand to keep the fondant from sticking to your hands and the surface you use to roll it out.  I've only ever done this with a stand mixer, I'm sure it can be done by hand but it's going to be a lot more time consuming.

Marshmallow fondant

16 oz marshmallows - the size doesn't matter
2 1/2 T water
1 T vanilla extract (use clear extract if you want a true white fondant)
2 pounds powdered sugar
Vegetable shortening

Begin by liberally greasing a microwave-safe bowl to melt the marshmallows in, a large spoon, mixing bowl of your stand mixer and the dough hook attachment.  Add all but about one cup of powdered sugar to the mixing bowl and make a well in the center.  Add marshmallows and water to the microwave-safe bowl and heat about one minute in the microwave.  Stir and continue heating another 30 seconds to a minute until melted.  Add vanilla and stir to combine. 

Pour melted marshmallow mix into the powdered sugar and begin mixing on low speed.  When mixer begins to sound strained, turn up the speed a notch.  Mix until all the sugar is incorporated.  If mixture is too dry, add water, half a teaspoon at a time, mixing after each addition until all the sugar is incorporated.  If mixture is too sticky, add remaining powdered sugar. 

Coat hands with shortening, transfer mixture to a large sheet of plastic wrap, kneading into a ball.  Coat fondant with shortening and wrap tightly.  Either wrap in a double layer of plastic wrap or slide plastic wrapped ball into a large Ziploc bag.  This yields about three pounds of fondant which is approximately enough to cover two eight inch, two-layer cakes. 

Thursday, September 16, 2010

Giveaway!

**This Giveaway is now closed**

It's your lucky day -- I'm doing the first ever Homemade by Holman giveaway thanks to CSN stores!  If you have never heard of CSN stores, they sell a little bit of everything from dining tables to bakeware to home decor. 

I've been looking at a couple of great Le Creuset dishes that would be perfect for fall baking.

http://www.csnstores.com/Le-Creuset-PG071523-67-LEC1834.html

And just imagine how handy this apple peeler/corer is for making apple pies and other delicious apple dishes.

http://www.csnstores.com/Back-to-Basics-A505-BTB1044.html
But the great part about this giveaway is that you don't win what I want - you can pick out whatever you want or need because the winner gets a $45 gift card to CSN stores.  All you need to do to enter is leave a comment below telling me what your favorite fall baked good is. 

For an extra entry, become a follower of Homemade by Holman on Facebook by clicking here and leave a separate comment below. 

Finally, for one more entry, become a follower of HomemadeHolman and tweet about the giveaway on Twitter and leave a separate comment including your tweet below.

The winner will be chosen by a random number generator and announced next Friday.  The contest will close next Thursday, September 23 at 5 pm EST.  All entries must include a valid email address or they will not count.  Please note international shipping charges may apply for non-US residents.

Monday, September 13, 2010

Fauxstess Cupcakes

One more marshmallow frosting recipe - this time I'm using the frosting as a filling for the cupcakes though.  These are homemade versions of the ever-popular Hostess cupcakes - complete with little swirls scrolling across the tops. 


A couple tips for these - make your ganache in a small container that is at least a few inches deep so you have enough depth to dip your cupcakes even as you get low on ganache.  Also, you'll want to make sure you fill your cupcakes full enough that they rise over the tops of the liner so you aren't hitting the liner before you hit the cupcake when you dip them.  You'll have to work quickly once your ganache is ready as it cools quickly and gets thicker as it cools so its harder to make the tops of the cupcakes smooth.


To fill these cupcakes, I used the cone method.  Once cool, I cut out a small cone-shape in the center of each cupcake with a paring knife and then filled them with a piping bag full of marshmallow filling.  This allows much more filling in the center than if you just try to pipe the filling in. 

Once the ganache is set, you can add any decoration you want, I used a bit of extra marshmallow filling and changed my piping bag to a small round tip (I think I used Wilton #3) to pipe on the traditional swirls. 


Fauxstess Cupcakes

Cake:
2 cups sugar
1 3/4 cups all purpose flour
3/4 cup cocoa powder
1 1/2 tsp baking powder
1 1/2 tsp baking soda
1/2 tsp salt
2 eggs
1 cup milk
1/2 cup vegetable oil
2 tsp vanilla extract
1 cup boiling water

Preheat oven to 350 degrees and line pans with cupcake liners. Recipe yields about 30 cupcakes. Combine sugar through salt in a large boil. Add eggs, milk, oil and vanilla and beat on low until just incorporated. Increase speed to medium and beat two minutes. Stir in boiling water, the batter will be thin. Transfer batter to prepared pans, filling each liner about 3/4 of the way full, approximately 1/4 cup of batter. Bake approximately 22 minutes, until a toothpick inserted in the center comes out clean. Cool in pans about five minutes and transfer to a wire rack to cool completely.  When cool, use a paring knife to cut a small cone shape out of the center of each cupcake.

Filling:

2 egg whites
1/2 cup sugar
1/4 tsp cream of tartar
1/2 tsp vanilla extract

In a double boiler (I set my stainless steel mixing bowl over a small saucepan) combine egg whites, sugar and cream of tartar and heat over simmering water. Whisk almost constantly, heating to 160 degrees. Transfer mix to mixing bowl and beat on high speed (with whisk attachment if you are using a stand mixer) until egg whites hold stiff peaks. Add vanilla and mix until just incorporated. Transfer to a piping bag and pipe into the holes in the top of each cupcake.  Reserve remaining filling for piping swirls or decoration as desired.

Ganache:
1/2 cup heavy cream
4 oz semi-sweet chocolate

Heat heavy cream until simmering in a small saucepan (you can also microwave but do it in 30 second intervals and watch it closely). Cut chocolate into chunks and put in a small bowl. Pour cream over chocolate and let sit for one minute. Stir until chocolate is melted. Let stand about 5 minutes and then dip each filled cupcake quickly into the chocolate, tap lightly to get rid of the excess and turn over.  Let cool on a wire rack until chocolate is set.  Pipe on swirls or decoration as desired.

Wednesday, September 8, 2010

Jalapeno Popper Dip

I have so many jalapeno peppers in my garden right now.  This spring I planted one jalapeno plant, one cayenne pepper plant and one Anaheim pepper plant.  So far I've harvested maybe 3 Anaheim peppers, about 100 cayenne peppers and for the past few weeks I've had tons of jalapenos and there are a lot more to come.  After picking roughly a dozen late last week, I remembered seeing a recipe for jalapeno popper dip a while back and decided to make it to take to the first football tailgate this past weekend.


I am so glad that its football season.  Fall is my favorite time of year and the kickoff to college football means its finally time.  Of course, football season and tailgating also gives me an excuse to make lots of great appetizers and dips.  Some of last year's favorite snacks included Goat Cheese Spinach Dip, Oktoberfest Dip, Stuffed Mushrooms, and Cinnamon Roasted Almonds - I'm really going to have to make some of these recipes again soon just so I can update the pictures!


Back to the jalapeno popper dip though, you may have to adjust the number of peppers to get the right level of spiciness depending on how hot your peppers are - usually I think the homegrown variety are a little more potent than the ones you buy in the store. 

Jalapeno Popper Dip

2 8 oz packages cream cheese (I used 1/3 less fat Neufchatel cheese), at room temperature
1/2 cup mayonnaise
1/2 cup roasted red bell peppers, chopped
6 jalapeno peppers, seeded, ribbed and finely diced
2 cloves garlic, minced
2 T cilantro, finely chopped
2 T lime juice
1 1/2 cups Mexican blend shredded cheese
1 tsp Ancho chili powder
1 tsp ground cumin
1 cup panko bread crumbs

Preheat oven to 350 degrees.  In a medium bowl, combine cream cheese and mayo.  Add bell peppers, jalapenos, garlic, cilantro, lime juice, 1/2 cup shredded cheese, and half of the chili powder and cumin.  Mix well to combine to a uniform mixture.  Spread dip into a baking pan (I used a 1 1/2 quart oval Corningware baking dish but you can use any similar sized baking dish), smoothing into an even layer.  Top with remaining shredded cheese, cover with bread crumbs and sprinkle with remaining chili powder and cumin.  Bake approximately 30 minutes until cheese is hot and bubbly and the breadcrumbs are golden brown.  Serve warm or at room temperature with tortilla chips. 

Sunday, September 5, 2010

Homemade Oatmeal Cream Pies


Now that kids are back to school, maybe you need the occasional sweet treat to send in your child's lunchbox.  When I was a kid, we used to get Little Debbie snacks every once in a while and one of my favorites were Oatmeal Cream Pies.  The soft oatmeal cookie sandwiching marshmallow cream filling was such a great combination.  However, these days if I'm going to eat baked goods, I dont want them in a cellophane package from the grocery store. 


As I mentioned in my last post, I've been loving this marshmallow frosting lately so knowing I would have some leftover, I baked a batch of soft, chewy oatmeal cookies and decided to make some homemade oatmeal cream pies to send with my husband for his company picnic.

I would recommend using a cookie scoop or some form of uniform measure to drop the cookies onto the sheet so that you end up with cookies that match up fairly well for even sandwiches. 


Homemade Oatmeal Cream Pies
Cookie recipe adapted from Quaker Oats, Filling recipe from here

Cookies:
1 cup unsalted butter, softened
1 cup firmly packed light brown sugar
1/2 cup sugar
2 eggs
1 tsp vanilla extract
1 T dark corn syrup
1 1/2 cups all purpose flour
1 tsp baking soda
1 tsp cinnamon
1/4 tsp nutmeg
1/2 tsp salt
3 cups old fashioned oats

Preheat oven to 350 degrees. Line cookie sheets with parchment paper.  Combine butter and sugar in a mixing bowl and beat until creamy.  Add in eggs, vanilla and corn syrup and beat well.  Add flour, baking soda, cinnamon, nutmeg and salt and mix until well incorporated.  Add oats and mix in by hand until evenly mixed.  (A sturdy wooden spoon works well for this as the batter will be quite stiff.)

Use a cookie scoop or similar measure to drop onto prepared cookie sheets and bake for approximately 8 to 10 minutes until golden brown.  (Depending on how big you make the cookies, you may need to flatten slightly.)  Cool for about a minute on the pan and then transfer to a wire rack and cool completely.  Match up cookies in pairs and pipe on filling.

Filling:
2 egg whites
1/2 cup sugar
1/4 tsp cream of tartar
1/2 tsp vanilla extract

In a double boiler (I set my stainless steel mixing bowl over a small saucepan) combine egg whites, sugar and cream of tartar and heat over simmering water.  Whisk almost constantly, heating to 160 degrees.  Transfer mix to mixing bowl and beat on high speed (with whisk attachment if you are using a stand mixer) until egg whites hold stiff peaks.  Add vanilla and mix until just incorporated.  Transfer to a piping bag and pipe onto half the cookies (a small offset spatula will also work if you prefer), leaving about 1/4 - 1/2 inch around the edges.  Sandwich with top cookie and press lightly to distribute filling.  Store in an airtight container.
 

Related Posts with Thumbnails