

These cupcakes are perfect for the Oreo cookie lover. They start out with half an Oreo in the bottom of the liner. Add more chopped cookies to the batter and garnish with yet another Oreo. Topped with a cream cheese frosting, these cupcakes are cookies and cream heaven.
The most time consuming part of these cupcakes is separating the Oreo halves for the bottoms of the cupcakes. Because I'm a little too Type A, I wanted to make sure all the cupcakes had an Oreo half complete with the cream filling. So I ended up splitting about 50% more Oreos than I would have needed. No big deal though, just add the extras, along with the other halves into the food processor to add to the cupcake batter. You can crush the Oreos a few different ways, I throw mine in the food processor and pulse just a few times so I get a nice mix of small and large pieces. You definitely want the cookies on the chunky side so that the pieces show up in the batter and you don't just end up with gray cupcakes. If you don't want to mess with the food processor, you can add the cookies to a large Ziploc and crush with a rolling pin or just chop them up with a knife.
Oreo Cupcakes
Recipe adapted from Beantown Baker
Cake:
1/2 cup unsalted butter, at room temperature
1 2/3 cups sugar
3 large egg whites
2 1/4 cups all purpose flour
1 tsp baking powder
1/2 tsp salt
1 cup milk
2 tsp vanilla extract
36 Oreo cookies
Preheat oven to 350 degrees. Line 24 cupcake cups with liners. Separate 24 Oreos, leaving cream filling on one half. Place cream side up in the bottom of each liner. Add the other halves and remaining cookies to food processor and pulse a couple times to create large chunks. Set aside Oreo chunks.
Combine butter and sugar in a mixing bowl and beat on medium speed for 2-3 minutes until light and fluffy. Add egg whites, one at a time, mixing well after each addition. Sift together flour, baking powder and salt in a small bowl. Add milk and vanilla to a large measuring cup and stir together. Add 1/3 of the flour mixture to the butter mixture and mix on low speed just until incorporated. Follow with 1/2 the milk mixture, mix on low and continue alternating additions, ending with flour mixture. Stir in Oreo chunks.
Scoop batter into prepared liners, filling 2/3 of the way full. Bake for 18-20 minutes until tops are golden and a toothpick inserted in the center comes out clean. Cool in the pan about five minutes and transfer to a wire rack to cool completely.
Frosting:
1/2 cup unsalted butter, at room temperature
8 oz cream cheese, at room temperature
1 T vanilla extract
2 T heavy cream
1 lb powdered sugar
24 Oreos for garnish
Beat butter and cream cheese on medium speed until smooth and creamy, about 2 minutes. Add vanilla and cream and beat until incorporated. Add powdered sugar, one cup at a time, beating on low speed until incorporated. Increase speed to medium high and whip for 30 seconds to a minute. Fill a piping bag and pipe onto cupcakes as desired.
Garnish with an additional Oreo or Oreo halve.
Tuesday, July 27, 2010
Oreo Cupcakes

Friday, July 23, 2010
Pina Colada Cupcakes
These cupcakes have a coconut cupcake base and a pineapple cream cheese frosting. Topped with some shredded coconut and festive "skewer" of pineapple and a maraschino cherry, these just look like a fun summer treat - just as tropical as the ever-popular frozen drink. I spiked them with a little dark rum to make them extra fun.
Make sure when you fill the liners for these cupcakes that you don't fill them too full - I had a bit of a problem with the cupcakes running over the edges because they don't puff up as much as others. If you stick with filling the liners just 2/3 of the way full, you should be fine.
Pina Colada Cupcakes
Recipe adapted from Annie's Eats
Cake:
2 cups sifted cake flour
2 tsp baking powder
1/4 tsp salt
1/2 cup unsalted butter, at room temperature
1 3/4 cups sugar
1/3 cup milk
2 T dark rum
1/2 tsp vanilla extract
1/2 tsp coconut extract
4 egg whites
1/2 cup flaked coconut
Preheat oven to 350 degrees and line 18 muffin cups with paper liners.
Sift together flour, baking powder and salt in a medium bowl and set aside. In a mixing bowl, beat butter until smooth and creamy, gradually add the sugar, beating until light and fluffy about 2-3 minutes.
Combine the milk, rum, vanilla and coconut extracts in a large measuring cup. Add 1/3 of the flour mixture to the batter, mixing on low until just incorporated. Add 1/2 the milk mixture and mix until incorporated. Continue alternating with the flour and milk, ending with the flour mixture. Add coconut to the batter and stir in. Transfer to a separate bowl and clean mixing bowl if necessary to beat egg whites.
In a clean mixing bowl, use mixer fitter with the whisk attachment to beat egg whites. Start on low speed and increase speed gradually as egg whites thicken, beating until they form stiff peaks. Fold in 1/3 of the egg whites to lighten batter, once incorporated, add remaining egg whites and fold gently until smooth.
Transfer batter to prepared pans, filling each liner approximately 2/3 of the way full. Bake about 15 minutes, until a toothpick inserted in the center comes out clean. Cool 5-10 minutes in the pan and then transfer to a wire rack to cool completely.
Frosting:
2/3 cup crushed pineapple, drained
8 oz cream cheese, at room temperature
1/2 cup unsalted butter, at room temperature
1 lb powdered sugar
1 T dark rum
1 cup shredded coconut
Pineapple and maraschino cherries for garnish
In a food processor, puree pineapple until smooth. Add cream cheese and butter to mixing bowl and beat until smooth and creamy, about 2 minutes. Add rum and mix in until incorpated. Add powdered sugar, one cup at a time, mixing on low speed until incorporated. Add pineapple, you may not need all of it, start with about 1/2 cup and add more as necessary. The frosting will be a little thinner than a normal buttercream, you can refrigerate to help it set up a little before frosting. I frosted these with a spatula rather than piping the frosting on. Top with shredded coconut and garnish with pineapple and maraschino cherry skewer if desired.
Wednesday, July 21, 2010
Invitations to Dessert: Cupcake Bar
For a recent event, Nikki from Doodle Dog and I teamed up to create a cupcake bar. For this summer party, we wanted some fun flavors and bright colors. Nikki designed some signs to put on the cupcake bar to identify the flavors and add a playful feel reminiscent of a 1950’s soda shop to the buffet.
What really elevates this cupcake bar to the next level are the special little touches of detail. Sure we could have just set out the cupcakes on plates and called it a day – but putting in the extra effort to add cute little coordinating signs and adding garnishes to the cupcakes makes it all special.
The signs were made on heavy smooth white paper. Carrying the same design theme from sign to sign really helped tie the entire cupcake bar and all of the flavors together perfectly. Nikki crafted the silver stands for next to nothing with some cheap finds and a can of paint from Michael’s. Each stand held one of the circle signs that coordinated with the matching cupcake flavor. All of the cupcakes were displayed nicely on some chargers that we also painted silver to match the rest of the bar.
The Flavors:
Pink Lemonade – a lemon cupcake with a delicious raspberry buttercream topped with a fresh raspberry. (See the recipe below)

Oreo Cookie Cupcake – a cookies and cream cupcake with half an Oreo on the bottom and more chunks of Oreo mixed in to the batter. Topped with classic cream cheese icing and garnished with another Oreo cookie.

Piña Colada – a coconut cupcake topped with a pineapple cream cheese icing and coconut flakes. These were garnished with a pineapple and maraschino cherry pick.

Check back soon for the remaining cupcake recipes and head on over to Nikki’s blog to see what she’s working on next.
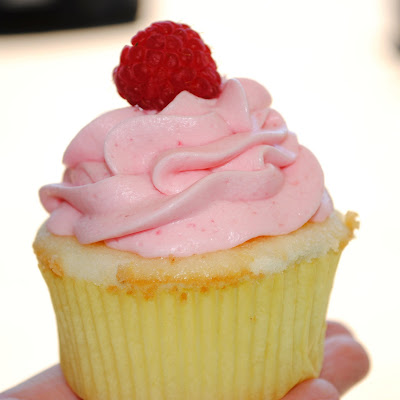
Pink Lemonade Cupcakes
Cake from Triple Lemon Cupcakes, Frosting adapted from SouthernLiving, March 2009
Cake:
1 1/2 cups all purpose flour
1 tsp baking powder
1/2 tsp salt
1/4 cup unsalted butter, at room temperature
2 ounces cream cheese, at room temperature
1 cup sugar
3 large eggs
1/4 cup plus 2 T lemon juice
1/2 cup buttermilk
Zest of 1 lemon
Preheat the oven to 350 degrees and line 12 cup muffin tin with liners. Sift together flour, baking powder and salt in a small bowl and set aside.
Add sugar and lemon zest to mixing bowl or stand mixer and rub zest into sugar with your fingertips until well distributed and fragrant. Add the butter and cream cheese to the sugar and beat until light and creamy, 2 - 3 minutes. Add the eggs, one at a time, beating about 1 minute after each egg. Add 1/3 of the flour mixture, beating on low speed until just incorporated. Add 1/2 of the buttermilk, once incorporated, add the next 1/3 of the flour mix, followed by remaining buttermilk, and remaining flour, beating each addition until just incorporated. Add lemon juice, beating until just incorporated on low speed.
Transfer batter to muffin cups, filling each about 2/3 of the way full. Bake for approximately 20 minutes or until a toothpick inserted in the center cupcake comes out clean. Cool about 5 minutes in the pan and then remove to a wire rack to cool completely.
Frosting:
½ cup unsalted butter, at room temperature
½ cup fresh raspberries
½ tsp lemon extract
1 pound powdered sugar
Cream butter in a mixing bowl until smooth. Add in raspberries and lemon extract and beat until most of the chunks are gone. Add powdered sugar, one cup at a time, beating on low speed until incorporated. Increase speed to medium and whip for about thirty seconds. Transfer to a piping bag and decorate as desired. Top with fresh raspberries if desired.

Saturday, July 17, 2010
Strawberry Margarita Cupcakes

I made margarita cupcakes a few months ago and they were very popular but two things about the recipe left me a little bothered. One I don't usually bake from a cake mix, so while the cupcakes are good, I felt like I was cheating. The second problem is that if I'm going to order a margarita, its going to be strawberry or maybe mango. I like my margaritas a little fruity. So I searched for a strawberry margarita recipe and came up with a few choices. I decided on this one from The Picky Apple although I did make several changes. Namely I used a non-alcoholic margarita mix instead of limeade. Don't skip the glaze on the cupcakes, while its a little messy to put on, it really adds an extra kick of flavor and helps keep the cake nice and moist.
If you want to make these cupcakes completely non-alcoholic, replace the tequila in the cake with half lime juice and half margarita mix. For the glaze, use margarita mix in place of the tequila.
Strawberry Margarita Cupcakes
Adapted from The Picky Apple
Cake:
3 cups cake flour
1/2 tsp salt
1 tsp baking powder
1/2 tsp baking soda
1 cup unsalted butter, at room temperature
1 cup sugar
1/2 cup margarita mix
2 T lime juice
1 tsp lime zest
5 T strawberry preserves
1/3 cup tequila
3 eggs
1/2 cup milk
Preheat oven to 350 degrees. Line 24 muffin cups with paper liners.
Sift together flour, baking powder, baking soda, and salt in a small bowl and set aside. In a mixing bowl, cream butter and sugar until light and fluffy. Add margarita mix, lime juice, lime zest, strawberry preserves and tequila and mix on low speed to incorporate. (Mix may appear slightly curdled at this point but don't worry, it will come back together with the flour.) Add in eggs, one at a time, mixing after each addition. Add 1/3 of the flour mixture, then 1/2 the milk, and repeat mixing after each addition until just incorporated, ending with the flour mixture.
Divide the batter evenly among the cupcake liners and bake approximately 20 minutes until a toothpick inserted in the center comes out clean. Cool approximately 10 minutes and remove from pan to a wire rack to cool completely.
Glaze:
1/2 cup margarita mix
2 T tequila
1/2 cup powdered sugar
Red food coloring
Add powdered sugar to a small bowl, whisk in margarita mix and tequila to make a thick liquid glaze. Add a few drops of red food coloring to desired color. Poke 4-5 holes in each cooled cupcake with a wooden skewer. Spoon glaze over cupcakes, about a tablespoon at a time, giving the glaze a chance to absorb before adding more. You don't want to saturate the cupcakes so you may have some extra glaze left over.
Frosting:
1/2 cup unsalted butter, at room temperature
8 oz cream cheese, at room temperature
4-6 cups powdered sugar
3 T margarita mix
2 T strawberry preserves
Red food coloring
Beat together butter and cream cheese until smooth and creamy. Add margarita mix and strawberry preserves and beat until well incorporated. Add powdered sugar one cup at a time until frosting is desired consistency. Add a few drops red food coloring to tint frosting to desired color. Pipe frosting onto cupcakes as desired. Top with sliced strawberries for garnish if desired.
Wednesday, July 14, 2010
Linguine with Zucchini and Fire Roasted Tomato Sauce
The zucchini looked especially good at the grocery store the other day and it was on sale so I picked up a couple with an idea for a pasta dish in my head. I decided to use a whole wheat linguine and julienne the zucchini, along with a red bell pepper into long thin strips to put in the pasta. I wanted to make a spicy tomato sauce to bring everything together so I started with a can of fire roasted tomatoes to add a layer of smoky flavor.
I added some shrimp to round out the meal. Do yourself a favor and take the tails off before you cook them though. I bought the pre-cooked frozen shrimp the other day because they were on sale and didn't think about the fact that they had the tails on them until I dumped them in the pan. Not a huge deal, just makes it a bit of a hassle to eat.
Linguine with Zucchini and Fire Roasted Tomato Sauce
1 T olive oil
1 T butter
3 cloves garlic, minced
1 small onion, diced
1/2 tsp crushed red pepper flakes
1 can fire roasted tomatoes
1/2 tsp salt (+ more to salt pasta water)
1/2 tsp black pepper
2 T tomato paste
1 small zucchini, julienned
1 red bell pepper, julienned
1 cayenne pepper, minced
1/2 pound linguine
20-24 large shrimp
2 T fresh basil, chopped
1 T flat leaf parsley, chopped
Heat a large deep skillet over medium heat and add butter and oil. When hot, add onion, garlic and red pepper flakes. Cook about five minutes until onions are translucent and add tomatoes. Break up the tomatoes with a wooden spoon and cook to reduce. Stir in tomato paste, add cayenne pepper and cook sauce for about ten minutes to reduce.
Meanwhile, heat a large pot of water to boiling for pasta. Salt water liberally and add pasta. Cook to al dente and drain, reserving about 1/2 cup of pasta water.
About five minutes before pasta is done, add bell pepper and zucchini to the tomato sauce. Stir in some of the reserved pasta water to thin sauce to desired consistency. Add shrimp and cook until opaque or heated through if pre-cooked. Toss with pasta and add parsley and basil and serve.
Tuesday, July 13, 2010
Mudslide Cupcakes

I was brainstorming ideas for cupcakes for a couple's shower the other day and I thought it would be fun to make some boozy cupcakes. Since the couple is getting married in Las Vegas, the hostess chose to make The Hangover the theme of the shower. I wanted to do a chocolate cupcake and non-chocolate cupcake for some variety. Eventually I decided on chocolate Kahlua mudslide cupcakes with Bailey's Irish Cream buttercream frosting and Strawberry Margarita cupcakes. (Stay tuned, I'll post the recipe for those soon.)

I also wanted to decorate the cupcakes with something "Las Vegas-y" so I made some little cupcake toppers with fondant. I layered circles of black and red fondant and then made little white fondant dice squares - adding the numbers with a black edible marker. I baked the cupcakes in red foil liners and overall, I thought they turned out really cute.

Chocolate Kahlua Mudslide Cupcakes
Adapted from Worth the Whisk
3 large eggs, separated
3/4 cup sugar
1/2 cup unsalted butter
1 cup brown sugar, firmly packed
2 1/4 cups all purpose flour
1/2 cup unsweetened cocoa powder
1 1/2 tsp baking soda
1/4 tsp salt
1/2 tsp vanilla extract
3/4 cup strong coffee, at room temperature
3/4 cup Kahlua
Preheat oven to 350 degrees. Line 2 cupcake pans (24 cupcakes) with paper liners. (You may get a couple extras out of this - I did.)
Sift together flour, cocoa, baking soda, and salt and set aside. In a clean mixing bowl, beat egg whites until frothy with whisk attachment. Slowly add in sugar, beating until stiff peaks form. Set aside. Cream together butter and brown sugar until light and fluffy, about two minutes. Add egg yolks one at a time, beating after each addition. Measure coffee, vanilla and Kahlua and stir together in measuring cup. Add 1/3 of the flour mixture to the batter and mix on low speed until just incorporated. Add 1/2 the Kahlua mixture, mix until incorporated and repeat alternating flour and Kahlua, ending with flour mixture. Gently fold in egg whites.
Fill cupcake liners 2/3 of the way full and bake approximately 20 minutes until a toothpick inserted in the center comes out clean. Cool about 10 minutes and transfer to wire racks to cool completely before frosting.
Bailey's Irish Cream Buttercream
1 cup unsalted butter
1/4 cup Bailey's Irish Cream
1 tsp vanilla extract
2 lbs powdered sugar
Beat butter on medium speed until smooth. Add Bailey's and vanilla and mix until incorporated. Add powdered sugar, 2 cups at a time, mixing on low speed until frosting is the desired consistency. Pipe onto cupcakes as desired. I piped these with a large star tip.
Monday, July 12, 2010
Pecan Streusel-topped Banana Bread

I had a very sad bunch of bananas hanging on my counter that were neither of us were going to eat since we had already walked by them for the last three days. For some reason, the last bunch I picked up seemed to turn brown overnight. So tonight I decided to make banana bread. I didn't want anything fancy or complicated, just something I could put together in 15 minutes with what I had on hand. So I turned to the classic red plaid Better Homes and Gardens cookbook and found a great easy recipe.

I subbed unsweetened applesauce for the vegetable oil to make it a little healthier but decided to go for the extra streusel topping. I added pecans to the topping instead of the suggested walnuts and left the walnuts out of the bread because I generally like my bread better without the nuts. The topping was listed as optional but my advice -- don't skip the streusel - it really takes this banana bread up an extra notch from ordinary.

I also increased the cinnamon and nutmeg and added some ginger. I baked mine in one large 9" bread pan and it took about 70 minutes but you could also use two smaller pans and bake it for about 40-45 minutes.

Pecan Streusel-topped Banana Bread
Recipe adapted from BHG New Cookbook
2 cups all purpose flour
1 1/2 tsp baking powder
1/2 tsp baking soda
1/4 tsp salt
1/2 tsp ground cinnamon
1/4 tsp ground nutmeg
1/4 tsp ground ginger
2 eggs, beaten
1 1/2 cups mashed bananas (it took 3 large bananas for me)
1 cup sugar
1/2 cup unsweetened applesauce
Preheat oven to 350 degrees and grease one or two loaf pans, as desired. In a large bowl, combine flour, baking powder, baking soda, salt, cinnamon, nutmeg and ginger. Stir to combine and make a well in the center.
In a separate bowl, mash bananas. Add applesauce, beaten eggs, and sugar and stir until combined. Add wet ingredients to dry ingredients all at once and stir just until combined. Batter will still be lumpy. Transfer batter to pans and top with streusel topping, below. Bake 60-70 minutes, cover loosely with foil if the top browns too much before the inside is done. To check, insert a knife or skewer, when it comes out clean, the bread is done. Cool in the pan about ten minutes and then turn out onto a wire rack to cool completely.
Pecan Streusel Topping
1/4 cup brown sugar
1/4 cup all purpose flour
2 T butter
1/4 cup chopped pecans
Combine brown sugar and flour in a small bowl. Cut cold butter into small pieces and cut into flour mixture until mixture resembles coarse crumbs. Add in pecans and sprinkle over batter.
Wednesday, July 7, 2010
Chicken and Mushroom Dinner
 This dinner was inspired by a dish my mom used to make all the time. It was a combination of ground beef, egg noodles, cheddar cheese soup and cream of mushroom soup. Despite the canned soup, its delicious and a great comfort food dish.
 However, I wanted to eliminate the high sodium, chemicals and fat from the canned soup and ground beef to lighten this dish up. I also switched out the regular egg noodles for whole wheat. It's still comfort food and a bit of splurge with the cheddar cheese but it’s also delicious. Since you're splurging with the cheese, make sure you get a block of decent sharp cheddar and grate it yourself - you'll get so much more flavor for only a little extra effort.
Chicken and Mushroom Dinner
1 pound boneless, skinless chicken breasts
1 T olive oil
1 cup sliced mushrooms - I used white button mushrooms but use whatever mix you like
1/2 white onion, diced
2 cloves garlic, minced
1/4 cup dry white wine
1 T butter
1 T flour
2 cups milk - I used skim
1/2 tsp dry mustard
1/2 tsp crushed red pepper flakes
1 tsp freshly ground black pepper + more for chicken
1/4 tsp salt + more for chicken and pasta
1 cup sharp cheddar cheese, grated
1 T fresh thyme
8 oz egg noodles
Heat a large pot of water to boil. Separately, heat a large skillet over medium high heat. Trim any fat off chicken and butterfly and cut into thin small sections. Season both sides with salt and pepper. Add olive oil to the pan and add chicken when hot. Cook chicken approximately three minutes per side until golden brown. Transfer to a plate and cover with foil. Add onions, garlic and mushrooms to the pan and cook about five minutes.
Salt pasta water when it boils and add egg noodles. Cook to al dente and drain.
Meanwhile, add wine to skillet and reduce heat to medium low, cook until the wine is almost all evaporated, scraping the bottom of the pan with a wooden spatula. Add butter and flour and stir to combine until smooth, reduce heat to low, cook about one minute and slowly add milk. Stir to incorporate. Add mustard, red pepper flakes, salt and pepper and cook until sauce begins to thicken. Add cheese and stir to melt. Thinly slice chicken and add to pan. Add drained noodles to pan. Toss to coat with sauce and cook a couple minutes for flavors to combine. Top with fresh thyme and serve.
Sunday, July 4, 2010
Happy 4th of July!

Happy Birthday America! In honor of the 4th of July, I made some red, white and blue cupcakes. I love the 4th of July - summer parties and barbecues are my favorite way to celebrate. And there's the nice bonus of a 3-day weekend in the middle of summer. Plus there are fireworks and no matter how old I am, I always love fireworks. So Happy 4th of July to all of you - I hope you have a great holiday!
These traditional white cupcakes are from a Martha Stewart recipe and the buttercream is my usual recipe made with half shortening and half unsalted butter and clear vanilla extract to result in a true white icing.

You can use this technique to color cake for any occasion, just layer the batter in whatever order you like and bake. Don't shake the pan or the colors will begin to mix together. The easiest way to fill the cupcakes, in my opinion, is to mix up your colors, fill piping bags or Ziplocs with each color and then just add a bit of each color batter to the cupcake liners. I used gel coloring to tint the batter so as not to upset the balance of liquid ingredients with too much liquid food coloring. When making colors like red this is more important as it takes a lot of red coloring so it doesn't just look pink. In this case I used Wilton's No-Taste Red.

In order to make the detail on these festive white liners really showed up, I baked the cupcakes in one liner and then dropped the finished cupcakes into an extra cupcake liner, an unnecessary step but if I'm going to use cute liners, I want them to stand out.

To top these cupcakes, I used red candy melts to form stars. I just melted candy melts in the microwave, transferred to a squeeze bottle and piped stars onto parchment paper. I put them in the freezer to harden and then just peeled them off the parchment paper to top the cupcakes.

Red-White-and-Blue Cupcakes
Recipe from Martha Stewart's Cupcakes
14 T unsalted butter
1 3/4 cups sugar
1 cup plus 2 T milk (I used 1 cup skim milk and 2 T heavy cream)
1 T vanilla extract
3 1/4 cups sifted cake flour
1 1/2 T baking powder
1/4 tsp salt
5 egg whites
Preheat oven to 350 degrees. Line 24 muffin cups with cupcake liners.
Beat butter on medium speed in mixing bowl until smooth and creamy. Gradually add sugar and continue mixing until light and fluffy, about two minutes. In a measuring cup, combine milk and vanilla. In a separate bowl, sift together flour, baking powder and salt. Add 1/3 of the flour mixture, mixing on low speed until just incorporated. Alternate with 1/2 the milk mixture, ending with the flour. In a clean mixing bowl, mix egg whites with whisk attachment, increasing speed as the whites thicken, until stiff peaks form. Gently fold egg whites into cake batter.
Divide the batter into three equal portions. Add red food color to one bowl and blue food color to another. Thoroughly mix in the colors and transfer batter to three Ziploc bags. (To make it easier, fold the top of the bag over a large cup and transfer batter into bag. Gather bag so batter is in one corner and twist the top, cut off a small corner.) Squeeze a bit of each color into each cupcake liner and bake 18-20 minutes until a toothpick inserted in the center comes out clean. Let cool about 10 minutes and transfer to a wire rack to cool completely. When cool, frost as desired.
Thursday, July 1, 2010
Traditional Vanilla Ice Cream

Homemade ice cream is one of my favorite summer treats. Growing up my mom had one of those old fashioned ice cream makers that you filled the metal insert with the cream and such and then loaded up with ice and rock salt. The machine would churn for what seemed like hours - but maybe that's because it was super loud and mom always seemed to start it around 6 am - I truly have no idea how long it took to make. But it would turn out the best ice cream, super rich and creamy with the best texture.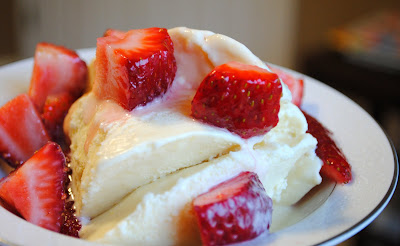
As a wedding present, I got a KitchenAid ice cream maker attachment for my stand mixer and I love it. All I have to do is remember to freeze the bowl over night (which is sometimes a challenge as I'm not the best at advanced planning all the time) and I'm just a few easy steps away from homemade ice cream.
For this one, I made a traditional custard base with egg yolks, half and half, sugar and vanilla. You can make homemade ice cream without the custard step but I think it adds a creamier texture and richness that's especially important when making vanilla. Good vanilla is also a must for this recipe - don't use the imitation stuff, if you have a vanilla bean, even better.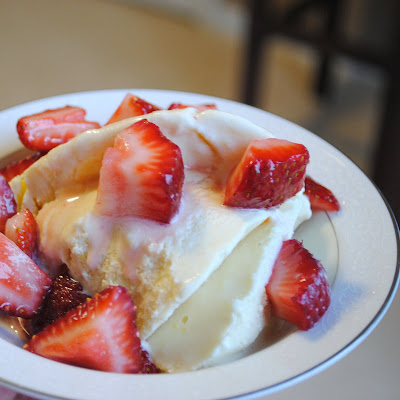
Traditional Vanilla Ice Cream
Recipe adapted from Mark Bittman's How to Cook Everything
2 tsp vanilla extract or seeds of 1 vanilla bean
4 cups half and half
3/4 cup sugar
6 egg yolks
In a large saucepan, heat 2 cups of half and half with the vanilla and 1/4 cup sugar until steaming. In mixing bowl, beat egg yolks with remaining sugar until light yellow and thick, about 3 minutes. Slowly stream in 1/2 cup hot half and half mixture to temper the yolks. Transfer egg mixture to the saucepan, whisking constantly while slowly streaming the egg mixture in. Cook over medium-low heat, stirring almost constantly until the mixture thickens and reaches 180 degrees. Do not boil the custard. It will be thick enough to coat the back of the spoon and if you drag your finger through it, the outline will remain.
Strain the custard through a mesh strainer into a glass bowl and stir in the remaining half and half. Cover and chill to at least 40 degrees or overnight. When cold, add custard to ice cream maker and mix according to directions. Transfer to a freezer safe container and freeze until solid.
I served the ice cream topped with simple ripe strawberries sprinkled with a bit of sugar.
Wednesday, June 30, 2010
Italian Sausage and Red Pepper Risotto

I wasn't so sure what I would think about this dish when I first saw the recipe. I've only ever made risotto once before and last time I made it as a side dish rather than including meat. But once I saw the recipe, I couldn't get it out of my head. I figured it might be a little too much work for a weeknight dinner since risotto pretty much requires thirty minutes next to the stove and I generally like to multitask during weeknight cooking. Friday I was going to make it but then my husband suggested going out for Mexican food and I don't really ever turn down chips and salsa. Saturday we already had dinner plans too. By Sunday, I was still thinking about this risotto so I picked up what I needed when I did my grocery shopping and got to work.

So the verdict - turns out, risotto works great as a main dish. This was absolutely delicious. I halved the original recipe because it was just the two of us eating and I didn't want leftover risotto all week (there was enough leftover for a lunch the next day). I also increased the amount of sausage in the recipe, mostly because I'm bad at halving recipes because I sometimes forget to halve all the ingredients but I would make it the same way again. I think I would cut it back if I was serving it as a side dish but for a main course, its perfect. I used ground turkey sausage in this dish to cut down on the fat and it worked perfectly, but you could also use sausage links (remove the casings) or traditional pork sausage. The other changes I made were to cut out the mushrooms (I don't like them), add a clove of garlic and decrease the salt (even with low sodium chicken broth, I don't think it needed any extra).

Italian Sausage and Red Pepper Risotto
Recipe adapted from Brown-Eyed Baker, who adapted it from Giada DeLaurentiis
8 oz Italian sausage
3 cups low sodium chicken stock
3/4 cup arborio rice
1 T butter
1/2 medium yellow onion, chopped
1 red bell pepper, chopped
1 clove garlic, minced
1/4 tsp black pepper
2 T white wine
1/4 cup Parmesan cheese
2 tsp flat leaf parsley, chopped
Simmer chicken stock in a small saucepan over medium heat.
Add butter to a large skillet or saucepan over medium heat. Add sausage and break up with a wooden spatula as it browns, cook about five minutes. Add garlic, red pepper and onion and cook about eight minutes until softened, scraping up the brown bits on the bottom of the pan as it cooks. Add black pepper and rice, stir to coat. Add wine and cook until liquid is almost all evaporated, about one minute.
Add chicken stock, one ladle at a time, to the rice mixture. Stir almost constantly. When the liquid is almost completely absorbed, add another ladle full. Repeat this process until you have added all the stock to the rice mixture. This process will take about twenty to thirty minutes. The rice mixture should be thick and creamy. The rice should still be al dente but not hard. Add 3/4 of the cheese and stir to combine. Transfer to serving dish and top with chopped parsley and remaining cheese. Serve immediately.
Friday, June 25, 2010
Fondant: The First Attempt
 Fondant...
It's one of those things that I've been meaning to try for a long time. I've always admired the fondant cakes that I see but I've been a little intimidated. I've also heard some stories about how awful fondant tastes. Plus the stuff isn't cheap when you buy it at Michael's and the like - I didn't want to spend the money to make a cake that looked and tasted bad. What's the point?
But then I heard about marshmallow fondant...
Easy to make at home with cheap ingredients in a short amount of time. Compared to the stuff at the store, it's amazing. It costs next to nothing and it tastes pretty good. I'm not going to lie; it's sweet, it's a little chewy, it will give you a sugar high... but compared to the boxed stuff, it's a whole different ball game. Unfortunately I was experimenting this time, so I'll give you a recipe once I figure out real measurements. 
So I made a big batch of the stuff and set out to make a cake. I made this one to match a baby shower invitation and for my first attempt, I'm pretty happy with it. Obviously, my skills need some work, and I think I made it a lot harder than it had to be because I didn't know any of the tips (for how to get out the air bubbles) and I didn't have the proper tools (like letter cutouts), but I'm working on that. I finally signed up for Wilton's fondant class (I've been trying to find a class but there hasn't been enough interest for the class to be held at my local Michael's at a time when I can take it) so I'm getting better.

As for the cake on this one, I used a basic butter cake recipe with a strawberry filling for this. The cake recipe was from The Cake Bible and uses a slightly different method than many cakes. It claims to prevent over mixing but I'm not sure I really notice a difference. I'll probably continue using my regular method just because this seems backwards to me.

For the filling, I went with a Wilton recipe for strawberry filling found on Annie's Eats. When you use a fruit filling like this one, make sure and use a buttercream dam around the edges to keep the filling from sliding out the sides of the cake. And for the buttercream, I used my lemon buttercream, but tinted it pink to match the girly cake.
All Occasion Downy Yellow Butter Cake
Recipe from The Cake Bible by Rose Levy Beranbaum
6 egg yolks
1 cup milk
2 1/4 tsp vanilla extract
10.5 oz sifted cake flour (approx 3 cups)
10.5 oz sugar (approx 1 1/2 cups)
1 T + 1 tsp baking powder
3/4 tsp salt
6 oz unsalted butter, at room temperature
Preheat oven to 350 degrees. Butter and flour two 9-inch round pans.
Combine egg yolks, 1/4 cup milk, and vanilla in a small bowl and beat lightly. In mixing bowl, combine dry ingredients and beat on low speed for 30 seconds just to combine. Add butter and remaining milk. Mix on low until the dry ingredients are moistened. Increase to medium speed and beat for approximately 1 1/2 minutes. Add the egg mixture in three additions, beating for about 20 seconds after each addition, scraping the sides when necessary.
Pour batter into prepared pans, filling each about half full and smooth with a spatula. Bake about 25 to 35 minutes or until a toothpick inserted in the center comes out clean. Cool approximately 10 minutes and invert onto wire racks to cool completely.
Flank Steak Fajitas

I love fajitas, they might be my favorite dinner - it's hard to narrow it down to one favorite dinner but Mexican food is definitely my favorite and I always get fajitas. While I prefer chicken fajitas, my husband loves steak and I rarely make it for a couple of reasons - because I'm not a big red meat fan and because it's generally expensive.

Flank steak is one of the more affordable types of steak and making it into fajitas really allows you to stretch your dollar even a little further. Make chicken and steak fajitas like I did here and you can really cut back the cost. This whole plate of food consists of half of a flank steak and one chicken breast and was enough for both of us with enough leftovers for a second meal. For the chicken, I use the marinade from this recipe.

Flank Steak Fajitas
Steak:
1 flank steak
1/4 cup red wine
1 jalapeno pepper, minced
2 cloves garlic, minced
1/2 tsp cumin
1 1/2 tsp ancho chili powder
1/2 tsp salt
1 T olive oil
Zest and juice of 1 lime
Small handful of cilantro, finely chopped
Veggies:
1-2 bell peppers (any color)
1 onion (red or white will work)
1 tsp garlic salt (I prefer Lawry's)
1/2 tsp cumin
1/2 tsp ancho chili powder
Juice of 1/2 lime
Tortillas and any desired toppings for serving.
Combine all ingredients except steak and cilantro in a large Ziploc bag, mix well and add steak. Refrigerate for approximately one hour.
Preheat grill to medium high heat and remove steak from refrigerator to come to room temperature while grill preheats. If you add steak to the grill straight the from the refrigerator, it will make the meat tougher.
While grill preheats, slice bell peppers and onions into long thin strips. Lay out a large square of foil, add vegetables to the center, sprinkle with garlic salt, cumin and chili powder and squeeze lime juice over the top. Toss to coat the vegetables and fold foil around the vegetables to make a foil packet.
Add steak (and chicken if you are making both) to the grill. Cook steak directly over medium high heat to sear the outside for about five minutes per side, move to a cooler part of the grill and cook as desired, approximately another three to five minutes for medium. Cook vegetables over medium heat for about ten minutes until tender. Warm tortillas on grill over indirect heat. Let steak rest, covered with foil for an additional five minutes before slicing. Slice thinly, top with cilantro and serve.
Wednesday, June 23, 2010
Banana Cream Pie
Banana Cream Pie has long been a favorite of my dad's - so in honor of his birthday and Father's Day (which just so happened to be 2 days apart this year), I baked him a banana cream pie. I remembered seeing a banana cream pie recipe in my Dorie Greenspan cookbook, Baking: From My Home to Yours, a while back and decided I should do it the homemade way. I will admit though that I bought a graham cracker crust at the grocery store... not so much because I didn't want to go to the trouble of making a pie crust but rather because I had to transport this pie almost 500 miles and wanted the disposable pie pan with the handy plastic lid. Next time, I'm going to use the sweet tart dough in Dorie's book.

Store bought crust or not, this pie was delicious. The custard is so rich and creamy and adds a really nice vanilla flavor to the pie. For the bananas, make sure they are ripe but still firm. Save the brown mushy bananas for banana bread. You want the banana slices to hold their shape in the pie. The whipped cream topping is just perfect, the addition of a little sour cream makes it rich and keeps it from being too sweet. Even though there are a few steps to this pie and you do have to plan in advance a little to give the custard time to set up, this was a really easy recipe and I didn't have any issues putting it together.

Banana Cream Pie
Recipe from Dorie Greenspan
Filling:
2 cups whole milk
6 egg yolks
1/2 cup packed light brown sugar
1/3 cup cornstarch, sifted
1/2 tsp cinnamon
1/4 tsp nutmeg
1/4 tsp salt
1 tsp vanilla extract
3 T cold, unsalted butter, cut into 6 pieces
3 ripe bananas
Crust:
1 9-inch pie shell (graham cracker crust or whatever you prefer)
Topping:
1 cup heavy cream, cold
2 T powdered sugar
1 tsp vanilla extract
2 T sour cream
For the filling, bring milk to a boil in a small saucepan. In a separate, larger heavy-bottomed saucepan, add the yolks, brown sugar, cornstarch, cinnamon, nutmeg, and salt and whisk until everything is combined. Add approximately 1/4 cup of the boiling milk, whisking constantly to temper the eggs. Add remaining milk, still whisking and set pan over medium heat. Whisking constantly, bring the mixture to a boil. Boil for about two minutes and remove from heat. Whisk in the vanilla and let the mixture stand for about five minutes. Add butter, one piece at a time, whisking to incorporate. The custard should be thick and smooth at this point. Strain the custard through a mesh strainer into a bowl and cover with plastic wrap, pressing the plastic directly against the surface of the custard to prevent a skin from forming. Refrigerate until cold (if you need to cool the custard faster, you can set the bowl in an ice bath and stir occasionally until cold). The custard can remain in the refrigerator up to three days.
To assemble the pie, stir the cold custard to loosen it so its spreadable. Add 1/4 of the mixture to the bottom of the crust. Slice the bananas diagonally into 1/4-inch thick slices. Layer 1/2 the banana slices over custard. Cover with 1/2 of the remaining custard and add remaining bananas, top with remaining custard and smooth with a rubber spatula.
To make the topping, add the heavy cream to a large bowl, beat until the cream begins to thicken, increasing the speed as you go. Add powdered sugar and vanilla and beat until the cream holds stiff peaks. Fold in the sour cream. Top the custard filling with the whipped topping as desired and refrigerate until ready to serve.
Monday, June 21, 2010
Strawberry Summer Salad

This is a great light side dish to accompany summer BBQs and dinners. Take advantage of the wonderful fresh strawberries on sale everywhere these days. I prefer the baby spinach in this salad but a mix of baby greens or a mix other lettuces work equally as well. Don't skip the candied pecans - they add a sweet crunch that really makes this salad special. I used chopped pecans because I had them on hand but pecan halves make for a prettier presentation in my opinion.
I like to use a honey mustard vinaigrette for this salad, I think it goes really well with the fruit. Some other good choices would be poppy seed dressing, raspberry vinaigrette or balsamic vinaigrette.
Strawberry Summer Salad
1 cup strawberries, thinly sliced
4 cups baby spinach or other mixed greens
1/4 - 1/2 cup pecans
1 T brown sugar
1 tsp olive oil
1/4 cup dried cranberries
1/4 cup crumbled feta cheese
2 scallions, chopped
Heat a small skillet over medium heat. Add oil and sugar and stir to combine. Add nuts and toss to coat. Cook about five minutes and transfer to parchment paper, separate nuts with a fork and cool. Wash and dry greens and add to a large bowl and toss gently with remaining ingredients and add dressing.
Honey Mustard Vinaigrette
Recipe adapted from Leslie Sarna
1 clove garlic, grated
2 T whole grain Dijon mustard
2 tsp apple cider vinegar
3 tsp honey
Scant 1/4 cup olive oil
Salt and pepper to taste
Combine garlic, mustard, vinegar and honey and whisk to incorporate. While mixing, slowly stream in olive oil. Whisk vigorously until dressing is emulsified. Add salt and pepper to taste.
Thursday, June 17, 2010
Jerk Chicken Mango Kebabs

Kebabs are always fun to make on the grill and they generally impress your guests as well because you can incorporate different vegetables and fruits to make them nice and colorful. For maximum impressiveness, leave the kebabs skewered and serve, to make it easier on people, pull everything off the skewers and serve on a plate. This is what I do at home since the metal kebabs stay hot for a long time. They are also convenient because they cook very quickly because you cut the food into small chunks. In this case, I made jerk chicken and skewered it with mango chunks and red bell pepper pieces. The sweetness of the mango and peppers works great with the slightly sweet but spicy jerk chicken. The mangoes get soft and turn even sweeter when grilled to be completely delicious.

One thing to be aware of when making kebabs is that you want to load them up with foods that will cook at similar speeds. That way you don't have burned vegetables and undercooked poultry. If necessary you could also load up skewers with each type of food so they can be cooked at different times or over different parts of the grill.
You also want to make sure you soak wooden skewers if you are using them for at least 30 minutes before you put them on the grill so they don't catch on fire. You can also use metal skewers which I like because you don't have to mess with the soaking and they can be used over and over.

Jerk Chicken Mango Kebabs
Juice of 2 limes
1 T chili powder
1 tsp cayenne pepper
2 tsp chopped fresh thyme
1/2 tsp allspice
1/2 tsp salt
2 cloves garlic, minced
1 T brown sugar
1/4 tsp cinnamon
2 lbs boneless, skinless chicken breasts
2 mangoes
2 red bell peppers
Combine all ingredients through cinnamon in a large plastic Ziploc bag and mix well. Trim any fat off the chicken breasts and cut into approximately 1 1/2" chunks. Add chicken to the marinade and refrigerate for at least one hour.
Preheat the grill to medium heat.
Cut mangoes into large chunks. Mangoes have a large flat pit in the center. Cut each side off the mango, your knife will easily slice through the flesh of the fruit but not the pit so you'll know where to cut. Score each half into large chunks and fold the peel in to pop the pieces out. Slice off the chunks of mango to remove the peel.
Cut the bell peppers into large chunks and skewer alternating with the mangoes and chicken pieces. Grill about six minutes, rotate skewers, continue grilling about six more minutes until cooked through.


